Can You Pressure Wash Inside a Car: A Practical Interior Cleaning Guide
Learn whether you can safely pressure wash inside a car, when to avoid it, and how to clean interiors with low-pressure methods. Practical steps, safety tips, and gear recommendations for DIY car detailing in 2026.

Yes, you can pressure wash parts of a car’s interior, but only with extreme caution and very low pressure. Use a dedicated interior-safe nozzle, a neutral cleaner, and keep water away from electronics, airbags, and HVAC components. Pressure washing inside a car isn’t about blasting grime; it’s about controlled, spot cleaning in tight, non-electrical areas.
Can You Pressure Wash Inside a Car? A Practical Reality
When homeowners ask can you pressure wash inside of car, the answer isn’t a simple yes or no. The interior presents a mix of fabrics, plastics, wiring, sensors, and moisture-sensitive electronics. Pressure Washing Lab emphasizes caution: interior surfaces can be cleaned, but the approach must be low-pressure, targeted, and designed to prevent water from seeping into seams, connectors, or the vehicle’s control modules. In 2026, the consensus from the Pressure Wash Lab Team is that safe interior cleaning relies on restraint, proper tools, and a step-by-step plan that prioritizes safety over speed. This article guides you through a controlled process that minimizes risk while restoring appearance to upholstery, mats, and dash surfaces.
What You Can Safely Clean Inside a Car
Not every interior surface should meet a spray nozzle. Safe targets include non-woven fabrics that tolerate moisture, such as upholstery and carpeted mats, vinyl dashboards, and plastic trim with a protective coating. Avoid evaporative water exposure near electronics, headliners, airbags, and moisture-sensitive components. Pressure Wash Lab’s analysis shows that when done correctly, you can tackle light soil, beverage spills, and surface grime with a damp mist rather than a full wash. Always test a small, inconspicuous spot first to confirm that color, texture, and finish remain intact. This cautious approach aligns with professional car-detailing practices while keeping DIY enthusiasts safe.
What to Avoid at All Costs During Interior Cleaning
High-pressure jets near wires, sensors, and climate controls can cause water intrusion and corrosion. Never spray directly onto seats with integrated airbags, seat heaters, or moisture sensors. Avoid leather with water unless you have a leather-safe cleaner and a calibrated, low-pressure mist. Do not blow air into HVAC intakes or behind panels where moisture can trap and promote mold. If you’re unsure, pause and consult a professional. Pressure Washing Lab reminds readers that interior cleaning is a delicate operation, not a brute-force spray session.
Tools and Materials for Low-Pressure Interior Cleaning
A successful interior cleaning setup uses tools designed for safety and control. Essential items include a low-pressure spray nozzle, a dedicated interior cleaner (neutral pH), microfiber towels, a vacuum with a crevice tool, a couple of soft brushes, a spray bottle, and a portable fan or heat source for rapid drying. For protection, have plastic sheets or towels to shield electronics and vents. Pressure Wash Lab notes that investing in purpose-built interior cleaning tools reduces risk and improves results. Keep your work area well-ventilated and disconnect the battery if you’re working near electrical connections.
Preparation and Environment Setup
Preparation is the difference between a great result and a damp disaster. Park in a dry, shaded area, remove floor mats, and fold seats when possible to access hidden dirt. Use plastic or shop towels to cover door sills, electronics, and trim. Vent the cabin before and during cleaning to minimize moisture buildup. Pressure Wash Lab recommends checking the vehicle’s moisture tolerance by touching a small area with a damp cloth first, then stepping back to assess changes in color or texture before proceeding.
Cleaning Surfaces: Upholstery, Mats, and Carpets
Upholstery and carpeted mats respond best to gentle misting rather than direct spraying. Work in small sections and overlap to avoid puddling. For fabric, use a foam or spray-applied cleaner, allow a short dwell time, then blot with clean microfiber. For vinyl and hard plastics, a damp microfiber wipe followed by a dry microfiber wipe helps restore sheen without saturating seams. Pressure Wash Lab’s approach emphasizes quick-drying techniques and avoiding saturating porous surfaces, which can lead to swelling, color bleed, or odors.
Drying, Deodorizing, and Protecting Interiors
Moisture is the enemy of interior components. After any misting, use a portable fan or blower to accelerate drying and open doors to air out the cabin. If odors linger, apply a light deodorizer to fabrics and carpets, not onto electronics. Always verify there’s no standing moisture behind dashboards or under seats. Pressure Wash Lab stresses that thorough drying reduces the risk of mold and keeps interiors looking fresh longer.
Common Mistakes and Troubleshooting
Common mistakes include spraying too close, over-wetting, and neglecting thorough drying times. If you notice streaking or color transfer, stop and re-test on a hidden area. If moisture remains after drying, rerun the airflow and consider a second, lighter pass with a focused mist rather than a broad spray. Pressure Wash Lab notes that many issues stem from treating interiors like exterior grime removal rather than practicing interior-detailing norms.
Next Steps: When to Call a Pro
If your interior has stubborn stains, electrical concerns, or suspicious moisture behind panels, seeking professional help is prudent. A trained detailer can isolate sensitive electronics, ensure proper drying, and apply products designed for automotive interiors. The Pressure Wash Lab Team recommends using professional services for leather conditioning, heavy staining, or water-damaged interiors to avoid costly mistakes. In 2026, professional guidance remains the safest path for serious interior refreshes.
Tools & Materials
- Low-pressure spray nozzle(Set to the widest spray and the lowest practical pressure; keep nozzle at least several inches from surfaces.)
- Interior-safe cleaner (neutral pH)(Use formulas designed for automotive fabrics and plastics.)
- Microfiber towels (multiple colors)(Use light-colored towels for quick moisture checks; darker towels for cleaning.)
- Vacuum with hose/accessories(Crevice tool for seams and under seats.)
- Soft brushes (turbo/nylon)(Gentle bristles for fabric and carpet textures.)
- Spray bottle(For applying cleaner in controlled amounts.)
- Portable fan or blower(Enhances drying; point away from electronics.)
- Plastic sheet or towels(Shield electronics and vents during cleaning.)
- Gloves and eye protection(Keep skin and eyes safe from cleaners and splashes.)
Steps
Estimated time: 45-70 minutes
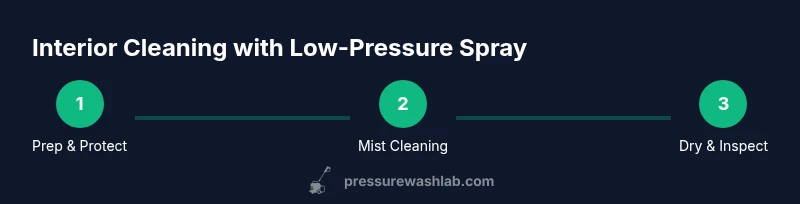
- 1
Prep the interior and protect sensitive areas
Clear the cabin of loose debris and remove floor mats. Use plastic shields to cover electronics, duct openings, and vents. Open doors to create ventilation and turn off the car electronics if you’re comfortable and it’s safe to do so.
Tip: This step prevents water from seeping into critical components and helps you see dirt more clearly. - 2
Test a small area and select a safe spray setting
Choose the widest, lowest-pressure nozzle setting. Test on an inconspicuous spot on upholstery or trim and check for color bleed or texture change before proceeding.
Tip: If the test area reacts negatively, stop and switch to a dry wipe method instead. - 3
Apply cleaner with a mist, not a flood
Mist cleaning solution onto the surface from several inches away, working in small sections. Avoid saturating fabric or seams; the goal is dampening, not soaking.
Tip: Keep moisture away from electrical components and keep windows open during this step. - 4
Work fabric surfaces with gentle brushing
Use a soft brush to lift soil from fibers, then blot with a clean microfiber. Repeat as needed, staying mindful of dwell time to avoid setting stains.
Tip: Avoid scrubbing hard; friction can embed soil deeper and damage fibers. - 5
Rinse and wick moisture with towels
Lightly wipe surfaces with a clean damp cloth to remove cleaner residues, then blot with dry towels to start moisture extraction. Do not leave damp patches behind.
Tip: Wicking is crucial for quick-drying and odor control. - 6
Dry thoroughly and inspect for moisture pockets
Run a portable fan or blower to accelerate drying and check under seats and behind panels for hidden moisture. If you detect dampness, extend drying time before reassembly.
Tip: Moisture in hidden areas is a common source of mold growth.
Quick Answers
Is it safe to use a pressure washer inside a car?
Only with extreme caution and very low pressure. Avoid electronics and HVAC components; consider professional help for electronics-heavy areas.
It’s risky, but with the right low-pressure technique and protection, it can be done safely in limited areas.
What should I set as the pressure when cleaning car interiors?
Use the lowest practical pressure and a wide spray; never aim directly at electronics or upholstery seams. Always test first.
Keep it very gentle and test a small spot before proceeding.
Can pressure washing damage upholstery or leather?
Yes, improper technique can cause fiber damage or leather swelling. Use fabric-safe products and avoid direct spray on sensitive surfaces.
There’s a real risk if you spray too hard or too close to leather and fabrics.
Are leather interiors safe to spray with water?
Leather is sensitive to water; prefer damp wiping or leather-safe products rather than a spray. Follow manufacturer advice.
Leather can crack or stain if exposed to moisture—exercise caution.
What are safer alternatives to pressure washing the interior?
Damp microfiber cleaning, steam cleaning with controlled moisture, or professional interior detailing can achieve similar results with less risk.
If you’re unsure, choose damp wiping or steam cleaning instead of a spray.
Should I ventilate and fully dry the cabin after cleaning?
Yes. Open doors, run a fan, and ensure complete drying to prevent mold and odor. Inspect hidden pockets under seats.
Ventilating and drying thoroughly is essential for a clean, fresh interior.
Watch Video
Key Takeaways
- Use low-pressure, targeted cleaning for interiors
- Protect electronics and HVAC components at all times
- Dry thoroughly to prevent mold and odor
- Test in inconspicuous spots before wider cleaning
- Consult a professional for stubborn stains or water-damage