Affordable Power Washing: A Practical How-To Guide
Learn practical, budget-friendly power washing tactics for homes, driveways, and more. This step-by-step guide covers affordable gear, smart techniques, and cost-saving tips for homeowners and DIY enthusiasts.

Affordable power washing means cleaning your home's exterior and hard surfaces at a reasonable cost using budget-friendly equipment and efficient methods. With careful prep, a suitable pressure washer, the correct nozzle, and economical detergents, homeowners can achieve professional-looking results without overspending. This guide shows practical steps, smart gear choices, and cost-saving tips for DIY or budget-conscious services.
Why affordable power washing matters
Affordable power washing is within reach for most homeowners who plan ahead, select the right gear, and follow a proven workflow. When you manage costs effectively, you gain curb appeal, protect exterior surfaces from decay, and reduce the need for expensive professional visits. The goal isn’t to scrub harder than necessary, but to clean smarter—prioritizing safe surfaces, proper dilution, and efficient passes. Pressure Washing experts agree that a budget-conscious approach can deliver noticeable results without sacrificing quality. Pressure Wash Lab’s research emphasizes planning, surface assessment, and intelligent gear choices as the core of affordable power washing. For many households, the best value comes from a DIY mindset paired with a dependable, budget-friendly setup.
In practice, affordable power washing starts with a realistic scope: defining which surfaces to clean, how dirty they are, and what outcomes you expect. A well-scoped project helps you avoid overkill, reduces water waste, and minimizes the risk of surface damage. It also makes it easier to compare quotes if you hire help. This approach aligns with Pressure Wash Lab’s guidance on practical, cost-conscious cleaning that yields durable, presentable results.
Additionally, budgeting for this task can be straightforward. You’ll allocate funds for the washer or rental, detergents, protective gear, and potential surface-specific treatments. By staying within a plan and resisting impulse gear purchases, you’ll keep the project affordable while still achieving meaningful improvements in home aesthetics and surface health.
note2null
Tools & Materials
- Pressure washer (electric or gas)(Aim for 1.2–2.5 GPM; choose a model with adjustable pressure and a reliable trigger gun.)
- Extension wand(Reach higher areas safely; 12–18 inches minimum for basic tasks.)
- Detergent (biodegradable)(Use surface-safe, biodegradable formulations; avoid bleach-based cleaners on paint.)
- Garden hose(13–25 ft hose with good water flow; have a quick-connect set.)
- Nozzle set (0°, 15°, 25°, 40°)(Start with 25° for most surfaces; adjust to prevent damage.)
- Safety goggles and gloves(Protect eyes from spray and chemical splashes; wear non-slip footwear.)
- Tarps or plastic sheeting(Protect plants, electronics, and delicate landscaping.)
- Ladder or stable scaffold(Only if you must reach high siding; ensure stability and fall protection.)
- Stiff-bristle brush(For stubborn stains on siding or deck boards.)
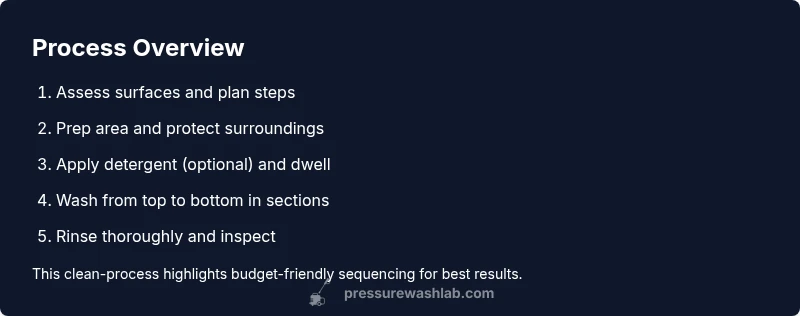
Steps
Estimated time: 60-90 minutes
- 1
Survey area and prep
Inspect all surfaces to clean and remove loose debris. Move furniture, pets, and fragile items away. Cover plants and outlets as needed. This prep minimizes overspray and protects landscaping while setting clear boundaries for the work.
Tip: Test a small inconspicuous patch with the chosen nozzle and pressure to ensure there’s no surface damage. - 2
Attach nozzle and set safe pressure
Select a 25° nozzle for general cleaning and start at the lowest effective pressure. Too much pressure can etch surfaces; always test on a hidden spot first and adjust to a safe level.
Tip: Keep the wand at a slight angle to avoid gouging gutters or wood. - 3
Apply detergent (optional)
If using detergent, apply from bottom up after pre-wetting the area, then let it dwell for a few minutes on the surface. Keep the nozzle moving to prevent streaking and rinse away residues in the next step.
Tip: Avoid letting soap dry on vertical surfaces; rinse from top to bottom to prevent streaks. - 4
Wash surfaces in sections (top-down)
Start at the topmost area and work downward in manageable sections. Use sweeping motions and maintain a consistent distance (usually 6–12 inches) from the surface. Avoid lingering too long on one spot to prevent damage.
Tip: Keep the wand moving to prevent concentrated streaks and heat buildup. - 5
Rinse thoroughly and assess
Rinse each section completely and inspect for remaining stains. Re-treat stubborn areas if needed, but avoid over-wetting or forcing water into crevices that could trap moisture.
Tip: Patience pays off—over-washing can compromise finishes and cause oversaturation. - 6
Clean up and store equipment
Disconnect water supply, relieve pressure safely, and drain hoses. Rinse soap residues from tools, inspect for wear, and store in a dry place. This reduces corrosion and extends tool life.
Tip: Dry surfaces before storage to prevent rust and mildew. - 7
Document results and plan next steps
Take photos before/after to track improvements and plan any follow-up work or maintenance. A simple maintenance schedule helps you preserve your results longer.
Tip: Set reminders for annual cleanings or seasonal touch-ups to keep costs predictable.
Quick Answers
What defines affordable power washing?
Affordable power washing is cleaning exterior surfaces at a reasonable cost using budget-friendly gear and efficient methods. The goal is effective results without overspending by planning, choosing the right equipment, and applying best practices.
Affordable power washing uses smart planning and budget gear to clean effectively without breaking the bank.
Can I do power washing myself to save money?
Yes. With proper prep, a quality budget-friendly washer, and the correct technique, DIY power washing can save money compared to full-service cleaning. Always follow safety guidelines and surface-specific recommendations.
Yes—do your prep, pick the right gear, and follow safety rules to save money.
What surfaces are safe to power wash on a budget?
Most siding, concrete driveways, and brick surfaces can be power washed using moderate pressure and a wide-angle nozzle. Delicate surfaces like aged wood, stained shingles, or glass require gentler methods or alternative cleaning.
Most siding and driveways are safe with careful settings; avoid delicate surfaces without testing first.
How long does a typical project take?
A small house wash might take 1–2 hours, while driveways or decks can take 2–4 hours depending on size and dirt levels. Plan for extra time if you’re learning the technique.
Most projects take a few hours, depending on size and dirt.
Are there risks if I rush the process?
Rushing can cause surface damage, overspray, or inadequate cleaning. Take it step by step, test areas, and avoid skipping prep or rinsing steps.
Rushing can cause damage or poor results; slow, steady work is safer and more effective.
What maintenance helps keep costs down long-term?
Regular inspection of hoses and nozzles, proper storage, and timely replacement of worn parts prevent costly breakdowns and keep outputs consistent. Cleaning gears between jobs extends life and reduces downtime.
Inspect and store gear properly to prevent expensive breakdowns later.
Watch Video
Key Takeaways
- Plan budget and scope before starting
- Choose the right nozzle and pressure for each surface
- Wash top-down and rinse thoroughly
- Maintain equipment to extend life