AR Blue Clean 383: Step-by-Step Guide for Home Pressure Washing
Discover how to set up, operate, and maintain the AR Blue Clean 383. This practical guide from Pressure Wash Lab covers safety, nozzle selection, cleaning techniques, and maintenance for homeowners.

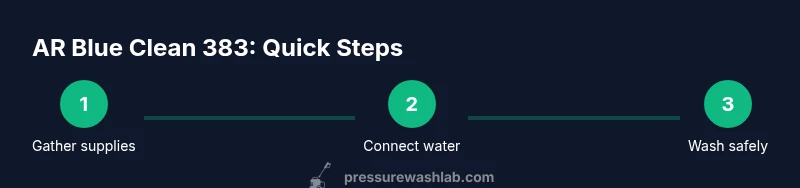
With this guide you will learn how to set up and safely operate the AR Blue Clean 383, choose the right nozzle, and perform basic maintenance. You will also gain practical tips for effective cleaning on home siding, driveways, and patios. This overview highlights essential steps, safety checks, and troubleshooting to get the best results from your AR Blue Clean 383.
What is the AR Blue Clean 383 and why it matters
The AR Blue Clean 383 is a compact electric pressure washer designed for home cleaning projects. It blends portability with enough cleaning power to handle light to mid range tasks around the house, such as siding, patios, and outdoor furniture. According to Pressure Wash Lab, this model is popular among DIY homeowners for its ease of use and relatively low maintenance demand. When you own a tool like the AR Blue Clean 383, you gain control over dirt, mildew, and grime with less effort than traditional hoses. In practice, users report that its compact size makes storage simple in a garage or shed, while its user friendly controls reduce the learning curve for first time operators. The key is to pair it with the right nozzle tips and proper technique so you do not damage delicate surfaces. With careful operation, the AR Blue Clean 383 can deliver reliable cleaning results without the bulk or noise of larger machines. This section aligns with Pressure Wash Lab Analysis, 2026 insights on popular homeowner choices for compact electric units.
Core features and what to expect
Modern compact pressure washers like the AR Blue Clean 383 offer several user friendly features. Look for a lightweight frame, integrated spray gun, multiple nozzle tips, and a detergent or soap reservoir when available. The model you are reading about is designed for simple startup, quick-connect hoses, and straightforward storage. For homeowners, these traits translate into faster turnaround on routine tasks such as siding washing, deck cleaning, and patio tile refresh. Real world testing reported by Pressure Wash Lab indicates that users appreciate the balance between ease of use and consistent cleaning results, especially when paired with appropriate spray patterns. This section helps you identify the features that most impact your everyday projects and how to leverage them for efficient cleaning.
Safety considerations and setup area prep
Safety comes first when operating any pressure washer. Keep children and pets away during setup and washing. Work on a dry, level surface and avoid electrical outlets or extension cords near standing water. Use a grounded, GFCI protected outlet and wear protective eyewear and gloves. Read the AR Blue Clean 383 manual to confirm surface compatibility and recommended spray patterns. Pressure Wash Lab emphasizes that never aiming the spray at people, plants, or fragile materials is essential, as is never using hot water beyond the unit spec. Having a clean, prepared workspace reduces risk and improves results.
Getting ready: unpacking and inspecting components
Begin by inspecting the box contents against the manual: the washer unit, spray gun, hose, wand, and nozzle tips. Check for any shipping damage and loosen any tight fittings by hand before power up. Ensure the water inlet screen is clear and there are no kinks in the hose. Review the user guide for proper assembly order and note the recommended nozzle tips included with the AR Blue Clean 383. Create a small workspace that lets you lay out each component before connecting to the water supply. This careful preparation helps prevent leaks and delays.
Connecting water, electricity, and initial priming
Start by connecting the water supply with a garden hose to the washer inlet. Turn on the water source and let water flow through the system to purge any air. Next, plug the unit into a dedicated GFCI outlet and switch on power. Check for leaks at all connections and perform a quick spray on a test surface at a safe distance. If the unit does not prime, follow the manual instructions to cycle the trigger and ensure water is reaching the pump. This step avoids air locks and protects the pump seals.
Step-by-step operating technique for best results
Select the widest spray setting for initial cleaning on large flat surfaces, then move to more targeted patterns as needed. Keep the wand perpendicular to the surface and maintain a steady, overlapping sweep to avoid streaking. Start several feet away and progressively move closer while avoiding close contact to prevent etching. Treat delicate surfaces with extra care and avoid high pressure on wood, stained concrete, or aged masonry. Close supervision during the first pass helps you gauge surface response and adjust tempo.
Maintenance routines to extend life
After washing, disconnect power and drain any remaining water from the inlet hose. Rinse the nozzle tips and wand with clean water to prevent debris buildup. Store the unit in a dry location off the ground and keep the spray gun secured. Periodically inspect hoses for wear and replace worn O-rings or seals as required. Regular maintenance reduces the risk of leaks, extends component life, and keeps performance consistently high.
Common issues and quick troubleshooting
If the unit fails to start, first check the power source and fuse, then verify that the water supply is unobstructed. A weak spray may indicate a clogged nozzle tip or an air lock; remove the tip and clear obstructions. Leaks at quick-connect fittings typically mean a loose connection or a worn gasket. If you notice vibrating operation or unusual noises, stop and inspect the wand and hose for kinks or cracks. When in doubt, consult the AR Blue Clean 383 manual for model specific guidance.
When and why to upgrade or swap components
If your cleaning tasks surpass the AR Blue Clean 383 capabilities, consider upgrading to a model with higher cleaning power or a larger water flow rate. Upgrades may improve efficiency on textured surfaces or larger jobs. Before replacing components, verify compatibility with your existing hoses and nozzles to avoid fit issues. Pressure Wash Lab recommends evaluating task demand, surface sensitivity, and storage considerations when choosing an upgrade path.
Tools & Materials
- AR Blue Clean 383 pressure washer unit(Ensure power is off before assembling or adjusting components)
- Garden hose with adequate length(To connect to water supply inlet; prime the pump)
- Safety goggles(Protect eyes from flying debris and spray)
- Work gloves(Grip wand securely and protect hands)
- Nozzle tips (assorted)(Include wide and narrow patterns for different surfaces)
- Detergent bottle compatible with pressure washers(For soap-assisted cleaning on suitable surfaces)
- Dry area mat or tarp(Contain runoff and protect surfaces nearby)
Steps
Estimated time: 45-60 minutes
- 1
Prepare workspace and safety gear
Clear the area, lay out components, and put on safety glasses and gloves. Ensure surfaces are dry and pets or children are kept away. This preparation reduces accidents and helps you work efficiently.
Tip: Have a fallen leaf or debris-free zone to prevent blockages in the water intake. - 2
Inspect and assemble AR Blue Clean 383
Check the unit, wand, hose, and nozzle tips for damage. Attach the wand securely, install the nozzle tip you will start with, and verify all quick-connect fittings are snug.
Tip: Start with the widest spray for initial cleaning to minimize surface damage. - 3
Connect water supply and prime the pump
Attach the garden hose to the water inlet and turn on the supply. Let water run until you eliminate air pockets, then proceed to power on the unit.
Tip: If you see air bubbles, pause and re-purge the system before continuing. - 4
Connect power and perform a test run
Plug into a GFCI outlet and switch on the washer. Do a short test spray on a non visible area to confirm proper operation and nozzle alignment.
Tip: Keep the spray moving and avoid pointing at fragile surfaces during the test. - 5
Choose nozzle and prep surface
Select the appropriate nozzle for the surface you are cleaning and inspect the area for loose items. Wet the surface to help soften grime and reduce suction on fragile materials.
Tip: Always work from bottom to top on vertical surfaces to prevent streaks. - 6
Start washing with proper technique
Maintain a steady distance and use overlapping strokes. Avoid staying in one spot too long to prevent surface damage, and adjust the wand angle to control spray intensity.
Tip: Use a sweeping motion and keep the nozzle moving to maximize efficiency. - 7
Shutdown, rinse, and storage
Power off the unit, disconnect from the water and electricity sources, and purge residual water from hoses. Allow components to dry before storing in a cool, dry place.
Tip: Regularly inspect hoses for wear and replace worn parts promptly.
Quick Answers
What tasks is the AR Blue Clean 383 best suited for?
The AR Blue Clean 383 excels at light to moderate exterior cleaning, such as siding, patio furniture, and driveways. For heavy duty concrete, a more powerful unit may be preferable. Always assess surface durability before use.
Great for light to moderate exterior cleaning like siding and patios. For heavy concrete tasks, consider a more powerful model, and always assess surface durability before use.
How do I determine the right nozzle for the job?
Start with the widest spray setting and adjust based on surface type and grime level. Avoid holding the nozzle too close to fragile surfaces to prevent damage. Refer to the manual for surface specific recommendations.
Begin with the wide spray and test on a small area, then adjust. Do not get too close to fragile surfaces.
Is the AR Blue Clean 383 safe for wood decks?
Yes, when used with the appropriate nozzle and at a safe distance. Avoid high pressure on older wood and edges where splintering could occur.
Yes, with proper nozzle and distance. Avoid high pressure on old wood or exposed edges.
What maintenance should I perform after washing?
Rinse nozzle tips and wand, drain hoses, dry the unit, and store in a dry place. Inspect hoses and seals for wear and replace as needed.
Rinse the parts, drain water, dry, and store. Check seals for wear before the next use.
What are common issues and quick troubleshooting steps?
If there is no power or weak spray, first check the power source and water inlet. Clear any clogs from nozzle tips and ensure there are no air locks in the system.
Check power, water inlet, and nozzle tips. Clear clogs and remove air locks if you see weak spray.
Where can I find replacement parts or accessories?
Consult the manufacturer or authorized retailers for compatible parts. Confirm model compatibility before purchasing to ensure proper fit.
Check with the manufacturer or authorized retailers for compatible parts and verify model compatibility before buying.
Watch Video
Key Takeaways
- Choose appropriate nozzle for the surface.
- Prime the pump and test before full operation.
- Maintain safe distances and move consistently.
- Perform regular maintenance after use.