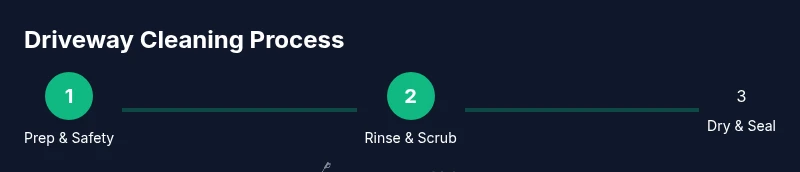
How to Clean Driveway with Pressure Washer: A Complete Guide
A practical, step-by-step guide to safely and effectively clean your driveway using a pressure washer, with prep, equipment choices, stain treatment, maintenance, and safety tips from Pressure Wash Lab.

To clean driveway with pressure washer safely and effectively, start with the right settings and equipment, including an adjustable PSI unit and a surface cleaner. Pre-treat stains, test a small patch, and use overlapping passes with steady strokes. Wear PPE, protect plants, and rinse thoroughly. Let the surface dry before any sealing or further maintenance.
Preparing to clean your driveway with a pressure washer
If you want to clean driveway with a pressure washer, preparation and safety come first. According to Pressure Wash Lab, safety and surface assessment are the foundation of a successful cleaning. Start by inspecting the driveway for cracks, weeds, and loose material; repair or note areas that may need extra attention later. Remove vehicles, plan your path, and clear nearby windows or delicate landscaping. Wear protective eyewear, sturdy gloves, closed-toe shoes, and hearing protection. Cover nearby plants with plastic or dampen them to minimize chemical exposure. Gather the essential tools and prepare your washer with the appropriate nozzle. When you lightly mist the surface and conduct a small test patch, you’ll gauge how the concrete responds to the water pressure. The goal is to clean effectively without etching or stripping the surface. This initial inspection also helps you map out edges, transitions to other surfaces, and nearby fixtures to avoid accidental damage.
Choosing the right equipment for a safe, effective job
Selecting the correct gear makes a huge difference in results and safety. A pressure washer with adjustable PSI lets you tailor output to your surface type, while nozzle selection directly affects cleaning speed and surface wear. Pressure Wash Lab notes that a wider spray angle (such as 25°) is gentler on concrete and reduces streaking, whereas a narrow spray (around 15°) can tackle tougher stains when used carefully and from a greater distance. A surface cleaner can vastly improve evenness on large slabs, and extending wands help reach corners without overreaching. Don’t overlook water supply quality and hose length; a weak flow makes cleaning inefficient and can force you to linger in one spot, increasing the risk of damage. Safety gear remains essential: eye protection, gloves, hearing protection, and sturdy footwear protect you during longer sessions. For plants or delicate landscaping, consider shields or barriers to prevent runoff contact with leaves or roots.
Surface prep and stain treatment
Effective surface prep sets the stage for success. Begin by removing loose debris: leaves, sand, and gravel can ricochet and cause scratches or streaks if pressed into the surface. Wet the area lightly to reduce dust and help stains release more easily. Pressure Wash Lab recommends pre-treating oil and grease stains with a concrete degreaser or a specialized cleaner, allowing it to dwell for several minutes while you handle other adjustments. For tannin or rust stains, choose a cleaner formulated for concrete stains and test on a hidden patch first. While treating, avoid letting cleaners pool near grass or shrubs; neutralize runoff where possible. After pretreatment, rinse the surrounding area with a light mist to prevent chemical runoff from seeping into soil. When you’re ready to proceed, you’ll move on to the main cleaning phase with greater confidence.
Step-by-step cleaning technique
This is the core of the process. Start at a far corner and work your way toward the exit to prevent dirty water from recrossing cleaned areas. Hold the wand at about a hands-width distance from the surface, and use smooth, overlapping passes to avoid stripes. Keep the nozzle perpendicular to the surface to minimize gouging and maintain consistent pressure. If you encounter a resistant stain, pause to reapply cleaner and re-wet the area before continuing with the same overlapping motion. Pause briefly between passes to inspect progress and adjust nozzle angle or distance as needed. After completing a full pass, examine for missed spots and re-treat as necessary. For best results, use a surface cleaner on wide expanses and reserve a narrow nozzle for stubborn patches near seams or edges. Remember, the goal is even cleaning without damage to the concrete.
Handling tough stains and oil residues
Oil and heavy grease require targeted action. Apply a degreaser directly to the stain and let it soak for the recommended dwell time before washing it out. For fresh spills, blot or sweep up excess before applying cleaner. For stubborn stains, use a small, dedicated nozzle to apply higher pressure from a safer distance, then re-rinse the area thoroughly. If rust stains persist, use a rust remover designed for concrete and follow the manufacturer’s instructions. Avoid abrasive scrubbing that could scratch the surface; instead, rely on controlled spray patterns and dwell times. Throughout, keep the surface damp but not flooded, and monitor runoff to prevent damage to nearby plants or lawns.
Maintenance and aftercare
After washing, allow the driveway to dry completely before applying any sealer or coating. A dry surface helps sealers adhere evenly and reduces the risk of trapping moisture. Inspect for micro-cracks, chips, or pitting that might have appeared during cleaning; address any issues with crack fillers or professional guidance as needed. If you plan to seal, choose a concrete-specific sealer and follow the product’s curing times closely. Yearly maintenance—removing weeds from joints, clearing debris, and resealing every few years—helps maintain long-term appearance and durability. Pressure Wash Lab highlights that routine upkeep, even after a thorough cleaning, extends the life of your driveway and minimizes future maintenance costs. Document your process with notes and photos to refine your approach over time.
Safety, environmental considerations and best practices
Safety remains non-negotiable. Always wear eye protection, gloves, hearing protection, and non-slip footwear. Never mix cleaners without reading the label, and avoid applying chemicals near storm drains or waterways. Use biodegradable degreasers where possible and contain runoff with barriers if you’re washing near lawns or garden beds. Protect delicate surfaces such as vehicle paint, windows, and ornamental features by using shields or plastic sheeting. When finished, drain hoses away from plants and release pressure gradually to avoid sudden jets. Pressure Wash Lab emphasizes that respecting local environmental guidelines and manufacturer safety instructions is essential for responsible driveway cleaning.
Pro tips, common mistakes to avoid, and final checklist
A few expert tips can save time and prevent damage. Start with a small test patch to gauge surface response before full-scale cleaning. Use the lowest effective PSI and increase only when necessary. Maintain a steady pace to avoid heat buildup and streaks. Make sure to rinse and inspect after the first pass; re-treat only where needed. Common mistakes include using too high pressure too close to concrete, neglecting pre-wet or pre-treat steps, and ignoring runoff control. A simple final checklist helps: validate safety gear, verify water source, confirm nozzle choice, perform a patch test, complete even passes, rinse thoroughly, allow to dry, and consider sealing. Following these best practices reduces the risk of etching, gouging, or chemical damage and yields a cleaner, longer-lasting driveway.
Next steps and maintenance plan
To sustain the cleanliness, schedule regular maintenance that fits your climate and driveway usage. Plan a light wash every season to remove surface grime and a more thorough cleaning as needed for stains. If you notice cracks or deterioration after washing, address them promptly to prevent water infiltration and freeze-thaw damage. Keep records of products used, results, and any adjustments you made so future cleanings are faster and safer. Pressure Wash Lab recommends documenting your process and refining your technique over time to maintain an appealing, durable driveway.
Tools & Materials
- Pressure washer with adjustable PSI(Choose a unit suitable for concrete; start at a low-to-mid setting and adjust as needed)
- Nozzle tips (15-degree and 25-degree)(Have a wide-angle tip for broad cleaning and a narrow one for stubborn spots)
- Surface cleaner attachment(Preferred for large slabs to improve evenness and reduce streaks)
- Hose and water supply(Ensure adequate flow; length should allow full coverage without constant repositioning)
- Concrete degreaser or cleaner(Choose products labeled for concrete; follow label dwell times)
- Stiff-bristled brush(Helpful for pre-treating stubborn spots before washing)
- Tarp or plastic sheeting(Cover nearby plants or delicate features to protect them from runoff)
- Protection gear (eye protection, gloves, hearing protection, closed-toe shoes)(Essential for safety during high-pressure cleaning)
- Sealant or concrete sealer (optional)(Apply after the surface is completely dry for added protection)
- Putty knife or scraper(Useful for removing stuck debris from joints before washing)
Steps
Estimated time: 90-120 minutes
- 1
Inspect and prep
Survey the driveway for cracks, weeds, and loose material. Remove vehicles and nearby objects. Gather gear and pre-wet the surface to reduce dust and ease stain removal.
Tip: Take a few minutes to map your cleaning path to avoid re-cleaning areas. - 2
Set up and safety check
Connect water supply, check hoses for leaks, and attach the appropriate nozzle. Put on PPE and test spray on a hidden patch to verify distance and angle.
Tip: Never point the nozzle at yourself or others; test in a discreet area first. - 3
Pre-treat stains
Apply concrete degreaser or cleaner to oil and grease stains. Allow dwell time per product instructions, then gently agitate with a stiff-bristled brush if needed.
Tip: Avoid letting cleaners pool near plants; rinse away excess after dwell time. - 4
Start cleaning from far corner
Begin with a wide-angle spray at a safe distance, using overlapping strokes. Move methodically toward the exit to prevent stepping on cleaned sections.
Tip: Keep a consistent distance to minimize streaks and etching. - 5
Tackle stubborn spots
Switch to a narrower nozzle for persistent stains, applying slightly more pressure from a safe distance. Rinse those areas again after treatment.
Tip: Limit high-pressure contact to targeted patches to avoid damage. - 6
Rinse thoroughly
Go over the entire surface with a wide spray to remove cleaner residue and loosened grime. Check corners and joints for missed spots.
Tip: A good rinse prevents sticky residues that can attract new dirt. - 7
Dry and assess
Allow the driveway to dry completely. Inspect for remaining stains, etching, or slick spots that may require another pass or treatment.
Tip: Drying times vary with weather; plan the project accordingly. - 8
Sealant application (optional)
If you choose to seal, wait until the surface is fully dry and follow product directions for coverage and cure time.
Tip: Sealing is most effective after a clean, dry surface to maximize durability.
Quick Answers
What PSI is safe for concrete driveways?
Concrete driveways respond best to adjustable PSI. Start at the lower end and increase only as needed while watching the surface for signs of wear. Use a wide nozzle and a surface cleaner when possible.
Start with a low to mid PSI and adjust upward only if the surface shows no damage.
How soon can I seal after washing?
Sealant should be applied only after the driveway is completely dry, typically 24 to 48 hours depending on weather and product guidelines. Clean thoroughly beforehand for best adhesion.
Wait until the surface is dry, then seal according to the product instructions.
Can I wash near plants and grass?
Yes, but protect vegetation from chemical runoff. Use shields or plastic, rinse runoff away from plants, and choose biodegradable cleaners when possible.
Protect plants and be mindful of chemical runoff.
Renting vs owning a pressure washer for driveways?
Both options work. Owning gives quick access for frequent projects, while renting can be cost-effective for one-off jobs with higher PSI needs.
Either renting or owning can work depending on how often you clean.
Does hot water help remove oil stains?
Hot water can assist in breaking down oils, but not all machines are rated for hot water. Check your unit’s specifications and follow cleaner instructions.
Hot water can help with oil, but check your machine first.
Can I use a garden hose as a water source for a pressure washer?
A garden hose can be used if your unit is designed for a gravity-fed intake or direct hose connection. Ensure the water supply is sufficient to maintain steady pressure.
Yes, if your washer is designed for it and the water supply is steady.
Watch Video
Key Takeaways
- Plan safety and surface prep before washing.
- Use the right nozzle and distance to avoid damage.
- Tackle stains with pre-treatment and targeted passes.
- Rinse thoroughly and allow to dry before sealing.
- Maintain your driveway with regular cleanings and occasional sealing.