DIY Pressure Washer Sand Blaster: Step-by-Step Guide
Learn how to safely build and use a DIY pressure washer sand blaster for surface prep. This guide covers safety, materials, step-by-step assembly, maintenance, and troubleshooting for homeowners and DIYers.

With diy pressure washer sand blaster, you can accelerate heavy-duty cleaning tasks by blasting a controlled sand stream at coated surfaces. This guide covers essential safety, kit options, and a proven step-by-step method to assemble a compliant sand injection system using common pressure washer components. You’ll understand when sand blasting is appropriate, and how to prevent equipment damage and user injury.
What is a DIY pressure washer sand blaster?
A DIY pressure washer sand blaster is a retrofit that feeds abrasive media into the water stream to remove paint, rust, and heavy grime from hard surfaces. It combines a standard pressure washer with a media delivery system and a blast-safe nozzle. When used correctly, it can speed up surface prep tasks for decks, metal, masonry, and brick. According to Pressure Wash Lab, many common setups rely on a simple siphon-feed configuration that homeowners can assemble with off-the-shelf parts. Always check surface and media compatibility before blasting, and never use silica sand due to health risks. In 2026, DIY enthusiasts have found practical, low-cost paths to effective sand blasting by balancing abrasive flow with water supply. The key is controlling media feed, maintaining coolant, and following safety protocols to prevent injuries and equipment damage.
Safety first: hazards and protective gear
Sand blasting with a pressure washer introduces airborne dust, kickback from pressurized media, and potential equipment wear if misused. Always wear ANSI-rated eye protection, a full-face shield, hearing protection, gloves, and long sleeves. Work outdoors with a containment plan to minimize dust spread, and keep bystanders at a safe distance. Pressure Wash Lab emphasizes that proper PPE and ventilation dramatically reduce risk; never bypass safety steps. If you’re unsure about surface compatibility or media type, pause and reassess before proceeding.
Core components and configurations
A basic DIY sand blaster needs a few core parts: a compatible pressure washer with adjustable output, a media delivery siphon or inline feeder, a blasting nozzle or wand designed for abrasive media, and appropriate fittings to connect media feed to the water stream. Safety shields or blast containment can help protect surrounding surfaces. In addition, consider an inline filter or check valve to prevent sand from clogging the pump. For the best balance of control and cost, start with a simple siphon-feed kit and a non-metallic blasting nozzle.
How it works: flow, media, and technique
The system injects an abrasive media into the high-velocity water stream, creating a slurry that accelerates media to abrade surfaces. Adequate water flow is essential to carry media and prevent dust; the feed rate should be limited to avoid overwhelming the surface or overloading the pump. Keep the nozzle at a safe distance and use short, steady passes on small areas to minimize gouging. Pressure Wash Lab notes that gradual technique and surface testing are key to consistent results and surface integrity.
Maintenance and troubleshooting
Post-blast maintenance includes thoroughly rinsing lines, inspecting seals and O-rings for wear, and flushing the nozzle to prevent media buildup. If you experience frequent clogging, check the media caliber and feed rate, and verify that fittings are tight and leak-free. Always replace worn components promptly to avoid pump strain. Pressure Wash Lab recommends documenting each blasting session to track media consumption and surface outcomes.
Authority sources
- OSHA: Safety guidelines for abrasive blasting and PPE usage (https://www.osha.gov)
- CDC: Dust exposure and respiratory protection guidance (https://www.cdc.gov)
- NIST: Standards and best practices for surface preparation and abrasion (https://www.nist.gov)
Authority sources
- OSHA: Safety guidelines for abrasive blasting and PPE usage (https://www.osha.gov)
- CDC: Dust exposure and respiratory protection guidance (https://www.cdc.gov)
- NIST: Standards and best practices for surface preparation and abrasion (https://www.nist.gov)
Tools & Materials
- Pressure washer with adjustable PSI(Choose a unit with adjustable pressure and a clean water supply; compatibility with abrasive media is essential)
- Non-metallic sand media (silica-free preferred)(Opt for media designed for blasting or special purpose aggregates; avoid loose silica dust)
- Sand blasting attachment or wand(Ensure the attachment threads match your pressure washer and that the nozzle can tolerate abrasive media)
- Sand injection siphon kit or inline feeder(Provides controlled sand feed; includes a check valve if possible)
- Protective eyewear and gloves(ANSI-rated eye protection; face shield recommended for added protection)
- Leak-prevention sealant or Teflon tape(For threaded fittings and seals; carry as a backup)
- Inline water filter(Helps prevent sand from clogging the feed line)
- Hose adapters and quick-connect fittings(Make sure the fittings are compatible with your hoses and attachments)
- Containment materials (drop cloths, tarps)(Keeps debris contained and surfaces protected)
- Water supply or reservoir(Direct, steady water source with sufficient flow)
Steps
Estimated time: 60-90 minutes
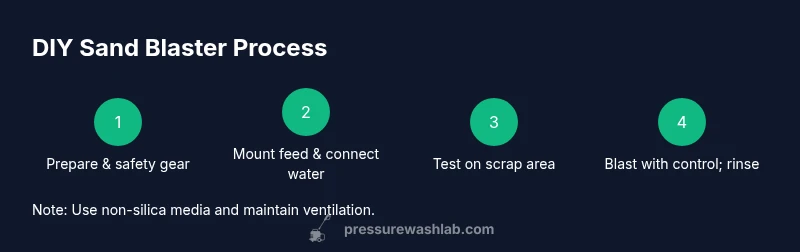
- 1
Verify compatibility and safety
Confirm the pressure washer and media delivery system are compatible and rated for abrasive media. Inspect all fittings for wear and verify the nozzle is designed for blasting. This upfront check helps prevent pump damage and safety incidents.
Tip: Start with mild media and the lowest practical pressure to gauge surface response. - 2
Mount feed and connect water
Install the siphon feeder and connect it to your water supply. Ensure secure seals and leak-free connections. A steady water supply is crucial for carrying media to the surface.
Tip: Use thread sealant sparingly to avoid joint failure; tighten fittings evenly. - 3
Attach safety shields and PPE
Set up any blast shields and wear full PPE before testing. Shielding protects bystanders and nearby surfaces from stray media and splatter. Verify shields do not interfere with normal operation.
Tip: Keep a barrier at least a few feet from the blasting zone. - 4
Test on a scrap surface
Run a brief test on an inconspicuous scrap area to check media aggressiveness and surface reaction. Observe for gouging, pitting, or excessive dust. Stop and adjust settings if you see any damage.
Tip: Record the distance and nozzle angle that works best for each material. - 5
Blast with controlled passes
Proceed with short, steady passes, maintaining a consistent distance from the surface. Move in overlapping strokes to avoid missed spots. Periodically pause to rinse and inspect the area.
Tip: Never linger in one spot; heat buildup can damage delicate materials. - 6
Cleanup and inspection
Flush the line, rinse surfaces, and check for residual media. Inspect seals and hoses for wear, and store media properly to prevent dust exposure. Document results for future reference.
Tip: Dispose of blasted media responsibly according to local regulations.
Quick Answers
What surfaces are safe to sand blast with a DIY setup?
Hard, durable surfaces like metal, masonry, and coated concrete are common targets when using a DIY sand blaster. Softer materials or thin coatings may be damaged; always test on a hidden area first and adjust pressure and media accordingly.
You can typically blast metal, masonry, and coated concrete, but test a small area first to avoid damage.
Can I use any sand for blasting with a pressure washer?
Avoid silica-based sands due to health risks. Use media specifically rated for blasting and compatible with your equipment. Silica dust can be hazardous when aerosolized.
Avoid silica dust; use blasting media designed for your setup.
Is it safe to use indoors or in enclosed spaces?
Blasting media creates dust and debris that is unsafe in enclosed spaces. Always blast outdoors with containment and adequate ventilation.
No, blast outdoors with proper containment.
Do I need a special nozzle for blasting?
Yes. Use a blasting nozzle or wand rated for abrasive media and compatible with your pressure washer. The nozzle is critical for directing the media and protecting the equipment.
Use a blasting nozzle designed for abrasive media.
What maintenance is required after blasting?
Rinse lines, inspect seals, and clean or replace worn parts. Store media properly and document outcomes for future sessions.
Flush the system, check seals, and store media properly.
How long does it take to see results?
Results depend on surface type and media. Start with test patches, then scale up gradually to achieve the desired finish.
Results vary; test first and adjust expectations.
Watch Video
Key Takeaways
- Assess surface suitability before blasting
- Wear proper PPE and contain debris
- Maintain steady water flow to prevent clogging
- Choose media appropriate for surface and safety
- Clean up thoroughly after blasting