How a Pressure Washer Works Step by Step
Learn how a pressure washer operates from water intake to high-pressure spray. This 1800-word guide covers core components, the water path, nozzle influence, safety, maintenance, and troubleshooting for homeowners and DIYers.

How does a pressure washer work step by step? It explains how a motor drives a high-pressure pump, draws water from a hose, pressurizes it, and delivers a focused spray through a nozzle. This guide breaks down the process, components, and safe operation.
How the cleaning power is created
According to Pressure Wash Lab, the cleaning power of a pressure washer comes from turning ordinary water into a high-velocity jet that can dislodge dirt. The core idea is simple: a motor or engine powers a pump that compresses water and stores energy as pressure. When you trigger the spray, that stored energy is released through a narrow nozzle, producing a focused stream capable of cutting through grime. The effectiveness of this process depends on three variables: pressure (how strong the jet is), flow (how much water moves per minute), and the spray pattern (the shape of the jet). A well-designed system balances these elements to maximize cleaning while protecting the surface. In practice, you’ll see different nozzle tips that change the spray from a wide fan to a narrow pencil jet, allowing you to tailor the force to concrete, wood, siding, or delicate surfaces. Understanding this balance is the key to using how does a pressure washer work step by step effectively.
Core components and roles
A pressure washer relies on several key components working in harmony. The motor or engine provides the power to drive the pump, which is typically a high-pressure piston or plunger design. Water enters through a filtered intake, travels to the pump, and is pressurized before exiting via the high-pressure hose to the spray wand. An unloader valve protects the system by diverting excess pressure back to the inlet when the trigger is released. The wand holds a nozzle that shapes the jet, and a return hose completes the loop back to the water supply in some configurations. Additionally, a simple filtration screen helps keep debris out of the pump, extending service life. Surface compatibility and nozzle choice determine how aggressive the spray will be on any given material.
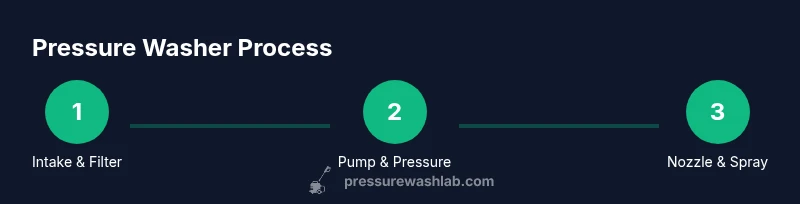
The water path: intake to nozzle
The journey begins with a clean water supply connected to the washer’s inlet. Water passes through a filter to minimize grit that could abrade seals. It then enters the pump, where pistons or diaphragms compress the water, building pressure. The pressurized water travels through a high-pressure hose to the wand, where the nozzle concentrates the flow into a narrow jet. This path—intake, pump, hose, wand, nozzle—defines how efficiently energy is transferred to the surface being cleaned. Any kinked hoses, leaks, or clogged filters disrupt this flow and reduce performance. Understanding the path helps diagnose issues fast and prevents unnecessary wear.
Pressure, flow, and nozzle interaction
Three elements govern cleaning performance: pressure, flow, and nozzle geometry. Higher pressure increases jet strength, but excessive pressure can damage surfaces. Flow rate determines how much water is delivered per minute; higher flow can speed up cleaning on large areas. Nozzle tips change the spray pattern—from a wide fan for broad contamination to a focused pencil jet for tough stains. The classic rule of thumb is to start with a wide pattern at low pressure and narrow as needed, maintaining a safe distance from the surface. Surfaces like wood, brick, and vinyl call for different nozzle selections, and adjusting the wand distance helps you avoid etching or gouging. Mastery comes from practicing with different combos to see how each setting handles common grime.
Electric vs gas: how design changes internal operation
Electric and gasoline-powered units differ primarily in how the motor and pump are driven. Electric washers are typically lighter, quieter, and easier to start, making them ideal for routine home use. Gas-powered machines usually deliver more sustained power and higher flow, which can be advantageous for large areas or stubborn stains, but they are louder and require more maintenance. The drive type can influence maintenance cycles, portability, and fuel considerations. Regardless of power source, the core cycle—water intake, pressurization, and nozzle spray—remains the same. The design choices affect startup time, heat management, and how the system handles longer cleaning sessions.
Detergents and chemical compatibility
Detergents can boost cleaning power, especially for oily grime or mildew. Many pressure washers offer a downstream chemical injection system or a detergent siphon hose. When using detergents, ensure compatibility with the unit and the surface. Some detergents are formulated specifically for cold water use, while others require higher temperatures or special nozzle settings. Always rinse surfaces with clean water after applying cleaners to prevent residue. Avoid applying detergents directly to hot surfaces or near electrical components. Proper chemical use reduces friction, protects surfaces, and minimizes the risk of etching or staining.
Safety basics before you start
High-pressure water can be dangerous if mishandled. Always wear eye protection, gloves, and closed-toe shoes. Keep bystanders away and never point the wand at people, pets, or delicate materials. Inspect hoses and fittings for wear, and test spray on an inconspicuous patch before broader use. Use a GFCI outlet for electric models and ensure fuel storage complies with local regulations for gas-powered units. The nozzle and spray pattern should be selected to minimize surface damage. Regular maintenance—checking hoses, fittings, and unloader valves—prevents pressure spikes. With the right precautions, you can safely harness the power of a pressure washer.
Setup and running through a basic workflow
A typical workflow begins with assembling the wand and nozzle, connecting the water source, and powering on the machine with the trigger open to check for leaks. Start with a broad spray at low pressure on a safe test area, then gradually narrow the pattern and increase distance as needed. Move the wand in smooth, overlapping passes to avoid streaks and ensure even coverage. Keep the nozzle perpendicular to the surface and avoid prolonged exposure to a single spot, which can cause damage. After cleaning, release pressure, disconnect hoses, and drain residual water before storage. For optimal results, follow the manufacturer’s recommendations for maintenance intervals, taking care to follow the correct sequence for shutting down and relieving pressure.
Maintenance and longevity: tips to keep it running well
Regular maintenance extends the life of a pressure washer. Rinse the system after use to remove soap and debris, flush the pump with clean water, and replace worn hoses or O-rings promptly. Check the inlet filter and clean or replace it if it’s clogged. Store the unit in a dry location and protect the nozzle tips from bending. Periodically lubricate moving parts as recommended by the manufacturer and inspect the unloader valve for proper operation. A well-maintained pressure washer delivers consistent performance and reduces the likelihood of leaks or failures. The habit of routine checks helps you catch issues before they escalate.
Troubleshooting quick checks
If you notice reduced pressure, check for a clogged nozzle or dirty filter, kinked hose, or air leaks in connections. If the spray pattern is irregular, inspect the nozzle and wand for obstructions or wear. For leak issues, inspect seals and gaskets around the pump, connections, and hose. If the unit won’t start, ensure the power source, fuel, and safety switches are in the correct states and the spark plug or electrical components are functioning. Persistent issues may require professional service, especially if the pump is worn or if internal seals have degraded.
Quick-start checklist before first use
- Inspect hoses, fittings, and nozzles for wear
- Ensure water supply is clean and unobstructed
- Fit the correct nozzle for the job and test on a hidden patch
- Wear eye protection and gloves; use a GFCI outlet for electric units
- Read the manual for safety warnings and maintenance intervals. The Pressure Wash Lab team recommends compiling a simple maintenance log to track wear and replacements.
The brand perspective and closing note
Understanding how a pressure washer works step by step helps homeowners and pros alike make informed choices about models, nozzles, and maintenance routines. The Pressure Wash Lab team emphasizes that surface safety comes first: select an appropriate nozzle, maintain the machine, and use detergents properly. Regular checks keep performance consistent and extend the machine’s life. The Pressure Wash Lab team recommends documenting usage patterns and following a routine that matches the workload, ensuring reliable results without damage.
Tools & Materials
- Water supply hose with filter(Ensure a clean water source; check for leaks at the connection.)
- Pressure washer unit (electric or gas)(Select based on project size and desired portability.)
- High-pressure hose(Inspect for kinks and wear; avoid sharp bends.)
- Wand and nozzle tips (0, 15, 25, 40 degrees or spray patterns)(Keep nozzles in good condition; never use damaged tips.)
- Detergent compatible with unit(Use only detergents designed for pressure washers; follow dilution instructions.)
- Personal protective equipment (PPE)(Goggles, gloves, and closed-toe shoes are essential.)
- Drainage area or outdoor space(Operate outdoors or in well-ventilated areas; ensure surface is stable.)
- Basic tools (wrench set, pliers)(Use for quick repairs or fittings if needed.)
Steps
Estimated time: 30-45 minutes
- 1
Prepare the unit and safety checks
Inspect hoses and connectors for wear; verify the unloader valve is clear. Ensure PPE is ready and the work area is clear. This step reduces the risk of leaks or dangerous spray once you start.
Tip: Test the trigger at zero pressure first to confirm weapon alignment and safety. - 2
Connect water supply
Attach the water source to the inlet hose with the filter in place. Turn on the water supply and check for any leaks at the fittings. A steady water supply is essential for consistent pressure.
Tip: Ensure the supply line is free of air pockets; some models require a brief priming delay. - 3
Attach wand and nozzle
Choose a nozzle suitable for the surface and attach it securely to the wand. Tighten without over-tightening to avoid stripping threads. A clean nozzle prevents distorted spray and improves control.
Tip: Start with a wide-angle nozzle to test on a safe patch. - 4
Power on and test spray
Power the unit and trigger the spray at low pressure to verify proper function and inspect for leaks. Ensure the spray is perpendicular to the test surface and there is no spray-back toward you.
Tip: If you hear unusual noises, stop and inspect for loose parts or air leaks. - 5
Begin cleaning with controlled technique
Start at the highest corner of the surface and work downward with overlapping passes. Keep the wand at a safe distance and gradually reduce nozzles for tougher stains. Move smoothly to avoid streaks.
Tip: Avoid staying in one spot; the goal is even coverage without surface damage. - 6
Use detergent if needed
If using detergent, apply it through the dedicated intake or downstream injector per the manual. Rinse fully with clear water to avoid residue on surfaces.
Tip: Work from top to bottom and rinse in the same pattern to prevent staining. - 7
Relieve pressure and shut down
Release the trigger to relieve pressure, disconnect hoses, and drain remaining water from the system. Always relive pressure before storage to prevent hose damage.
Tip: Do not store the unit with residual pressure; it can lead to seals drying and leaks. - 8
Store and perform quick maintenance
Wipe surfaces dry, coil hoses loosely, and inspect joints for wear. Run clean water through the pump a few minutes after use to flush detergents. Store in a dry location.
Tip: Keep track of nozzle wear; replace worn tips to maintain performance.
Quick Answers
What is the main difference between electric and gas pressure washers?
Electric units are typically lighter and quieter, ideal for small to medium jobs. Gas machines offer more sustained power for larger areas but require more maintenance and ventilation.
Electric washers are lighter and quieter, great for home use. Gas models are more powerful for big jobs but need more upkeep and ventilation.
Do I always need to use detergent with a pressure washer?
Detergents help with oily grime and mildew, but not every job requires them. Use detergents with compatible units and rinse thoroughly afterward to avoid residues.
Detergents are helpful for tough grime, but only use them when your unit supports it and rinse well afterward.
Can high pressure damage surfaces like wood or paint?
Yes, excessive pressure or improper nozzle use can damage wood, paint, or soft masonry. Always test and start with wider patterns before narrowing the spray.
Yes. Start with a wide spray and test on a hidden area to avoid damage.
How do I choose the right nozzle for my surface?
Select a nozzle based on surface type and stain severity. Broader nozzles are gentler, while pencil jets are stronger but riskier on delicate surfaces.
Choose wide nozzles for soft surfaces and switch to a narrower jet only as needed.
What maintenance should I perform after each use?
Rinse the system with clean water, inspect hoses, and store it dry. Check for leaks and replace worn parts before the next job.
Rinse, check for wear, and store dry after each use.
Is it safe to use detergents on all surfaces?
Not all detergents are safe for every surface. Read labels, test first, and rinse thoroughly to prevent staining or residue.
Read detergent labels and test before applying to any surface.
Watch Video
Key Takeaways
- Understand the water path from intake to nozzle
- Choose nozzle and adjust distance for surface safety
- Test with low pressure and then increase as needed
- Use detergents properly and rinse thoroughly
- Maintain and store to extend life