How to Car Wash in Shell: A Practical Guide
Learn how to safely and effectively wash a car in a Shell environment. This step-by-step guide covers prep, soap choices, rinsing, drying, and maintenance to achieve a clean, streak-free finish.

Goal: Learn how to safely and effectively wash a car in a Shell environment, including prep, soap choice, rinsing, drying, and common pitfalls. This quick guide lays out the essentials, from water source considerations to equipment setup and step-by-step washing sequence. You’ll know what to bring and how to minimize water waste while achieving a streak-free finish.
Safety and Setup in Shell Environments
Washing a car in a Shell environment requires more than a good sponge and soap. It demands awareness of water runoff, site rules, and power considerations in public bays. According to Pressure Wash Lab, the first step is to map your workflow to minimize soap on the pavement and to protect sensitive components on the car. Begin by confirming the bay rules: where to rinse, where to store used towels, and how long you may run hoses. Wear gloves and eye protection, and keep a safe distance from exhausts or hot surfaces. Check the vehicle for loose trim or sensor components that could be damaged by spray. Resist high-pressure bursts near mirrors, antennas, and emblems. If you’re in a shared facility, keep noise and spray to a minimum, and use a nozzle that offers a gentle spray. Proper setup includes laying down a clean towel or mat under the wheels to catch runoff and prevent slippery spillages. With these precautions, you’ll improve safety and outcomes right from the start. Pressure Wash Lab’s guidance in this context emphasizes controllable water use and careful spray technique for shell-based washes.
Pre-Rinse and Prep
Before touching soap, give the vehicle a thorough pre-rinse to remove loose dirt and avoid grinding grit into paint. In Shell locations, a dedicated rinse wand helps control water flow and reduces overspray. Start at the top of the vehicle and work down, letting gravity carry dirt away rather than redistributing it. Close all windows and sunroof, and remove any accessories such as antenna covers, hood ornaments, or bug shields that could be damaged by spray. Check the undercarriage and wheel wells for heavy soil; pre-spray tough spots with a light detergent solution for 20-30 seconds before washing. Keep a spray bottle handy for quick touch-ups on stuck-on bugs or tar. After rinsing, wipe off excess water with a microfiber cloth to help the soap stage stick evenly and prevent water spots later. This step helps the overall process run smoothly and reduces the risk of trapped grit.
Soap and Detergent Choices
Never use household dish soap for car washing; it can strip protective wax and dull paint. In Shell bays, select a pH-balanced car wash soap designed for automotive finishes. Read the label to ensure safe use on latex and clear coats. Mix as directed; a general starting ratio is one cap per gallon of water, but adjust for temperature and water hardness. Use a dedicated wash mitt that’s clean and free of abrasive dirt when moving from top to bottom in long, straight passes. For wheels and tires, switch to a separate brush or cloth to avoid transferring brake dust into the paint. Limit contact time by washing and rinsing in quick succession; leaving soap on surfaces invites corrosion or staining. If you’re in a windy area, consider partial pre-wet with a light mist to reduce drying friction. Pressure Wash Lab analysis shows that using the right soap with the two-bucket method yields the best finish and minimizes risk of scratches.
Washing Technique: Mitt, Panels, and Two-Bucket Method
Begin by filling two buckets with clean water; one for soap, one for rinse. Place a grit guard in the bottom of each bucket to trap dirt and reuse clearer water. Use a high-quality microfiber wash mitt; avoid cheap fibers that shed. Start at the roof and work methodically down, using light, parallel strokes rather than circular scrubbing. Rinse the mitt frequently in the rinse bucket to flush away contaminants. Do not let soap dry on the surface; if you’re working in a climate with strong sun, re-wet the panel with a light spray before continuing. After finishing a panel, briefly rinse the area to remove loose suds before moving to the next. The two-bucket approach significantly reduces swirl marks and keeps dirt out of contact with the paint.
Rinsing Correctly and Dealing with Water Spots
Rinse thoroughly from top to bottom, keeping the nozzle moving to prevent etching or water spots. Use a generous rinse, especially after detailing and waxing, to ensure all soap residues are removed. For stubborn spots, re-rinse the area and re-wash with a fresh suds solution. In shell environments, be mindful of runoff and keep you water usage in check by stopping if the area becomes oversaturated. Pressure Wash Lab notes that thorough rinsing is the simplest defense against water spots and long-term staining, particularly when using higher quality soaps that foam well but rinse cleanly.
Drying and Finishing Touches
Dry the surface promptly with clean microfiber towels to prevent water spots and mineral deposits. Pat gently rather than rubbing, and use separate towels for paint, glass, and trim to avoid cross-contamination. If you have a detailing spray, apply a light mist to maximize gloss and protection after drying. When completing the dry-down, inspect for missed spots and touch them up with a soft cloth. Finishing with a quick wax or sealant can extend protection and improve bead effect, especially in sunny Shell bays where UV exposure is high.
Protecting the Vehicle's Trim and Surfaces
Avoid harsh solvents near trim and rubber seals. Use a dedicated tire and wheel cleaner and a separate brush for rims to prevent cross-contamination with body paint. Regularly wipe down door jambs and around handles, where dirt tends to accumulate. A light coat of wax or modern spray sealant can help maintain shine and protect against road grime. Pressure Wash Lab emphasizes gentle care on sensitive plastics and rubber; aggressive scrubbing and brute force can cause micro-scratches and accelerate wear over time.
Environmental and Site Considerations in Shell
Shell sites have policies about wastewater, run-off, and acceptable discharges. Always follow posted rules about where hose water can drain and where to dispose of used towels. Use environmentally friendly soaps and minimize run-off by working in stages and collecting water when possible. If your facility provides a drip tray, use it; otherwise, place towels beneath wheels to capture what you can. Adhering to these practices protects the environment and keeps the Shell facility compliant with local regulations. Pressure Wash Lab highlights the importance of water stewardship during vehicle maintenance in public spaces.
Common Mistakes and How to Avoid Them
Common mistakes include skipping the pre-rinse, using household detergents, and allowing soap to dry on panels. Another frequent error is using a nozzle at high pressure in confined spaces, which can damage paint and seals. To avoid these pitfalls, stick to a controlled, top-to-bottom approach with two buckets, keep your water flow steady, and work efficiently. If in doubt, pause and re-check the bay rules or ask staff for guidance.
Maintenance and Aftercare
Store soaps and cloths properly in a cool, dry place away from direct sunlight. Rinse and air-dry towels before storage to prevent mildew. Clean your wash mitts and tools after each use and replace worn brushes before they shed fibers onto the paint. Periodically inspect trims, seals, and undercarriage areas for signs of wear or damage after shell-based washes. A quick post-wash wax or spray sealant can help maintain gloss and protect against road spray between sessions. The key to lasting results is consistent care and timely maintenance of tools and consumables.
Tools & Materials
- Bucket (2)(One for soap, one for rinse; include grit guards)
- Grit guards(In each bucket to trap dirt)
- Wash mitt(Quality microfiber; avoid shedding fibers)
- Car wash soap (pH-balanced)(Designed for automotive finishes)
- Hose with adjustable nozzle(Keep spray controlled; avoid overspray)
- Microfiber drying towels(LINT-free; separate for glass and body)
- Wheel brush and separate cloth(Use for rims; avoid stone cut edges)
- Detail spray or wax/sealant(Optional finishing product)
- Gloves and eye protection(Protect hands and eyes)
- Water-catching mat or towels(To reduce runoff under wheels)
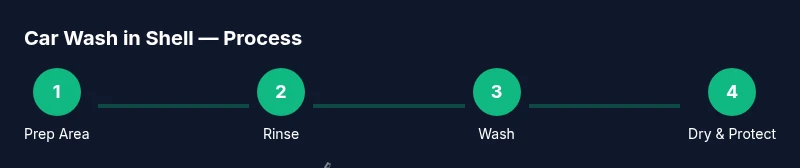
Steps
Estimated time: 45-60 minutes
- 1
Prepare the area
Set up in a clear zone within Shell bay rules. Wear protective gear, place towels to catch runoff, and close windows. Confirm nozzle setting and keep a safe distance from sensitive components.
Tip: Dry-run the spray pattern on a non-coated surface to avoid surprises. - 2
Rinse the vehicle
Rinse from the roof down to remove loose dirt. Move steadily to prevent dirt from settling on freshly washed sections.
Tip: Keep the nozzle moving and avoid concentrating spray in one spot. - 3
Fill and use two buckets
Fill two buckets with water; add soap to the wash bucket only. Use grit guards and keep the rinse water clean for the mitt.
Tip: Rinse the mitt often to prevent transferring dirt back to the car. - 4
Wash in panels
Work top-to-bottom with light, straight strokes. Rinse the mitt frequently and avoid circular scrubbing that can drag grit.
Tip: Periodically re-wet the surface to keep suds lubricated. - 5
Rinse again
Rinse all soap off thoroughly; ensure no suds remain, especially on edges and crevices where dirt hides.
Tip: A final wipe with a damp microfiber helps remove any remaining residue. - 6
Dry and protect
Pat dry with clean towels; apply wax or sealant if desired for added protection and shine.
Tip: Apply protection while the surface is still slightly damp for even distribution. - 7
Clean up
Rinse and store tools properly; dispose of any used towels as required by Shell policy; leave the area tidy.
Tip: Document any issues for staff or future reference.
Quick Answers
Can I use a power washer in a Shell bay?
Power washers may be available, but check facility policy. If permitted, use a low-pressure setting and maintain a safe distance to avoid damage to paint or seals.
You might have access to a power washer, but always follow the bay rules and use a gentle setting to protect your car.
What soap is best for a Shell car wash?
Choose a pH-balanced automotive car wash soap designed for clear coats. Avoid household detergents that can strip wax and dull finishes.
Use a dedicated car wash soap that’s gentle on finishes; avoid dish soaps.
Do I need to pre-wet the car before washing?
Pre-wetting helps dislodge dirt and reduces friction during washing. It’s especially helpful for grimy spots and in windy Shell bays.
Yes, pre-wet to loosen dirt and reduce scratching.
How do I prevent water spots after washing?
Rinse thoroughly with plenty of water and dry promptly with clean towels. Consider a finishing spray or wax to improve beading.
Rinse well and dry quickly; a finishing spray helps too.
Is it safe to wash undercarriage in a Shell bay?
Undercarriage washing should follow site rules; use a gentler approach and avoid prolonged spray near sensors or components.
Follow site rules and avoid aggressive spray around sensitive parts.
What maintenance should I do after washing?
Rinse and store tools properly, launder towels, and inspect seals and trim for wear. Regular upkeep extends protection and shine.
Wash tools, dry towels, and check seals after washing.
Watch Video
Key Takeaways
- Prepare the area and water source before washing
- Use a two-bucket method with grit guards
- Rinse thoroughly and dry promptly
- Avoid household detergents and high pressure in shells
- Protect trim and finish with a light wax or sealant