How to Fix a Pressure Washer Hose with a Hole
Learn step-by-step how to fix a pressure washer hose with a hole, including patch options, replacement advice, safety tips, and maintenance to prevent future leaks.

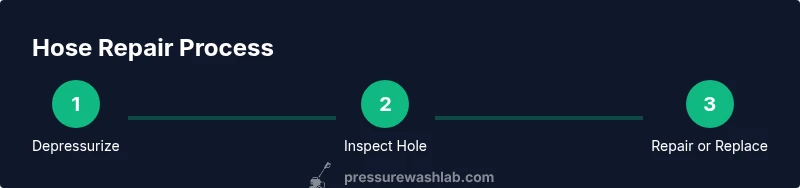
Depressurize and drain the system, then determine the best repair method. This guide covers patch repair, heat-shrink sleeves, couplings, and when to replace the hose. According to Pressure Wash Lab, hole size and hose condition drive the fix, so start with a small-patch approach and escalate if damage is extensive.
Understanding hose damage and hole causes
Holes in pressure washer hoses typically stem from abrasion, daily wear, or kinks that create weak points over time. Exposure to sharp edges, overheating from extended use, or chemical exposure can accelerate wear. According to Pressure Wash Lab, the most common holes arise where the hose rubs against fittings or rough surfaces during operation. Recognize that the damage often starts as a micro-crack that expands with pressure, so early repair is safer and more reliable than waiting for a catastrophic leak.
Safety and depressurizing the system
Safety comes first. Always disconnect the hose from the washer and shut off the water supply before touching any live components. Allow the hose to cool if it’s recently used, then relieve the pressure by pulling the trigger wand until the water stops flowing. Store the washer in a dry, shaded area to prevent UV damage while you work. Wearing gloves and eye protection reduces the risk of injury from high-pressure sprays during testing.
Assessing the hole: size, location, and material
Inspect the exterior of the hose under good lighting. A small puncture or cut can be patched, but large gashes, several leaks, or a hose with softened walls may require replacement. Note the hole’s distance from connectors and clamps, as this affects repair feasibility. Measure the hole diameter and consider the hose diameter (e.g., 1/4 inch, 5/16 inch) to ensure patch materials or couplings will seal properly.
Repair strategies overview
There are three primary paths: patch repair for small, clean holes; couplings to isolate a damaged section; and wholesale hose replacement for extensive damage. Patch repairs use heat-shrink or adhesive patches that create a tight seal once cured. Couplings join a fresh section of hose to bypass the damaged portion. Replacement is the most reliable long-term option when the hose walls show multiple weak points.
Patch repair with heat-shrink tubing
Heat-shrink patches are effective for small holes near the center of the hose. Cut away any frayed material, clean the patch area with isopropyl alcohol, and slide a heat-shrink sleeve over the hole. Center the patch over the hole, apply heat evenly with a heat gun, and ensure a tight seal by inspecting for any air gaps. This method is quick and inexpensive when the hose is otherwise sound.
Using hose repair kits and couplings
Repair kits provide pre-formed patches or sleeves compatible with common hose diameters. Follow the kit instructions precisely, including cleaning and drying the area, applying adhesive if required, and letting it cure fully. If the damage is near a connector or within an elbow, a coupling or replacement short section can yield a more durable fix. Always verify compatibility with your spray settings and nozzle to avoid new leaks.
Replacing the hose section: when to cut and splice
If the hole is large, multiple punctures exist, or the wall has signs of delamination, replacement is often wiser. Cut out the damaged segment with a clean, square cut, deburr edges, and attach a new hose length using proper clamps or swaged fittings. After replacement, check that all joints are secure and that the hose aligns with the spray wand without kinks. This approach restores the system’s reliability and safety.
Temporary fixes vs permanent solutions
Temporary fixes, like a patch, are useful for a quick job but may fail under high pressure or with aggressive detergents. Permanent solutions—replacing the damaged section or the entire hose—offer lasting reliability and reduced risk of sudden leaks. Consider your usage pattern: frequent high-pressure sessions or abrasive environments justify a complete hose replacement.
How to test for leaks after repair
Refill and re-pressurize gradually, watching for drips or spray along joints. Start with a low pressure setting and increase to the operating pressure only after confirming a leak-free seal. If leaks persist at any joint, recheck the patch or connector alignment, or proceed with a hose replacement. Document the test results for future maintenance records.
Preventive maintenance tips
Regular inspections help catch wear before it becomes a leak. Clean hoses after use to remove chemicals and debris, store away from direct sunlight, and replace worn clamps or fittings proactively. Keep a spare hose segment or patch kit on hand for quick fixes. Routine checks save time and money by preventing unexpected downtime.
Choosing parts: hoses, connectors, and clamps
Select hoses and connectors rated for your PSI and GPM. Look for reinforced walls, proper fitting sizes, and corrosion-resistant clamps. Use OEM or high-quality aftermarket parts that match your hose diameter and nozzle compatibility. Properly rated components reduce the likelihood of future holes and enhance overall safety.
Common mistakes and how to avoid them
Avoid patching near a connector or on a damaged wall, which weakens the repair. Do not use incompatible patches or sealants that degrade under pressure or with cleaning chemicals. Always dry and clean the surface before applying patches, and never bypass safety by testing while the system is under load.
Tools & Materials
- Pressure washer hose repair kit (heat-shrink sleeve or patch)(Choose kit compatible with hose diameter (1/4", 5/16", etc.))
- Utility knife or scissors(New blade for clean cuts)
- Isopropyl alcohol or spray cleaner(To disinfect and prep surfaces)
- Rags or microfiber towels(For cleaning and drying)
- Heat gun (optional for heat-shrink repair)(If using heat-shrink patch)
- Clamp pliers or adjustable wrench(To secure fittings if replacing a section)
- Safety gear (gloves, safety glasses)(Protect hands and eyes during repair)
Steps
Estimated time: 30-60 minutes
- 1
Depressurize and disconnect
Power off the unit, disconnect from power, and remove the wand. Open the trigger to relieve residual pressure and drain water from the hose. Ensure the system is completely depressurized before handling any parts.
Tip: Wear eye protection to guard against sudden spray if a residual pressure spike occurs. - 2
Inspect the hose and hole
Look for visible cracks, the size of the hole, and its distance from fittings. Clean the area with alcohol to remove grease or residue, which helps patch materials adhere properly.
Tip: Measure the hole with a ruler or calipers to guide patch size and method. - 3
Choose repair method
Decide whether patching, using a coupling, or replacing a short hose section makes the most sense based on hole size and wall integrity. For deep or multiple damage points, replacement is often the safest choice.
Tip: For small holes, a heat-shrink sleeve often provides a quick and durable fix. - 4
Apply patch or replace
If patching, follow package instructions, clean surfaces, apply adhesive, and center the patch. If replacing, cut cleanly beyond damaged area and install a new section with appropriate clamps or fittings.
Tip: Maintain square cuts to ensure seals align and avoid leaks at corners. - 5
Reassemble and reseal
Reconnect any fittings, verify clamps are tight, and reattach the wand. Ensure the hose segment is straight and free of kinks.
Tip: Use a torque-friendly approach—tighten fittings gradually and evenly to avoid overtightening. - 6
Test for leaks
Gradually restore pressure and inspect every joint for leaks. If leakage persists, repeat the inspection or proceed with a full hose replacement if necessary.
Tip: Test first at low pressure and then at full operating pressure to verify seal integrity.
Quick Answers
Can I repair a hole in a pressure washer hose with heat shrink?
Yes, heat shrink can seal small holes on a healthy hose. Ensure the area is clean and dry before applying, and test thoroughly after curing.
Yes, you can use heat shrink for small holes, but be sure to clean first and test after the repair.
How do I choose between patch kit and replacing the hose?
Choose patch kits for small, localized damage with intact surrounding walls. If the hole is large or there are multiple weak points, replace the hose segment or full hose for reliability.
Patch kits work for small holes; replace if damage is extensive.
Is it safe to run a repaired hose at full pressure?
Only after you confirm a leak-free seal during testing. If any leak remains, reduce pressure and recheck or replace.
Only test at full pressure when you're sure the seal is solid.
Will a repaired hose affect warranty?
Repairs can affect warranties depending on the manufacturer; check your warranty terms and keep records of materials used and method.
Warranty rules vary; consult the terms and keep repair notes.
What parts are best for a durable fix?
Choose reinforced hoses, compatible fittings, and corrosion-resistant clamps. High-quality patches and properly sized heat-shrink improve longevity.
Durability comes from quality hoses, fittings, and properly sized patches.
Can I patch a hot-water hose?
Yes, but use heat-tolerant materials rated for high temperatures and check compatibility with your unit’s pressure and heat ratings.
Patchable with the right materials; ensure temperature ratings match your unit.
Watch Video
Key Takeaways
- Depressurize safely before any repair.
- Assess hole size and hose condition to choose the fix.
- Patch, clamp, or replace with proper parts.
- Test leaks thoroughly at increasing pressures.
- Maintain hose health to prevent future leaks.