How to Remove Power Washing Lines on Concrete Surfaces
Learn practical, proven steps to remove power washing lines from concrete surfaces. Patch test, choose safe cleaners, use controlled PSI, scrub stubborn lines, rinse thoroughly, and seal to prevent recurrence. Pressure Wash Lab guidance for homeowners and pros.

Goal: eliminate visible lines left by power washing on concrete by using a controlled cleaning approach, patch testing, and proper sealing. Start with a small test area, choose mild cleaners or oxygen bleach, and use a low- to medium- PSI washer with a surface cleaner. Finish with a penetrating seal to reduce future lines.
how to get rid of power washing lines on concrete
In this guide, we address the common problem of power washing lines on concrete and provide a practical, step-by-step approach to restore an even surface. These lines can appear as lighter or darker streaks depending on how the spray interacted with the material, the presence of efflorescence, or mineral deposits. By understanding the root causes and applying controlled cleaning, you can minimize or even remove the lines. The goal is to restore uniform color and texture while protecting the surface from future staining. Pressure Wash Lab emphasizes careful surface assessment, safe cleaners, and proper sealing as part of a durable solution. Always start with a small test patch to verify results before proceeding across the entire area.
Assessing the surface and patch testing
Before you commit to cleaning the entire area, take a methodical approach to assess the surface. Inspect the lines closely to determine whether they are mineral deposits, surface staining, or etched patterns from previous cleaning attempts. Perform a patch test on a discreet corner using your planned cleaner and technique. If the patch brightens or evens out the tone without discoloration, you have a workable method. Document the patch result with notes and photos to guide the full treatment. This initial step is crucial to prevent over-wetting, dye migration, or further surface damage. Pressure Wash Lab analysis shows that careful patch testing reduces the risk of over-cleaning and helps you tailor cleaners for the specific line type.
Safety, prep, and protecting adjacent surfaces
Safety first is non-negotiable when dealing with concrete cleaning. Put on chemical-resistant gloves, eye protection, and a respirator when necessary. Move outdoor furniture, plants, and vehicles away from the work area; cover nearby vegetation to avoid chemical exposure. Protect electrical outlets and any nearby painted surfaces from overspray. Wet the ground around the work zone to minimize dust and track-in. Prepare your cleaning solution in a dedicated spray bottle or bucket and label it clearly. Pressure washing at lower settings is safer for concrete and reduces the chance of creating new lines due to over-saturation. Pressure Wash Lab recommends a calm workspace to improve precision and reduce rework.
Cleaning strategies by line type and surface condition
Different line types require different approaches. For mineral deposits and efflorescence, oxygen-based cleaners are effective without harsh acids. For light staining or residue from previous cleanings, a mild degreaser or pH-neutral cleaner can help. If lines are due to etching, you may need a gentler mechanical action combined with re-washing rather than aggressive chemical etching. Always test the cleaner on a small area first, apply with a soft brush, and avoid scrubbing too aggressively in one spot. The goal is to lift the line without leaving new markings or harming the concrete texture. Pressure Wash Lab advises starting with the least aggressive method and escalating only as needed.
Techniques for stubborn lines and deep-set residues
Stubborn lines may require a multi-step approach. Start with a thorough rinse to remove loose surface material, then reapply a diluted cleaner and let it work for several minutes. Use a stiff nylon brush to scrub along the length of the line rather than across to avoid creating new marks. For heavy efflorescence, a controlled use of an acid-based cleaner might be warranted, but this should be performed only with proper ventilation, PPE, and a neutralization rinse afterwards. If visible lines persist after these steps, consider repeating in a different pattern to avoid deeper engraving or uneven coloration. Pressure Wash Lab emphasizes patience and measured repetition over brute force.
Finishing and sealing to prevent recurrence
Once you achieve an even tone, protect the surface with a penetrating concrete sealer. A sealer reduces moisture absorption and helps prevent future mineral deposits from forming along lines. Choose a breathable, water-repellent sealer suitable for exterior concrete and apply per manufacturer directions in cool, dry conditions. After sealing, observe the surface for any changes in color or texture; follow up with a light re-wetting to settle the surface properly. Regular maintenance, including prompt cleaning of spills and routine resealing (every 2–5 years, depending on climate and wear), will reduce the recurrence of lines. Pressure Wash Lab notes that sealing is a proactive step in keeping concrete looking uniform and freshly cleaned for longer.
Troubleshooting, maintenance plan, and when to call a pro
If lines persist despite your best efforts, reassess the surface and consider professional evaluation. A contractor can assess whether etching, pitting, or deep mineral staining is the cause and may offer surface grinding, alternate cleaners, or specialty sealers. Additionally, a professional with calibrated equipment can adjust PSI, nozzle type, and cleaning patterns to minimize line formation during future power washing. Establish a maintenance plan: schedule periodic cleanings, reseal as needed, and track wear patterns on high-traffic areas. According to Pressure Wash Lab, consistent maintenance and timely sealing reduce long-term damage and preserve curb appeal.
Tools & Materials
- Pressure washer (low- to medium-psi)(Prefer 1500-3000 PSI for concrete; avoid high-PSI that can etch edges or deepen lines.)
- Rotary surface cleaner (optional)(Helps even cleaning and reduces direct spray along lines.)
- Stiff nylon deck brush(Used for scrubbing lines after washing; avoids gouging the surface.)
- Heavy-duty scrub brush (pony brush)(For stubborn residues if a deck brush isn’t enough.)
- Oxygen bleach or oxygen-based cleaner(Safer alternative to chlorine cleaners; mix as directed.)
- pH-neutral concrete cleaner or degreaser(Pre-treat spots and light stains before washing.)
- Muriatic acid (optional, advanced use)(Use only with ventilation, PPE, and neutralization; risk of damage if misused.)
- Neutralizing rinse (baking soda or sodium bicarbonate solution)(Stops acid reactions after use and protects the surface.)
- Protective gear (gloves, goggles, respirator)(Eye and skin protection essential when handling cleaners and acids.)
- Penetrating concrete sealer(Apply after cleaning to reduce future staining and line formation.)
- Buckets, spray bottles, squeegee(Mix cleaners, apply solutions, and rinse effectively.)
- Test patch materials (rag, small test area)(Always verify cleaner on an inconspicuous area first.)
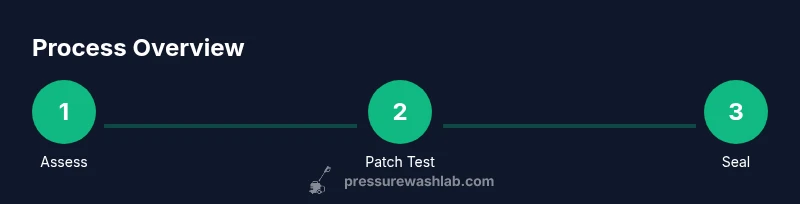
Steps
Estimated time: 2-4 hours (excluding cure times for sealers)
- 1
Assess the surface
Walk the area and document line patterns, noting whether they are light staining, mineral deposits, or etching. Photograph the area and identify any nearby plants or surfaces that could be affected by cleaners. This baseline helps tailor your approach and reduces trial-and-error.
Tip: Test a small patch on a hidden corner before full-area treatment to confirm color stability. - 2
Patch test a cleaner
Apply a diluted cleaner to a discreet patch and observe for 5–10 minutes. If the patch lightens without discoloration or bleed, proceed with the chosen cleaner for broader use. Never mix cleaners in the same container unless the product instructions explicitly allow it.
Tip: Use oxygen bleach or a pH-neutral cleaner first before trying stronger options. - 3
Apply cleaner to lines
Lightly mist the lines with cleaner or apply with a brush. Let dwell for 5–10 minutes (do not let it dry). The cleaner should soften residues without harming the concrete texture.
Tip: Avoid direct, constant spraying at one spot; work in a back-and-forth motion to keep the solution wet evenly. - 4
Scrub and agitate
Using a stiff nylon brush, scrub along the length of the lines with medium pressure. For stubborn lines, use a pony brush to break up deposits without gouging the surface. Rinse partially to gauge progress.
Tip: Work in 2–3 small sections to maintain control and avoid rerunning over the same areas too aggressively. - 5
Rinse thoroughly
Rinse the area with low- to medium-PSI water from a distance to avoid forcing cleaners under cracks. Inspect the area for remaining lines and re-treat if needed. Allow the surface to dry before evaluating color changes.
Tip: A surface cleaner can help with uniform rinsing and reduce missing spots. - 6
Neutralize and dry
If acids or strong cleaners were used, neutralize the surface with an appropriate rinse. Dry the area completely; moisture can affect final color and sealer acceptance.
Tip: Patience matters—wet areas can look different than dry areas under daylight. - 7
Seal and maintain
Apply a penetrating sealer after the surface is dry to reduce future staining and line formation. Follow the manufacturer's cure times and ensure proper ventilation. Plan periodic maintenance to preserve the surface’s uniform appearance.
Tip: Choose a breathable sealer and reseal every 2–5 years depending on climate and wear.
Quick Answers
What causes power washing lines on concrete?
Lines often come from mineral deposits, efflorescence, or uneven cleaning. They can appear lighter or darker depending on moisture and surface texture. Correctly identifying the cause helps choose the right cleaner and technique.
Lines usually come from minerals or uneven cleaning. Identify the cause to pick the right cleaner and technique.
Can household cleaners remove these lines?
Mild, household cleaners may help with light staining, but more stubborn lines often require specialized cleaners like oxygen bleach or pH-neutral products. Always patch test first.
Mild cleaners can help lightly, but tougher lines may need specialized cleaners after patch testing.
Is sealing necessary after removing lines?
Sealing is highly recommended. A penetrating sealer reduces moisture ingress and slows the recurrence of staining and line formation, especially in freeze-thaw climates.
Yes. Sealing helps prevent future lines and keeps the surface uniform longer.
When should I call a professional?
If lines persist after a thorough at-home approach or if the surface is old, heavily stained, or has structural damage, a professional assessment can prevent further harm.
If lines persist after DIY attempts, consider hiring a pro for evaluation and treatment.
Can high PSI damage concrete?
Yes. Using overly aggressive PSI can erode sealant, etch the concrete, and worsen line visibility. Stick to low-to-medium PSI and monitor the surface closely.
Yes—high PSI can damage concrete and worsen lines; use gentler settings.
Watch Video
Key Takeaways
- Test a patch first before full-area cleaning
- Use low- to medium-PSI for safer cleaning
- Choose safe cleaners (oxygen bleach or pH-neutral) first
- Scrub lines with a stiff brush, not aggressive aggression
- Seal after cleaning to prevent recurrence