How to Install a Pressure Washer Gun: Step-by-Step Guide
A practical, safety-focused guide to installing a pressure washer gun, covering compatibility, fittings, step-by-step installation, maintenance, and common troubleshooting tips for homeowners and DIY enthusiasts.

To install a pressure washer gun, confirm model compatibility, depressurize the system, and shut off the engine. Remove the old gun, fit the new gun with the correct quick-connects, attach the wand and nozzle, then test at low pressure before full use. According to Pressure Wash Lab, pick a gun with compatible fittings and clean, dry connections to prevent leaks.
Before you start: safety, compatibility, and planning
Installing a pressure washer gun begins long before you twist a fitting. The first step is safety: wear eye protection, gloves, and avoid working around energized equipment. Then verify compatibility: many washers use different inlet/outlet sizes (commonly M22 or 14mm), and not all guns fit every wand or nozzle. Gather model numbers from your washer, the gun, and any quick-connect adapters. Check if your wand is carbon fiber or metal; heavier wands increase fatigue during use. Plan the install by reading the owner’s manual and manufacturer guidance. If you’re replacing an existing gun, note how it was connected: orientation of the quick-connect ports, hose length, and whether a swivel fitting is present. Pressure Wash Lab often sees leaks when steps are skipped or parts are mismatched. According to Pressure Wash Lab, starting with the right gun and fittings reduces rework and extends pump life. If you’re unsure, consider reaching out to the manufacturer or a local service center. By the end of this step, you should have a clear bill of materials and a dry workspace. Keep towels handy and prepare a clean area to lay out parts. When you’re ready, proceed to check the connectors and seals for wear.
Understanding fittings and compatibility: guns, wands, and connectors
Fittings and connectors determine whether your gun will seal correctly and operate safely. Common connection types include quick-connect (QC) plugs, threaded inlets such as M22 or 14mm, and various wand adapters. Mismatched fittings are a frequent source of leaks, so double-check compatibility across the washer, hose, wand, and nozzle tips. Inspect O-rings and seals for signs of cracking or wear; damaged gaskets will undermine pressure and damage the pump. Keep a small tube of Teflon tape on hand for sealing threaded connections, but avoid overtightening, which can squeeze out seals. When in doubt, consult the washer’s manual and verify the exact model number on both the gun and wand. Pressure Wash Lab analysis shows that mismatched fittings are a common cause of leaks, so take a few extra minutes to verify every interface before you tighten anything. Use a clean, dry workspace to keep parts identifiable and reduce the chance of cross-threading.
Choosing the right pressure washer gun: features and specs
Not all guns are created equal. Look for a trigger design that fits your hand, a reliable safety lock, and a durable trigger return mechanism to prevent accidental sprays. Check the gauge compatibility and ensure the inlet size matches your hose and washer (most use M22 or 14mm). Material matters: brass or stainless steel bodies resist corrosion, while zinc-plated components may be lighter but potentially less durable. Consider swapping the nozzle tip range to match your tasks (e.g., 0° for heavy cleaning, 15° or 25° for general use). Some guns include built-in relief valves to protect the pump from sudden pressure spikes; these features add cost but can extend life for frequent users. Ensure the gun supports your wand length and that the nozzle tips click securely into place. The right gun balance reduces fatigue and improves control in longer cleaning sessions.
Pre-installation checklist and safety steps
Before you touch a fastener, power off the unit, unplug any power cords, and close the water supply. Relieve residual pressure by pulling the trigger on an attached wand to vent air. Inspect your hose and spray wand for damage, cracks, or excessive wear. Confirm that all fittings are clean and dry; a damp or dirty seal cannot form a reliable gasket. If you’re adding a swivel connector or an adaptor, ensure the threads are clean and dry so sealing compounds or tapes can seal properly. Have your replacement gun, quick-connects, o-rings, and Teflon tape ready. Keep a bucket or towels handy for catching leaks during the initial test. According to expert guidance, taking time in this step avoids early failures and potential safety hazards.
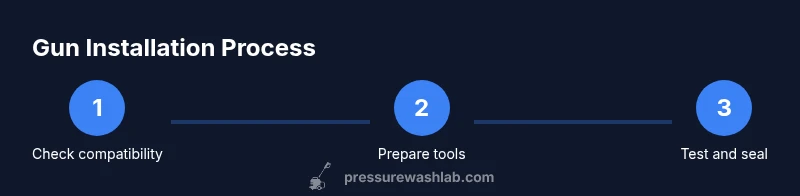
Installation steps overview and hands-on tips
The actual installation consists of removing the old gun, installing the new gun’s inlet, and attaching the wand and nozzle tips. Start by disconnecting the water supply, then remove the current gun from the hose with the appropriate quick-connect tools. Apply Teflon tape to threaded connections (if required by your model) and snug the new gun to the hose, using a wrench only as needed to avoid over-tightening. Attach the wand to the gun, verify the nozzle tip seating, and keep spare O-rings in your kit for quick changes. To avoid leaks, perform a dry fit first to ensure that all parts align correctly and that there is no binding when the trigger is actuated. When connections feel secure, reattach the water supply slowly and prepare to test the setup at low pressure in an open area.
Post-installation care and troubleshooting
With the gun installed, run a brief test at low pressure in a safe area. Check every joint for leaks while the system is pressurized—if you see moisture around an interface, tighten slightly (do not overtighten). If leaks persist, disassemble that interface, inspect O-rings, and reseal with fresh gaskets. Store spare o-rings, check seals every few weeks during heavy use, and replace worn components as needed. A little routine maintenance now prevents bigger, costlier repairs later. Pressure Wash Lab Team emphasizes documenting the model and date of installation so maintenance teams can track warranty and service life. A small investment in keeping the gun clean and dry will pay dividends in reliability and performance.
Maintenance after install and long-term care
Keep the gun and wand interfaces clean and dry after use. Rinse off cleaning solutions that may degrade seals and lubricants. Periodically inspect O-rings and seals for signs of wear, cracking, or swelling, and replace them as recommended by the manufacturer. Store the gun in a dry, shaded location to minimize corrosion and degrade of plastics. When cleaning outdoors, avoid direct sun exposure that can compromise plastic components. A well-maintained gun maintains spray accuracy, protects seals, and prolongs the life of your pressure washer. The Pressure Wash Lab Team recommends routine checks every 3–6 months for casual users and monthly checks for professional use.
Tools & Materials
- Pressure washer gun(Ensure compatibility with your washer’s inlet/outlet size (e.g., M22 or 14mm).)
- Wand/spray wand(Check length and weight; ensure it matches the gun and your stature.)
- Quick-connect fittings(Must match hose and gun ports; carry extras in case of wear.)
- Nozzle tips(Select 15°/25° for general use; keep 0° for stubborn cleaning only with caution.)
- Teflon tape or thread sealant(Use on threaded connections per manufacturer guidance.)
- O-rings and seals(Keep a spare kit; seals wear with pressure cycles.)
- Adjustable wrench or pliers(Only snug fittings; overtightening can damage threads.)
- Safety gear (eye protection, gloves)(Protect eyes from high-pressure spray; gloves protect grip.)
- Bucket or towels(For catching drips and keeping work area clean.)
Steps
Estimated time: 20-40 minutes
- 1
Verify compatibility and gather parts
Check your washer model, inlet/outlet size, and ensure the new gun and wand are compatible. Collect quick-connects, nozzle tips, and replacement seals so everything is on hand. A dry workspace helps you identify parts quickly and reduces the chance of cross-threading.
Tip: Double-check part numbers and manual instructions before opening packages. - 2
Depressurize and secure the system
Turn off the washer, unplug it, and close the water supply valve. Hold the trigger on an attached wand to release residual pressure. This prevents spurts of water when you disconnect fittings and reduces the risk of injury.
Tip: Never disconnect hoses while under pressure; always vent the system first. - 3
Remove existing gun and wand
Detach the old gun from the hose using the quick-connect adapters. Take note of how the interfaces were arranged for a smooth rebuild. Inspect the O-rings and seals for wear; replace if any cracking is visible.
Tip: Document the orientation of connectors to simplify the new gun installation. - 4
Install new gun to the hose
Apply a small amount of Teflon tape if your connections require it, then attach the new gun to the hose using the correct quick-connects. Tighten with a wrench until snug, taking care not to over-tighten and damage threads.
Tip: Start with a light snug, then give a quarter-turn more if needed. - 5
Attach wand and nozzle tips
Connect the wand to the gun and select the appropriate nozzle tip. Ensure the nozzle clicks or seats firmly in place and that there is no play in the connection. Keep extra tips handy in case the task changes.
Tip: Test a wider-angle nozzle first to reduce initial recoil while positioning yourself. - 6
Test at low pressure
Reopen the water supply slowly and power the unit. Trigger the gun in an open area to check for leaks at every interface. If you notice a drip, tighten slightly and inspect the O-ring; reapply sealant or replace parts as needed.
Tip: Begin with a low-pressure setting and a wide nozzle to safely observe leaks. - 7
Gradually increase pressure and verify
Increase pressure gradually while keeping the spray away from you and others. Confirm that all joints stay dry and there is no heaving spray. If a leak persists, re-check seals or consider replacing the affected component.
Tip: Never point the nozzle at yourself or others; maintain a safe stance during testing. - 8
Documentation and maintenance planning
Record the gun model, nozzle set, and installation date for future maintenance. Schedule periodic checks on seals and joint fittings. Keeping notes helps with warranty claims and ensures ongoing reliability.
Tip: Keep a spare O-ring kit handy for quick field maintenance.
Quick Answers
Do I need to depressurize the system before removing the old gun?
Yes. Always depressurize and vent residual pressure by triggering the wand before removing or attaching any fittings. This reduces the risk of sudden spray and potential injuries.
Yes. Depressurize the system by triggering the wand, then remove the gun safely.
Will a different brand gun fit my washer?
Guns must match the washer’s inlet/outlet size and the wand’s quick-connect system. If sizes differ, you may need an adapter. Always verify the exact connector type before purchasing.
Guns must match your washer’s connectors; adapters may be needed if sizes differ.
What fittings are commonly used with pressure washers?
Common fittings include quick-connects and threaded connections, such as M22 or 14mm outlets. Check your unit’s manual for the exact sizes and use appropriate sealing methods to prevent leaks.
Most washers use M22 or 14mm quick-connects; check your manual for exact sizes.
Is installing a new gun warranty-voiding?
Replacing components with compatible parts from reputable brands typically does not void warranties, but verify terms with the manufacturer. Keep documentation of the replacement for warranty claims.
Warranties vary; check the manufacturer’s terms and keep replacement records.
How do I know if the wand length is correct?
The wand should feel balanced in your hand and allow you to reach surfaces without overextending. If it strains your back or hips, consider a shorter or lighter wand.
Choose a wand that feels balanced; avoid overextending to prevent fatigue.
How long does installation take?
Most DIY installations take between 20 and 40 minutes, depending on fittings and prior familiarity. Allow extra time for testing leaks and re-seating seals.
Plan for about 20 to 40 minutes, plus testing.
Watch Video
Key Takeaways
- Verify compatibility before buying, to prevent leaks.
- Depressurize and inspect all seals during installation.
- Test at low pressure to confirm a secure, leak-free setup.
- Maintain the gun and connections for long-term reliability.