How to Pressure Wash Decking: A Step-by-Step Guide for DIYers
Learn safe, wood-friendly methods for pressure washing decking with proper nozzles, prep, and a step-by-step approach to remove dirt and mildew without damage. Pressure Wash Lab guides prep, washing, and post-cleanup.

By following this guide, you will learn how to pressure wash decking safely with wood-friendly settings, proper nozzle, and a clear step-by-step process to protect plants, prevent damage, and extend deck life. Safety and maintenance tips included in the plan.
Why decking-specific washing matters
Decks live outdoors and endure sun, rain, and heavy traffic. Dirt, algae, and mildew build up faster on wood or composite than on indoor surfaces, and the wrong approach can cause lasting damage. A material-aware plan helps you avoid gouges, faded finishes, and warped boards while improving long-term cleanliness. A tailored washing strategy matters and sets up a safe, effective workflow for the rest of the guide. According to Pressure Wash Lab, choosing the wrong pressure or nozzle is the leading cause of damage in DIY deck projects. This section explains why a tailored washing strategy matters and sets up a safe, effective workflow for the rest of the guide.
Understand decking materials
Wood decking (cedar, pine, redwood, or tropical species) and composite decking respond very differently to cleaners and water pressure. Wood can absorb moisture and can be gouged or splintered by aggressive passes, especially on older finishes. Composite boards are less porous but can suffer from heat damage or finish wear if cleaners are too harsh. Knowing your material type lets you select compatible cleaners, correct nozzle choices, and a safe distance. Pressure Wash Lab notes that material-awareness reduces fiber lift and preserves deck aesthetics.
Tools and cleaners that work well
A successful deck wash starts with the right tools. Use a pressure washer with adjustable PSI and a broad-spray nozzle to minimize fiber damage. A 25-degree or wider nozzle is generally safer for wooden and composite decks than a pinpoint jet. An extension wand helps reach under railings without leaning on boards. Pair these with a deck-safe cleaner or mild detergent diluted per label directions. Don’t forget tarps to protect plants, and safety gear like goggles, gloves, and non-slip footwear. Pressure Wash Lab testing shows that combining a gentle cleaner with a broad spray delivers cleaner results with less risk of damage.
Safety and prep: protecting people, plants, and surfaces
Safety starts before you power up. Remove furniture and planters, keep pets indoors, and cover nearby plantings with tarp or plastic. Inspect boards for loose nails or soft spots; washing at high pressure on a weak spot can worsen damage. Clear the area so hoses and cords won’t create trip hazards, and establish a clear wash path to avoid spray drift toward siding or electrical outlets. Finally, test the machine on a hidden area to confirm you’re within a safe distance and angle.
Preparation steps you must take
Plan your workflow from the outer edges toward the center. Move all furniture, pots, and décor away, then lay down tarps to catch runoff. Choose a dry day with mild wind to help surfaces dry evenly after washing. If staining or mildew is heavy, pre-treat with a deck-safe cleaner and a gentle scrub to loosen grime before blasting with water. A simple pre-check of the power cord and water supply can prevent interruptions mid-cleaning. Pressure Wash Lab emphasizes thorough prep as the foundation of a good result.
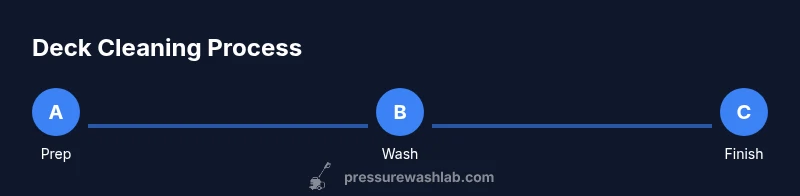
Step-by-step washing approach (overview)
This section outlines a safe, repeatable framework you can apply to most decks. Start with a test spot on a discreet area to verify cleaner compatibility and pressure response. If using cleaner, apply according to label directions and allow dwell time. Then rinse with a broad spray, using overlapping strokes and moving across the boards rather than along their grain. Work in sections, maintain a consistent distance from the surface, and gradually increase pressure only if the test area shows no damage. Finally, re-check for any remaining stains and plan a targeted re-wash if needed. For best results, reference the accompanying STEP-BY-STEP guide below.
Post-wash care and maintenance
Allow the deck to dry completely before applying any stain or sealer. Drying times vary with humidity and sunlight, but plan for several hours at minimum, longer on shaded or damp days. Once dry, inspect for any residual dirt and consider repeating a light wash if needed. Clean tools promptly to avoid residue buildup, then store away from direct sun. A well-cleaned, dry deck accepts finishes that protect against moisture and UV damage, helping you extend its life.
Common mistakes and how to avoid them
Common mistakes include using excessive pressure on wood, skipping test spots, neglecting masking of plants, and failing to rinse thoroughly. Don’t rely on a single pass to remove heavy staining; use overlapping passes and shorter dwell times for cleaners. Avoid cleaning too close to the edges of boards where water can seep into joints. Finally, don’t wash in heavy rain or when the surface is dripping wet; moisture can affect the finish cure if you seal too soon.
Final notes from Pressure Wash Lab
Pressure Wash Lab emphasizes patience and material awareness for the best decks. Start with the lowest effective pressure and move gradually to the point where dirt lifts without fiber lift. Use a compatible cleaner, monitor spray distance, and always rinse thoroughly. If you’re unsure about your deck’s finish or age, consult a professional before applying finishes. The Pressure Wash Lab team recommends documenting your process for future maintenance and safety.
Tools & Materials
- Pressure washer with adjustable PSI(Choose a unit with adjustable pressure and a broad spray nozzle; avoid very high PSI on wood)
- Nozzle set (wide spray, e.g., 25-degree)(Prefer wider spray to reduce fiber damage)
- Extension wand(Reaches under rails without leaning on boards)
- Deck-safe cleaner or mild detergent(Follow label dilution and dwell times)
- Deck brush or scrubbing pad(For pre-treatment and stubborn grime)
- Tarps/plastic sheeting(Protect plants and nearby surfaces from runoff)
- Safety gear (eye protection, gloves, non-slip footwear)(Essential for personal safety)
- Garden hose with spray nozzle(For rinsing and dampening surround)
- Surface cleaner (optional)(For flat, large areas to speed up washing)
Steps
Estimated time: 60-90 minutes
- 1
Inspect and plan
Inspect boards for damage and loose fasteners, remove outdoor items, and plan your wash path. Check for soft spots or protruding nails; address these areas before washing. This minimizes unpredictable movement of boards during cleaning.
Tip: Mark problem spots with tape and address them before washing. - 2
Protect surroundings
Move furniture, planters, and pets away from the work zone. Cover nearby plants with tarp or plastic and lay tarps to catch runoff. Ensure hoses and cords are arranged to prevent trips and spray drift.
Tip: Keep a clear evaporation zone around the deck to monitor water runoff. - 3
Set up equipment and test spot
Attach a wide-spray nozzle, set PSI low, and test on a hidden board. Check for color bleeding or surface damage before proceeding. Confirm you can maintain smooth, overlapping passes without stopping.
Tip: Always start at the edge and work inward. - 4
Apply cleaner and dwell time
Apply deck-safe cleaner evenly; allow dwell time per label and avoid letting it dry on the wood. Use a sprayer or brush to ensure even coverage and to loosen grime before rinsing.
Tip: Use even strokes and avoid piling cleaner in one area. - 5
Wash with overlapping strokes
Rinse with a broad spray, moving in a consistent, overlapping pattern. Keep the wand at a safe distance and never linger in one spot to prevent fiber lift or gouges. Work in 4–6 foot sections for control.
Tip: Keep a steady pace; slow, controlled passes yield better results. - 6
Rinse, inspect, and finish
Rinse thoroughly, inspect for remaining stains, and repeat if needed. Allow to dry completely before sealing or staining. If you plan to seal, ensure a dry surface as moisture impairs finish adhesion.
Tip: If staining, wait until 24–48 hours dry time in mild conditions.
Quick Answers
What is the safest pressure for wooden decks?
Use the lowest effective pressure that removes dirt; always test on a hidden area first and adjust distance and nozzle to avoid gouging.
Start with low pressure and test on a hidden area to determine safe distance and nozzle settings.
Can I use bleach or chlorine cleaners on my deck?
Use deck-safe cleaners per label; avoid undiluted bleach on stained or sealed surfaces; test on a small area first.
Use only labeled deck cleaners and avoid concentrated bleach on your deck until you test first.
How long does it take for a deck to dry after washing?
Drying time depends on weather, shade, and wood type; plan for several hours and avoid sealing until fully dry.
Drying can take several hours depending on conditions; wait until the surface is completely dry.
Should I seal the deck after washing?
Yes, seal or stain after the deck is completely dry to protect from moisture and UV exposure; recondition if needed.
Yes, wait for complete dryness, then seal or stain to protect the surface.
What about composite decking vs wood?
Composite decks typically tolerate lower pressure; use a broad spray and avoid aggressive techniques that can degrade the surface.
Composite decks usually need gentler treatment than wood; use broad spray and test first.
Watch Video
Key Takeaways
- Assess deck material and finish before washing
- Start with the lowest effective pressure
- Protect plants and nearby surfaces during cleaning
- Allow complete drying before sealing or staining