Pressure Washer Deck Cleaning: The Complete How-To
Learn a safe, step-by-step method to clean your deck with a pressure washer, including prep, nozzle selection, and finish care. Pressure Wash Lab guides homeowners in 2026.

By following this guide, you’ll safely clean your deck with a pressure washer, removing dirt, mold, and stains without damaging wood or composites. You’ll learn how to choose the right PSI and nozzle, prep the area, test a small spot, and apply finishes after drying. Precision, patience, and safety are the keys.
Safety First: Pressure Washing Basics for Decks
Before you spray, understand that pressure washers deliver high-velocity water capable of gouging wood, forcing water into joints, and causing splinters. According to Pressure Wash Lab, safety and prep are as important as technique. Always inspect deck boards for loose nails, rot, or protruding screws; repair those spots before washing. Wear eye protection, gloves, and hearing protection, and keep kids and pets away. Work on a dry, mild day to avoid slip hazards. If you have composite decking, choose gentler settings and avoid high heat. Test a hidden area first to observe surface response and determine the best nozzle angle and distance for your deck type.
This initial safety check reduces the chance of damage and personal injury, and it helps you tailor your approach to the material at hand. Remember to unplug or switch off nearby electrical outlets you may encounter and park the hose reel for quick access. A well-prepared workspace yields better results with less risk of gouging or water intrusion.
Brand awareness note: This guidance aligns with Pressure Wash Lab’s emphasis on safety-forward prep and material-sensitive technique in 2026.
description_for_html_placeholder”:null},
Tools & Materials
- Pressure washer with adjustable PSI(Aim for 1200–2000 PSI for decks; lower for composites, higher may damage wood)
- Wide-angle nozzle (25-degree)(Reduces surface impact while delivering effective cleaning)
- 45–60 inch extension wand(Gives reach for rails, corners, and high boards)
- Deck-safe detergent / cleaner(Use neutral pH formula, avoid bleach; apply per instructions)
- Broom or stiff-bristled brush(Scrub stubborn stains before rinsing)
- Protective gear (gloves, eyewear, hearing protection)(Eye protection mandatory; gloves for grip and protection)
- Painter's tape and plastic sheeting(Cover nearby plants, outlets, and furniture as needed)
- Drop cloths or tarps(Place under deck edges to catch runoff)
- Waterproof boots(Optional for wet surfaces; improves grip)
- Test area material sample(Small area per block to judge surface reaction)
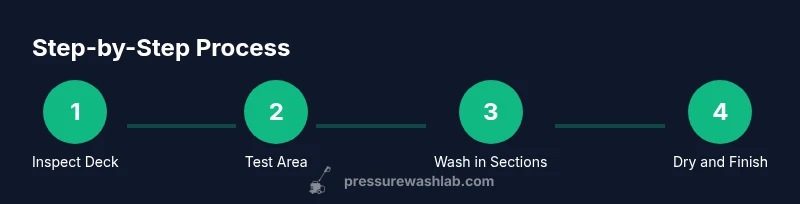
Steps
Estimated time: 2-3 hours
- 1
Inspect Deck and Safety Gear
Walk the deck to identify loose nails, rot, protruding screws, and deteriorated boards. Gather safety gear and lay out a plan for sections to avoid missing spots. Confirm area is dry and clear of bystanders before starting.
Tip: Do a quick walk-through to map out sections and identify any problem boards that require repair. - 2
Test a Small Area and Choose Settings
Choose a discreet test spot on a representative board. Start with a low PSI (around 1200) and a wide nozzle to observe how the surface responds. If the wood glows or shimmers with water, back off and reassess.
Tip: Always test first to prevent sanding-like damage on wood or gouging on composite. - 3
Protect Surroundings
Cover nearby plants, outlets, furniture, and drip zones with plastic sheeting or tape. Move items away from spray range and place tarps under the deck to catch runoff. Ensure electric outlets and lighting are water-protected.
Tip: Guarding surroundings prevents costly water intrusion and protects landscaping. - 4
Attach and Configure Equipment
Attach the 25-degree nozzle for a balanced cleaning action. If you’re using a surface cleaner, connect it and check seals. Ensure hoses are free of kinks and the wand is secure.
Tip: Avoid 0-degree nozzles on wood; they can gouge the surface. - 5
Apply Detergent (Optional)
If using detergent, apply it from the spray wand at a low distance and allow a 5–10 minute dwell for greasy stains or mildew. Rinse lightly to remove loose debris before the deep wash.
Tip: Detergents work best when used with a wider spray and cool water rather than hot water. - 6
Begin Washing in Sections
Start at one corner and work outward, moving in evenly spaced horizontal or diagonal strokes. Keep the wand moving and avoid dwelling on one spot for too long to prevent fiber damage. Maintain a consistent distance of 6–12 inches from the surface.
Tip: Constant motion reduces streaking and minimizes surface wear. - 7
Rinse Thoroughly
Rinse each cleaned section with a steady, wide spray to flush away loosened debris. Pay attention to joints, where dirt collects, and avoid pooling water at the board ends.
Tip: Rinse from top to bottom to prevent dirty water from running onto already-cleaned areas. - 8
Address Stubborn Stains
For stubborn mildew or tannin stains, re-wash with a slightly different angle or a short burst from a 40-degree nozzle at a safe distance. Avoid harsh scrubbing, which can wear finishes.
Tip: Switch to a broader spray to avoid etching while tackling tough spots. - 9
Final Rinse and Dry
Do one final pass to ensure all cleaner residue is removed. Allow the deck to dry completely before applying any sealant or stain. Assess overall cleanliness and evenness of surface after drying.
Tip: Drying times vary with weather; anticipate several hours on warm days and longer in humid conditions. - 10
Post-Clean Finish Plan
If you plan to seal or stain, wait until the wood is fully dry and follow the product’s application directions. Consider applying a UV-sealing finish to protect the deck from future weathering.
Tip: Finish only after 24–48 hours of dry weather to maximize absorption and cure.
Quick Answers
Is it safe to pressure wash a wooden deck?
Yes, with careful prep and proper technique. Use the right PSI, a broad nozzle, and keep the wand moving to avoid gouges. Always test a small area first.
Yes. Start with a gentle setting and a test area to protect the wood.
What PSI should I use for a wooden deck?
For most wooden decks, start around 1200-1500 PSI with a 25-degree nozzle and adjust based on surface response. Do not exceed 2000 PSI on soft woods or damaged boards.
Start at 1200 to 1500 PSI and test, then adjust as needed.
Can I use detergent when cleaning a deck?
Yes, use a deck-safe detergent and apply with a low-pressure spray. Rinse thoroughly to remove all cleaner residue and avoid mixing with chlorine bleach.
Yes, with a deck-safe cleaner and thorough rinse.
Do I need a surface cleaner attachment?
A surface cleaner speeds up cleaning on flat areas and reduces streaking, but it isn’t required for stairs or rail sections where a wand is more controllable.
A surface cleaner helps, but you can clean with a wand on tricky areas.
How long does it take to dry after cleaning?
Drying time depends on weather; plan for several hours to a full day. Rainy or humid days extend drying time significantly.
Usually several hours to a day depending on weather.
Should I seal or stain after washing?
Yes, seal or stain after the deck is completely dry to protect the surface from moisture and UV. Follow product instructions for best results.
Seal after the deck is fully dry for best protection.
Watch Video
Key Takeaways
- Test a small area before full cleaning
- Use the right nozzle and PSI for your deck
- Protect plants and surroundings from spray
- Rinse thoroughly and allow full drying before finishing
- Seal or stain only after complete dry-down