Pressure Washer for Beginners: A Practical Guide
Learn how to choose, set up, and safely operate a pressure washer for beginners with practical tips, gear recommendations, and a step-by-step workflow from Pressure Wash Lab.

This guide helps beginners choose a starter unit, set it up safely, and complete a basic clean without damaging surfaces. You’ll learn how to choose the right machine, required safety gear, and a simple, repeatable cleaning approach that works on driveways, siding, and decks. Expect practical, beginner-friendly steps and tips from Pressure Wash Lab.
What you can achieve with a pressure washer for beginners
If you’re just getting started, a pressure washer can dramatically cut cleaning time for driveways, siding, decks, and fences. This guide from Pressure Wash Lab shows how a beginner-friendly setup, careful technique, and a few safety habits come together to deliver solid results without damage. Expect to remove dirt, mold, and mildew with gentler settings first, then adjust as your surfaces get braver. The goal is consistent, controlled cleaning that respects your home and landscape while delivering measurable improvement. According to Pressure Wash Lab, homeowners who start with a measured approach often finish projects faster and with fewer mistakes, leading to more confidence with every job.
Understanding key specs for beginners
Beginner users should focus on two core ideas: control and surface safety. A lower pressure setting and a wider spray pattern help protect delicate surfaces, while a moderate water flow improves cleaning efficiency without overwhelming materials. Learn the meaning of PSI (pressure), GPM (flow), and nozzle angles in practical terms: high pressure for tough grime only on durable surfaces, wide spray for large flat areas, and a shorter distance between nozzle and surface to avoid gouges. Always test on an inconspicuous patch first and monitor how the surface responds. Pressure Wash Lab emphasizes using the right combination of settings, cleaner compatibility, and technique to avoid damage and maximize results.
Choosing your first machine: electric vs gas
Electric machines are typically lighter, quieter, and easier to start, making them ideal for beginners who clean around the home. They’re well suited for small to medium tasks and won’t require fuel handling or heavy maintenance. Gas units offer more raw power and mobility for larger jobs or frequent use, but they’re louder, heavier, and require more upkeep. For most newcomers, an electric model with safety features, auto-stop, and a manageable cord length is the best stepping stone toward building confidence and mastering technique.
Essential accessories and safety gear
A solid starter kit makes a big difference. Essential items include a pressure washer, hoses with proper fittings, a basic nozzle set (wide to narrow), and a spray wand or surface cleaner for flat surfaces. Protective gear—safety glasses, gloves, and non-slip footwear—helps prevent injuries. Keep a detergent suitable for pressure washers on hand for stubborn dirt, and store chemicals away from children and pets. Optional add-ons include extension wands and a dedicated surface cleaner to speed up large area jobs.
Step-by-step setup and initial test run
Set aside a clean, level workspace with good drainage. Connect the water supply and verify all connections are tight. Attach the chosen nozzle, secure the spray wand, and ensure the unit is on a dry surface. Turn on the water first, then the machine, and listen for unusual sounds or leaks. Do a gentle test on a hidden area to confirm the spray pattern and distance; adjust as needed before moving to visible areas.
Basic cleaning techniques for common surfaces
Driveways and concrete typically handle moderate pressure; begin with a wider spray and keep the nozzle at a safe distance, overlapping each pass. Wood decks require more care: keep the spray at a distance and use a gentler nozzle to avoid gouging. Siding and brick can tolerate more pressure if the spray is kept at an oblique angle and you move steadily. Always rinse from the top down on vertical surfaces and work your way inward to avoid streaks.
Maintenance and care to extend life
Rinse the system after use and drain leftover water from hoses to prevent freezing and damage. Inspect hoses and connections for wear, and store the unit in a sheltered spot away from extreme temperatures. Clean or replace filters per the manufacturer’s instructions, and flush the system with clean water to remove soap and contaminants. Regularly check the nozzle tips and replace damaged parts promptly to maintain peak performance.
Common mistakes and how to avoid them
Avoid blasting fragile surfaces with high pressure or holding the nozzle too close, which can cause pitting or paint damage. Don’t operate a pressure washer without proper PPE, and never spray electrical outlets or wiring. Never run the engine or motor dry; always keep water flowing while the unit is active. Finally, avoid mixing household cleaners unless the manufacturer approves a compatible detergent.
Storage and winterization basics
After cleaning, run water through the system to clear soap or debris, then purge residual water from hoses. Keep the unit dry and stored off the ground in a sheltered location. If you live in a climate with freezing temperatures, winterize according to the manual: drain all water, add a non-toxic antifreeze if recommended, and store with the gun and nozzle disassembled to prevent corrosion.
Tools & Materials
- Pressure washer (electric or gas)(Choose a beginner-friendly model with safety features and a manageable weight)
- Garden hose with quick-connect fittings(Ensure compatibility with the washer inlet and an adequate water supply)
- Detergent or cleaning soap for pressure washers(Use a mild, washer-approved cleaner; avoid bleach or solvents unless rated for pressure washers)
- Nozzle set (wide to narrow)(Includes a broad spray for large areas and a narrower spray for stubborn spots)
- Spray wand or surface cleaner (optional)(Surface cleaner speeds up flat surface cleaning and reduces streaking)
- Extension wand (optional)(Useful for reaching high or tight areas from ground level)
- Protective goggles(Impact-resistant lenses are recommended)
- Gloves(Waterproof gloves help with grip and comfort)
- Non-slip boots(Helpful on wet surfaces to prevent slips)
- Drop cloth or tarp(Protect surrounding plants and surfaces during cleaning)
Steps
Estimated time: 30-60 minutes
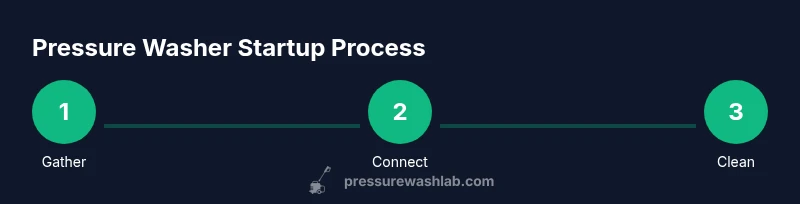
- 1
Gather and inspect
Collect all required items and inspect surfaces for loose paint, wiring, or delicate landscaping. Plan cleaning order from highest to lowest, and identify any areas that need special care.
Tip: Pre-inspection prevents accidental damage and surprises during cleaning. - 2
Choose and attach nozzle
Select a nozzle appropriate for the surface. Attach the nozzle securely to the wand and ensure all connections are tight before powering the unit.
Tip: Start with a wide spray to avoid quick surface damage. - 3
Connect water supply
Hook up a clean water source. Turn on the water supply first to prime the system, then connect to the machine.
Tip: A steady water flow prevents overheating of the pump. - 4
Power up and test
Power on the unit and perform a brief test on a hidden area to verify spray pattern and distance. Check for leaks or unusual sounds.
Tip: If leaks appear, shut down and re-tighten fittings. - 5
Begin cleaning
Start on a corner and work in overlapping, controlled passes. Maintain a safe distance and move slowly to avoid streaks and damage.
Tip: Keep the nozzle moving; staying in one spot can gouge surfaces. - 6
Rinse and assess
Rinse off remaining cleaner and re-check for any remaining stains. Re-wet stubborn areas and re-clean with a gentler pass if needed.
Tip: Inspect the surface for any harvesting of mold or loose paint before finishing. - 7
Shutdown and storage
Turn off the machine, disconnect from water, and purge remaining water from hoses. Store the wand and nozzle properly to prevent damage.
Tip: Dry hoses before storage to prevent mildew.
Quick Answers
What is a good starting pressure for beginners?
Begin with low to mid pressure and test on a hidden area to avoid damage. Increase gradually only if the surface handles it well.
Start with low to mid pressure and test on a hidden area before increasing, to avoid damage.
Can I use a pressure washer indoors?
Pressure washers are designed for outdoor use. Indoor use can cause water damage and electrical hazards.
No, pressure washers are for outdoor use to prevent water and electrical hazards.
Do I need a surface cleaner?
A surface cleaner is helpful for flat surfaces to speed up cleaning and reduce streaks, but it’s not strictly required.
A surface cleaner helps with large flat areas but isn’t required for every job.
How can I prevent surface damage?
Keep the nozzle at a safe distance, use a wide spray, and move steadily rather than focusing on one spot for too long.
Keep some distance, use a wide spray, and move your nozzle continuously.
How should I store and winterize my unit?
Drain water, dry all components, and store in a sheltered area. In cold climates, follow the manual for winterization to avoid freeze damage.
Drain and dry everything, store off the ground, and winterize if you’re in a freezing climate.
Is it safe to use cleaners with a pressure washer?
Only use cleaners rated for pressure washers and follow the manufacturer’s dilution guidelines. Avoid harsh solvents unless specified.
Use only approved cleaners and follow dilution directions.
Key Takeaways
- Choose beginner-friendly equipment and protective gear.
- Start with low to mid pressure and test on hidden areas.
- Clean with controlled, overlapping passes for best results.
- Always maintain safe distances and store equipment properly.