Replacement Hose for Pressure Washer: How to Choose and Install
Learn how to select and install a replacement hose for pressure washer, with safety tips, testing steps, and maintenance guidance from Pressure Wash Lab.

To replace a pressure washer hose, match PSI, diameter, and thread type; depressurize the unit, disconnect the old hose, and install the new hose with proper fittings. Tighten securely, re-pressurize slowly, and inspect for leaks. Use thread sealant if required and avoid sharp bends to prevent kinking, and check hoses for wear regularly.
What is a replacement hose for pressure washer and why replace
A replacement hose for pressure washer is the high-pressure line that connects your machine to the spray wand. Over time hoses degrade due to UV exposure, kinks, and high PSI cycles, leading to leaks or bursts. Replacing the hose promptly can prevent equipment damage, maintain spray pressure, and improve safety and cleaning performance. According to Pressure Wash Lab, a worn hose is a leading source of leaks, reducing efficiency and increasing water waste. Keeping the hose in good condition helps conserve water and prolongs the life of your pressure washer.
In many setups, the hose also carries the lot of the pump pressure to the wand. A failing hose can reduce spray power and cause sudden failures under load. By planning a replacement, you minimize downtime and ensure consistent cleaning performance for driveways, siding, and vehicles. Always inspect for cracks, bulges, or worn fittings before each season and set a replacement threshold based on visible wear rather than age alone.
How to identify the right replacement hose
Choosing the correct replacement hose starts with understanding three core criteria: pressure rating (PSI), diameter and connector type, and hose length. Start by checking your washer’s maximum PSI and GPM rating; choose a hose that comfortably exceeds or matches that specification. Next, verify the connector ends: some hoses attach via standard threaded fittings (such as M22 or 1/4-inch quick-connects), while others use polarity-specific ends; confirm which ends your machine and wand require. Finally, select a length that reaches the spray wand without excessive slack or sharp bends. Materials matter too: rubber hoses tend to be the most durable, while polyurethane offers lighter weight and flexibility; braided hoses provide extra kink resistance but may be stiffer. Consider climate and storage conditions; sunlight exposure and heat can degrade hoses faster.
Safety first: preparing to replace the hose
Preparation is the key to a safe hose replacement. Start by unplugging electric washers or switching off the engine and allowing the system to cool. Depressurize the unit by triggering the spray wand until all water is released and there is no residual pressure. Wear cut-resistant gloves and eye protection to guard against sharp fittings and spray. Clear the work area of children or pets and place a container or towels to catch any residual water. Gather your tools and the replacement hose in advance so you don’t have to leave the work area mid-repair.
Compatibility and fit: connectors and threads
Compatibility hinges on matching the hose ends to the pump outlet and wand inlet. Common end configurations include hose ends with male or female threads, sometimes with a quick-connect adapter. If you’re unsure, measure the thread diameter and count the threads per inch, or bring the old hose to the store as a reference. Ensure the hose length is sufficient to reach the spray wand without tensioning; avoid long, loose hoses that droop during use. If the new hose uses a different thread size, you may need an adapter, but be mindful of potential leaks that can occur with adapters and ensure proper sealing with Teflon tape when applicable.
Material choices and durability considerations
Hoses come in several materials. Rubber hoses offer excellent durability and resistance to heat but are heavier. Polyurethane hoses are lighter and more flexible but may wear faster in sharp bends or rough terrain. Braided stainless or nylon-reinforced hoses provide extra kink resistance and longer life in tough environments, but they can be stiffer and more expensive. Consider your typical use: frequent urban cleaning with long runs benefits from lighter hoses, while heavy-duty driveway cleaning may justify a more robust rubber or braided option. Regardless of material, check for reinforced fittings and robust couplings to resist leaks at the connection points.
Installation best practices and sealants
Before installation, inspect the new hose for any shipping damage or defects. If fittings require sealing, apply a small amount of thread sealant or Teflon tape to male threads only, ensuring it does not contaminate the hose interior. Attach the hose to the pump outlet first, hand-tighten, then use a wrench to snug the connection without overtightening. Repeat for the wand end. Avoid overtension that could crush fittings or cause kinks. Route the hose along stable surfaces, keeping it off sharp edges and away from heat sources. After assembly, verify that all clamps and couplings are aligned and not cross-threaded.
Testing for leaks and post-test safety
With the system reassembled, start at a low pressure and gradually introduce water. Listen for any hissing sounds near connections and visually inspect for wet spots that indicate leaks. If a leak appears, power down, depressurize, and retighten connections incrementally. Do not operate the pressure washer at full power until you’re confident the hose and fittings are secure. Check for kinks or pinches along the hose length during operation, and adjust routing as needed. Finally, run a short test cleaning session to ensure consistent spray and reliable performance.
Maintenance and storage after replacement
Regular inspection is key to long hose life. After each use, wipe fittings and ends to remove water and dirt, and store the hose off the ground to prevent abrasion. Avoid leaving hoses under heavy equipment or direct sun for extended periods, as UV exposure and heat accelerate wear. If you expect long storage, coil the hose with a gentle bend radius and secure with ties or a reel to prevent kinks. Periodically inspect for cracks, splits, or swelling near the fittings, especially after heavy use or noticeable drops in spray performance.
OEM vs aftermarket hoses: what to know before you buy
Original equipment manufacturer (OEM) hoses guarantee factory compatibility in size, connection type, and performance, but they can be more expensive. Aftermarket hoses often offer a broad selection at lower costs and may include braided variants or longer lengths. When choosing aftermarket, verify compatibility with your model and read customer reviews about fit and durability. If you run a small business or rely on consistent output, an investment in a higher-quality braided or reinforced hose can pay off in reduced downtime and better reliability.
Troubleshooting common leaks and problems
If you notice leaks after replacement, recheck that every end is clean, dry, and properly aligned. Verify there is no cross-threading and that thread sealant is used correctly only on male threads. For persistent leaks, inspect the O-rings and seals at the fittings; worn O-rings may cause slow drips; replace them if available. A kinked hose or a damaged outer jacket can reduce pressure and create weak points; re-route or replace again if necessary. If the issue persists, consider contacting the manufacturer or a professional technician for evaluation.
Tools & Materials
- Replacement hose for pressure washer(Ensure PSI rating and thread type match unit; verify length fits your setup)
- Adjustable wrench(For tightening fittings securely)
- Pliers(Help grip hose ends during removal)
- Teflon tape or thread sealant(Seal threaded connections to prevent leaks)
- Cut-resistant gloves(Protect hands when handling sharp fittings)
- Rags or absorbent towels(Wipe fittings and clean up drips)
- Container or bucket(Catch residual water during testing)
- Marker or label tape(Label hose with date and PSI rating)
Steps
Estimated time: 20-40 minutes
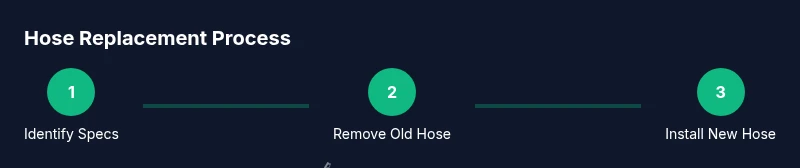
- 1
Power down and depressurize
Turn off and unplug the pressure washer if electric, or switch off the engine if gas. Release pressure by firing the wand until water stops. This prevents hose kinks and accidental sprays.
Tip: Always confirm there is no residual pressure before touching fittings. - 2
Disconnect old hose from wand and pump
Carefully loosen fittings at both ends using the appropriate wrench. Note which end connects to the pump and which to the wand so you can mirror the setup with the new hose.
Tip: Keep track of orientation to avoid cross-threading on reattachment. - 3
Inspect old hose for wear
Check for cracks, bulges, or swelling along the length and inspect fittings for corrosion. If any of these are present, replace both hose and fittings to prevent leaks.
Tip: If the hose shows visible damage, replace it rather than patching it. - 4
Prepare the new hose
Uncoil the replacement hose and inspect ends for protective caps. If needed, apply thread sealant to male threads only according to the product instructions.
Tip: Avoid applying sealant to the interior of the hose. - 5
Attach to pump outlet
Screw the hose onto the pump outlet by hand first, then snug with a wrench without over-tightening.
Tip: Cross-threading at this stage can ruin fittings. - 6
Attach to spray wand
Connect the other end to the spray wand using the same hand-first approach, ensuring the connection is straight and snug.
Tip: Use a partner if you’re replacing long hoses to keep ends aligned. - 7
Inspect routing and prevent kinks
Route the hose away from hot surfaces and sharp edges. Gate the hose to prevent sharp bends that can damage the outer jacket.
Tip: Use a hose reel or hooks to maintain a smooth bend radius. - 8
Initial low-pressure test
Power up the unit and run at a low PSI while watching every joint for leaks. Do not operate at full power yet.
Tip: Stand to the side in case of unexpected squirts during the test. - 9
Full-pressure test and leak check
Increase to typical operating pressure and inspect all connections again. If you see leaks, shut down and re-tighten or reseal as needed.
Tip: If leaks persist, replace O-rings or consider a different hose size. - 10
Document and store
Record the replacement date and PSI rating on the hose. Coil or hang the hose properly to prevent damage during storage.
Tip: Label with a reminder for periodic inspection.
Quick Answers
What makes a replacement hose compatible with my pressure washer?
Compatibility depends on PSI rating, hose length, and the connector types at both ends. Check your washer’s manual or measure the existing ends to ensure a match. If in doubt, bring the old hose to a store or consult the manufacturer.
Compatibility is about matching PSI, length, and connector types. If unsure, compare the old hose or consult the manual for exact specs.
How do I know which thread size I need?
Measure the thread diameter or bring the connector to the store. Common options include standard garden hose–style fittings and metric or imperial threaded ends. When possible, use a hose with the same end type as the original to avoid adapters.
Measure the threads or bring the end piece to the store to match the size. Use the same end type if possible.
Can I reuse old fittings with a new hose?
You can reuse fittings if they are undamaged and seal properly. If any wear, corrosion, or deformation is visible, replace the fittings along with the hose to reduce leak risk.
You can reuse fittings if they’re in good shape; otherwise, replace to avoid leaks.
Is it safe to test at full pressure right away?
No. Always start at a low pressure to detect leaks safely. Gradually ramp up to full operating pressure only after you confirm there are no leaks.
Start low and gradually increase pressure only after you confirm there are no leaks.
OEM vs aftermarket hoses: which should I buy?
OEM hoses guarantee factory compatibility but can be pricier. Aftermarket options offer value and flexibility but verify compatibility and warranty terms before buying.
OEM hoses fit like the original and are reliable but may cost more; aftermarket can save money if you check compatibility and warranty.
How long do replacement hoses typically last?
Lifespan depends on usage, climate, and storage. With proper care, reinforced hoses can last several seasons; inspect regularly for cracks or wear and replace as needed.
Hoses last several seasons with good care; regularly inspect for wear and replace when necessary.
Watch Video
Key Takeaways
- Verify compatibility before purchase.
- Depressurize and test at low pressure first.
- Choose a hose with the right PSI, length, and connectors.
- Inspect fittings and seals to prevent leaks.
- Store properly to extend hose life.