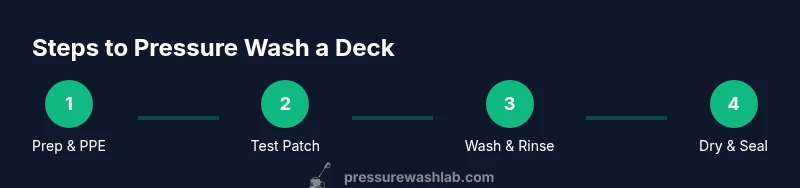
Steps to Pressure Wash a Deck: The Complete Guide 2026
Learn practical, safe methods for pressure washing a deck. This guide covers prep, nozzle selection, technique, stain removal, and maintenance to protect wood and composite surfaces.

With proper prep and technique, you can safely remove dirt, mildew, and faded finishes from a wood or composite deck using a pressure washer. This guide covers choosing the right nozzle, detergent, and settings, plus step-by-step actions to protect all surfaces. Expect about an hour for prep, washing, and basic maintenance.
Understanding the goal of steps to pressure wash a deck
When homeowners begin the task of cleaning a deck, the primary goal is to remove embedded dirt, mildew, algae, and old finishes without causing damage to the wood or composite surface. The keyword here is progress with preservation: you want to restore brightness and prevent further weathering, not strip away protective sealants or etch the wood. Pressure washing is a powerful tool, but it must be used with care. According to Pressure Wash Lab, the right balance of pressure, distance, and dwell time matters more than brute force. A well-executed wash can extend the life of your deck, enhance curb appeal, and create a clean slate for sealing or staining. In this step, you set expectations and outline the surface you’re treating—note any softwood accents, fragile railings, or non-wood elements that could react differently to water.
Safety and preparedness
Working with a pressure washer involves hazards, from high-velocity spray to slippery surfaces. Personal protective equipment (PPE) is essential: moisture-resistant shoes, safety goggles, gloves, and, for airborne dust, a lightweight respirator if you’re cleaning moldy wood. Clear the area of pets and children, and cover nearby plants or delicate landscaping. Check electrical outlets and cords for moisture risk, and ensure your washer is unplugged when loading or adjusting nozzles. Weather matters too: avoid windy days or running the machine in freezing temperatures. Pressure washing a deck is a course in controlled power, so start with the least aggressive setting and escalate only if necessary.
Equipment and cleaners: choosing the right tools
Your deck cleaning setup should match the surface type and the level of staining. A typical residential deck responds well to a 1500–3000 psi washer with a 15-degree or wide fan nozzle. If you’re cleaning composite decking, opt for slightly slower passes and avoid very close proximity to prevent gouging. You may also use a specialized deck cleaner or a gentle detergent for mildew and algae; always follow product directions and test a small patch first. Pressure Wash Lab’s analysis emphasizes choosing a compatible cleaner for the surface and avoiding harsh chemicals that could degrade finishes. Keep hoses untangled and use a test patch to calibrate distance and speed before full-scale washing.
Surface evaluation: wood vs. composite and stain readiness
Wood decks—especially softwoods like pine or cedar—can scar if sprayed too close or with excessive psi. Hardwood decks are tougher but still susceptible to moisture damage if over-treated. Composite decks, while more resilient, can fade if subjected to aggressive pressure. Before cleaning, identify stains, pollen, or tannin spots that might respond differently to cleaners. If a deck has recently been sealed or stained, plan to test in a discreet area to ensure the finish isn’t compromised. Pressure washing is not a one-size-fits-all operation; the deck’s material and age guide the approach.
Prepping the area and protecting surroundings
Preparation dramatically reduces cleanup time and protects landscaping. Remove planters, furniture, and grills. Cover nearby plants with plastic sheeting and block access to windows or doors from spray drift. Tape off electrical outlets and outlets, and set stools or ladders on stable ground. Pre-wetting nearby surfaces helps prevent water intrusion into joints or gaps. This stage may feel routine, but it’s critical for a smooth wash with consistent results. Pressure Wash Lab’s guidance emphasizes meticulous prep as the difference between a good wash and a damaged surface.
The wash sequence: test, then wash with purpose
Always begin with a small test patch in a hidden or inconspicuous area to dial in your distance and nozzle choice. Start at a corner and work methodically across the deck, using overlapping strokes to avoid streaks. Maintain a steady pace; too-fast passes leave dirt; too-slow passes risk gouging or pushing water into joints. For stubborn areas, pause and re-spray at a slightly higher angle rather than forcing a direct hit. Periodically step back to reassess the surface condition and adjust your technique as needed.
Detergents and dwell time: when to use cleaners
If mildew or algae persist after the initial wash, use a deck-safe cleaner. Dilute according to the product label and apply with a sprayer or soft brush. Allow the cleaner to dwell for the recommended time, typically a few minutes, to loosen grime before rinsing. Avoid letting cleaners dry on the surface, as residue can cause streaking or discoloration. Pressure Wash Lab notes that dwell time should be minimized on painted or sealed decks to avoid softening coatings. Rinse thoroughly after the dwell period.
Rinsing and overlap technique: ensure no rinsing gaps
Rinsing is as important as washing. Use a wider nozzle and back away slightly to create a soft spray that flushes cleaning residue from grooves and joints. Begin rinsing from the far end of the deck and work toward the drain to direct dirty water away from seating or door openings. Overlap each pass by 50–70% to prevent missed areas and to wash away any remaining cleaner. If you see behind-the-veil staining or discoloration, re-wet and re-wash that area with a slightly different angle.
Drying, sealing, and timing
After washing, allow the deck to dry completely—this can take 24–48 hours depending on weather. A dry surface is essential before applying a sealant or stain. Inspect for any remaining mildew or discoloration and treat promptly. Once sealed, your deck gains improved water resistance and longevity. Pressure Washing Lab advises scheduling sealing after the surface is dry, with the specific product and number of coats following manufacturer recommendations. Proper timing ensures maximum protection and a uniform finish.
Troubleshooting: common issues and fixes
If you notice whitening on wood, it is usually a sign of over-wetting or a too-close nozzle. Correct by stepping back and reducing pressure, then re-wetting with a wider spray. If staining persists after washing, consider applying a targeted cleaner to the spot and re-washing with a gentler pass. Melted or warped boards require professional attention, as excessive pressure can exacerbate structural damage. By staying within the surface limits and maintaining an even technique, most routine issues resolve with a standard wash.
Tools & Materials
- Pressure washer (gas or electric)(Choose a unit with adjustable PSI within 1500–3000; avoid exceeding 3500 on softwoods.)
- Nozzle tip (15-degree or adjustable fan)(Start with wider spray to protect delicate surfaces.)
- Detergent/deck cleaner (optional)(Use a deck-safe product; test patch first.)
- Splash guards or plastic sheeting(Protect plants and nearby surfaces.)
- Safety goggles(Eye protection against debris.)
- Gloves(Water-resistant, grippy, durable.)
- Closed-toe shoes with good traction(Slip resistance essential on wet decks.)
- Long sleeves and breathable clothing(Protect skin from spray and cleaner.)
- Garden hose with high-flow connection(Ensure adequate water supply and pressure balance.)
- Soft-bristle deck brush(Useful for stubborn spots before rinsing.)
Steps
Estimated time: 60-90 minutes
- 1
Prepare area and gear
Clear the deck, remove furniture, and cover nearby plants. Put on PPE and connect the water supply. Inspect electrical outlets and cords for moisture.
Tip: Test your setup on a parked patch away from the main surface. - 2
Inspect deck and plan approach
Determine wood vs. composite, identify stains, and decide if you’ll use a cleaner. Map a washing sequence that starts at the far end and moves toward the exiting point.
Tip: Begin with a low-pressure setting to avoid damage. - 3
Test patch and adjust distance
Spray a small, hidden area to gauge impact. Adjust nozzle distance and angle until you achieve a clean but safe result.
Tip: Track the recommended distance on the label and stay consistent. - 4
Apply detergent (optional)
If using a cleaner, apply as directed and let it dwell briefly. Avoid letting cleaners dry on the surface.
Tip: Use a spray pattern that evenly coats without pooling. - 5
Wash with overlapping passes
Start at one corner and move in narrow, overlapping strokes. Keep the spray at a 12–24 inch distance from the surface.
Tip: Avoid straight-on hits; angle slightly to push debris outward. - 6
Rinse thoroughly
Switch to a wider spray and rinse the deck from far to near, ensuring all cleaner residues are removed.
Tip: Keep drains clear of backflow by directing spray away from openings. - 7
Address stubborn spots
Re-spray stubborn stains with a slightly closer distance and/or a scrubbing brush, then rinse again.
Tip: Do not scrub vigorously with a hard brush that could gouge the surface. - 8
Dry and assess
Allow the deck to dry completely before sealing. Check for any remaining spots that may need a second pass.
Tip: Ventilate for faster drying on humid days. - 9
Seal or finish after dry
Apply a deck sealer or stain per manufacturer guidelines once dry for best protection.
Tip: Select a finish compatible with your deck material.
Quick Answers
What surfaces can be safely cleaned with a deck pressure wash?
Wood and composite decks are common targets; always test first and adjust pressure to avoid gouging or warping. Softwoods require extra care and distance, while composites tolerate slightly higher cleaning but still benefit from a gentler approach.
You can clean wood and composite decks, but test a patch first and adjust pressure to avoid damage. Softwoods need extra care.
Should I use detergent with a pressure washer on a deck?
Detergents help with mildew and algae but are optional. Use a deck-safe cleaner, follow dilution guidelines, apply evenly, and rinse thoroughly to avoid residue.
Detergents can help with mildew, but use them only if needed and rinse well.
Can I pressure wash a sealed or stained deck?
Yes, but use lower pressure and short bursts to avoid peeling. After washing, reapply sealant or stain following manufacturer directions.
Yes, but keep pressure gentle and re-seal after drying.
What nozzle and pressure setting should I use for a wood deck?
Start with a wide nozzle (15-degree or fan) at the lowest effective pressure. Move gradually to higher pressure only if needed, keeping a safe distance to prevent surface damage.
Begin with a wide nozzle at low pressure, adjust as needed while keeping a safe distance.
How long does it take to pressure wash a typical deck?
A small to medium deck typically takes 1–2 hours including prep and drying; larger or heavily soiled decks may take longer.
Most decks take about one to two hours, depending on size and soil level.
What should I do after pressure washing a deck?
Let the deck dry completely, then apply a sealer or stain if desired. Clean up tools and inspect for any damage or missed spots.
Let it dry, seal if you want, then tidy up and check for missed areas.
Watch Video
Key Takeaways
- Protect plants and surroundings before washing.
- Choose the correct nozzle and moderate PSI for surface type.
- Test a patch and document your optimal distance.
- Use overlapping passes for even cleaning and avoid streaks.
- Dry completely before sealing to maximize protection.