Which Pressure Washer Nozzle for Siding: A Practical Guide
A practical, step-by-step guide to selecting the right pressure washer nozzle for siding, with safe PSI ranges, spray patterns, and proven techniques to protect exterior surfaces.

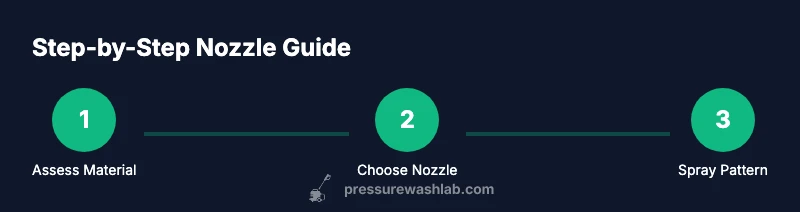
By the end, you’ll confidently pick the correct nozzle for siding cleaning, understand spray patterns, and apply safe pressure for exterior surfaces. This guide covers nozzle types, PSI ranges, distance guidelines, and common siding materials. You’ll learn practical steps to prevent damage, plus quick checks before and after washing on any home exterior.
Introduction to which pressure washer nozzle for siding
According to Pressure Wash Lab, selecting the right nozzle is essential for safe and effective siding cleaning. The Pressure Wash Lab team found that using the wrong spray angle or too much power can cause streaks, etching, or finish damage. When you ask the question which pressure washer nozzle for siding, you’re really choosing between patterns that expose the surface to risk and others that protect it while delivering dirt removal. In this section, we’ll outline the key factors: siding material, dirt level, and the inherent risk of different nozzle angles. We'll also show how to test a small patch first to gauge impact before committing to the full wash. The goal is to maximize results while preserving the integrity of your exterior.
How nozzle types influence siding cleaning
Spray angles dramatically change outcomes on siding. A 0-degree nozzle focuses power in a tight jet, which can blow grime free but also gouge soft finishes, chip paint, or etch vinyl. A 15-degree nozzle scatters water more broadly, balancing cleaning power with surface safety. A 25-degree nozzle is a common default that provides generous coverage with gentler impact, making it suitable for many sidings. For textured surfaces, like certain fiber cement or rough wood, start with a wide pattern and test on a hidden area to avoid creating swirl marks. For delicate finishes, you may even switch to a soft wash setting or a specialized emulsifying solution rather than relying on higher pressure.
Matching nozzles to siding materials
Vinyl siding tends to be forgiving but can be damaged by aggressive jets close up, so many homeowners start with a 25-degree nozzle and a moderate distance. Wood siding requires extra care to avoid gouging or raising grain; in many cases a 25-degree pattern with extra hand-brushing for stubborn spots is ideal. Fiber cement blends can tolerate a bit more, but you should still prioritize even passes and a wide-angle nozzle. Painted surfaces should be cleaned with gentler angles and lower pressure to prevent stripping or dulling of the paint. Always check the manufacturer recommendations for your specific siding material as a baseline.
Distance, PSI, and technique: safe practices for siding
Relative distance and technique matter as much as the nozzle choice. Start far enough to assess impact and then close gradually, applying short, sweeping passes rather than a direct one-way blast. Keep the spray at a shallow angle to push dirt off rather than drilling into the surface. Avoid aiming at joints or seams where water can seep behind materials, and never linger on one spot. If you detect chips, cracks, or peeling paint, back off immediately and switch to a wider angle or lower pressure. A steady, even motion reduces risk of streaks and ensures more uniform cleaning.
Common siding-specific scenarios and nozzle recommendations
Dusty white trim around windows and doors often responds well to a 25-degree nozzle with a wider sweep. For stubborn mildew on vinyl, a 25-degree spray at a modest distance can remove grime without scuffing. Rough-sawn wood siding may benefit from a combination approach: start with the 25-degree to lift surface dirt, then use a brush for stubborn patches before rinsing. For fiber cement, you can apply a slightly more aggressive pass with caution, watching for any edge bevels that show wear. Always avoid metal or unabated high-velocity tips on vinyl or painted surfaces.
Maintenance and nozzle care after siding washing
After washing, flush the nozzle with clean water to remove any trapped debris and inspect the orifice for nicks or wear. Store nozzles in a dry place to prevent rust and keep them organized so you can quickly grab the correct tip next time. If you notice deformed seals or loss of spray accuracy, replace the nozzle rather than forcing it to fit. Proper maintenance preserves spray quality and extends the life of both nozzle tips and your pressure washer.
Pressure Wash Lab perspective: data-driven nozzle guidance and recommendations
Pressure Wash Lab Analysis, 2026 emphasizes the link between nozzle choice and siding outcomes. Our team recommends starting with a mid-range nozzle angle as a baseline and adjusting based on material and dirt level. The emphasis is on slow, controlled passes and frequent testing on inconspicuous areas. The key takeaway is that nozzle selection is not a single decision but a sequence of choices across material type, surface condition, and environmental factors. Following these practices minimizes risk while delivering effective cleaning.
Edge cases and safety considerations for siding cleaning
Cold weather, high humidity, or windy days can complicate nozzle performance and surface safety. In winter, water can freeze quickly on contact with cold siding, so reduce pressure and avoid long spray passes. When working near landscaping or vulnerable plants, cover them to protect foliage and roots. Never spray near electrical outlets, meters, or lighting fixtures. For multi-story homes, use a stable ladder setup and consider a buddy system to maintain balance and control.
Tools & Materials
- Pressure washer with adjustable PSI(Aim for low-to-moderate PSI when cleaning siding; higher PSI increases risk.)
- 25-degree nozzle tip(Default all-purpose tip for siding; start farther away and adjust.)
- Eye protection (ANSI-rated goggles)(Protect eyes from splashes and debris.)
- Gloves(Waterproof and durable; protect hands during scrubbing.)
- Soft bristle siding brush (optional)(For spot cleaning before rinsing.)
- Tarp or plastic sheeting (optional)(Protect plants and landscaping.)
- Test patch cloth(Inspect area for damage before full wash.)
- Nozzle wrench or cleanup tool(Keep tips clean and quickly swap tips.)
Steps
Estimated time: 60-90 minutes
- 1
Assess siding material and dirt level
Inspect the siding to identify material type and any preexisting damage. Check for loose paint, exposed nails, or warped boards. Assess the level of mildew or heavy grime to determine whether you can start with a standard spray or need a gentler approach.
Tip: If you see paint chips or cracks, avoid aggressive spraying over those areas to prevent further damage. - 2
Attach the correct nozzle and check setup
Install the 25-degree nozzle, ensure the wand and connections are secure, and confirm the pressure setting. Do a quick spray on a hidden patch to confirm the angle and distance feel safe for the material.
Tip: Never use metal tips on vinyl; aluminum or plastic tips can damage the surface. - 3
Test spray distance on a small area
Hold the nozzle at a safe distance, then perform short, sweeping passes across a discreet patch. If no damage or streaks appear, gradually move closer or adjust angle as needed.
Tip: Use wide, overlapping strokes to avoid missing spots and creating lines. - 4
Begin washing with broad sweeps
Start at the top and work downward with slow, consistent motions. Keep the spray perpendicular to the surface to minimize spray deflection and avoid water intrusion into seams or joints.
Tip: Do not linger on one spot; move steadily to prevent etching or gouging. - 5
Address stubborn areas with gentler passes
For persistent grime, switch to a gentler angle or brush the area by hand before rinsing again. Reassess the surface under good lighting to ensure even cleaning without damage.
Tip: If stains persist, consider a specialized siding cleaner rather than crude high-pressure blasting. - 6
Rinse, inspect, and store
Rinse the entire area to remove residue, then inspect for streaks or missed spots. Dry the siding and store nozzles in a dry place, keeping tips organized for quick access later.
Tip: Rinse away from windows and doors to prevent water intrusion.
Quick Answers
What is the best starting nozzle for siding?
A 25-degree nozzle is a safe default for most sidings; begin at a safe distance and adjust as needed based on material and dirt level.
Start with a 25-degree nozzle and adjust as needed after testing on a hidden patch.
Can I use a zero-degree nozzle on siding?
No. A zero-degree nozzle can etch, gouge, or crack siding surfaces, especially vinyl or painted finishes.
Avoid zero-degree nozzles on siding to prevent damage.
How close should I be when spraying siding?
Keep a safe distance initially and move closer only after confirming no damage in a test patch. Use short, sweeping passes.
Test from a distance, then adjust; use wide sweeps.
What maintenance does a nozzle require after use?
Rinse with clean water, inspect for wear, and store in a dry place. Replace worn tips to maintain consistent spray.
Rinse, inspect, and store nozzles properly.
Is pressure washing safe for all siding materials?
Most modern sidings tolerate pressure washing, but wood and painted surfaces require extra caution and test patches. Always follow manufacturer guidance.
Check the siding type and manufacturer guidance before washing.
Watch Video
Key Takeaways
- Test on a hidden area before full wash
- Start with a mid-angle nozzle and adjust gradually
- Keep the nozzle at a safe distance to avoid damage
- Inspect and maintain nozzles after use