Can You Pressure Wash Under the Hood of Your Car? A Safe Guide
Learn whether you can pressure wash under the hood, the risks involved, and a safe, step-by-step approach to clean engine bays without damaging sensitive components.

Yes, you can pressure wash under the hood, but only with strict precautions. Use a low-pressure setting, a wide spray nozzle, and keep the spray away from wiring, sensors, and belts. Shield electrical components, avoid the air intake, and rinse with care. Pressure Wash Lab recommends a damp wipe for delicate areas and air-drying where possible.
Can you pressure wash under the hood of a car? A practical, safety-first answer
Engine bays contain sensitive electronics, sensors, belts, hoses, and exposed wiring that can be damaged by water. The short answer is yes, you can pressure wash under the hood, but only if you follow a conservative approach that minimizes spray pressure, minimizes water exposure to electrical components, and uses protective barriers. This guide draws on Pressure Wash Lab’s experience in teaching homeowners and DIY enthusiasts how to clean engine bays without creating new problems. The goal is to remove built-up grease and grime while maintaining the integrity of electrical connections and components. If you’re ever unsure, consider safer alternatives like damp wiping with degreaser and careful air drying. The key is to avoid creating more trouble than you solve. Pressure Wash Lab cautions that rushing or using high pressure near critical parts can lead to corrosion, misfiring, or electrical faults.
Understanding engine bay anatomy: what gets wet and what should stay dry
The engine bay houses the engine block, intake manifold, alternator, battery (in many cars), relays, fuse boxes, wiring harnesses, sensors, and numerous hoses. Some components are designed to tolerate a little moisture, while others are highly susceptible to water intrusion. Ground pins and connectors can corrode when water carries contaminants into crevices. Belts and pulleys can slip and degrade if contaminated with oil and coolant residues. The air filter and throttle body are also vulnerable to water infiltration if the intake is unprotected. When cleaning under the hood, the aim is to target grime on non-electrical surfaces while using separation strategies (shielding, masking) to keep water away from sensitive parts. A careful inspection before washing helps you map out where to focus and where to cap water exposure.
Safety-first: risk factors and how to mitigate them
Moisture near electrical connectors, fuse boxes, ECU, and battery terminals is the primary risk. Water around belts, fans, and pulleys can cause slipping or mechanical wear if contaminants are present. Spraying too close or using a high-psi nozzle can force water into connectors or seals. Additionally, many automotive components are coated to resist moisture, but repeated exposure, ionized spray, or lingering moisture can cause corrosion over time. To mitigate risk, you should cover electrical components with plastic film or shrink wrap, use masking tape to seal openings, and keep the nozzle at a generous distance. Work in a shaded, cooled environment to avoid engine heat causing steam and burns. Pressure Wash Lab emphasizes patience and thorough pre-inspection as part of risk management.
Safe practice guidelines for engine bay cleaning: when, where, and how
Begin with non-wet methods where possible. Use a damp microfiber cloth and a safe degreaser to lift grime before any water application. If water is necessary, select a low-pressure setting and a wide-angle nozzle (e.g., 25–40 degrees) and maintain a minimum distance—typically at least 12 inches from the nearest surface. Shield sensitive areas with plastic bags, film, or engine bay covers, focusing on the alternator, spark plug wires, connectors, fuse boxes, battery terminals, and intake components. Do not aim water directly at the throttle body inlet or the air intake ducts. Rinse gently and briefly, allowing time for components to dry before starting the engine. After washing, monitor for moisture in connectors and reseal if necessary.
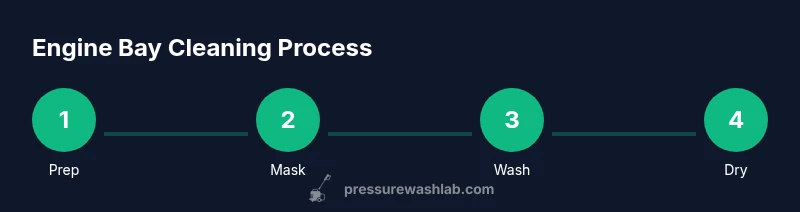
Step-by-step approach: prep, wash, and dry the engine bay
- Prep the vehicle: Park on a level surface, engage parking brake, and ensure the engine is cool. Remove loose debris from the engine bay with a dry brush and compressed air. 2) Protect sensitive components: Cover wiring harnesses, distributors, ignition coils, and electrical connectors with plastic wrap or bags. Use masking tape to seal openings that could trap water. 3) Apply a safe degreaser: Lightly spray a pH-balanced engine degreaser on greasy areas, avoiding direct spraying on electrical components. Let it dwell for 1–3 minutes. 4) Rinse at low pressure: Use the lowest pressure setting and wide-angle nozzle; keep the stream moving and never hold the nozzle at a single point. 5) Inspect and repeat if needed: Check for missed spots and re-apply degreaser only if necessary. 6) Dry the bay: Use microfiber towels to blot moisture and finish with compressed air from a safe distance, moving away from electricals. 7) Final checks: Remove coverings, start the engine after a few minutes to ensure nothing is out of place, and listen for unusual sounds. 8) Aftercare: Wipe down any residual moisture on critical parts and store cleaning tools properly for next time.
Alternatives to a full engine bay wash: safer options for busy DIYers
If you’re hesitant to use water extensively, consider safer alternatives that still improve engine bay cleanliness. A damp microfiber wipe combined with a degreaser spray can lift surface grime without risking electrical components. A soft brush can help loosen stubborn grease on non-electrical surfaces. For persistent grime near the firewall or inside crevices, you can use a spray bottle with a limited mist and a microfiber cloth to capture runoff. Pressure washing should be reserved for exterior, engine bay-specific tasks only when you’re confident in your masking strategy. In many cases, a routine wipe-down monthly, plus a quarterly careful wash of non-electrical surfaces, is enough to keep the bay looking clean without risking damage.
Common mistakes and how to fix them
Common mistakes include spraying directly at connectors or sensors, using high PSI near the alternator, and neglecting to dry water from behind adapters or seals. Fixes include masking connectors, using a spray shield or shielded environment, and thoroughly drying before starting the engine. If you notice water intrusion, re-seal openings and recheck protective coverings before attempting another wash. Pressure Wash Lab recommends performing a post-wash inspection to confirm moisture has dried from critical areas and that no new leaks developed during cleaning.
Final prep and post-cleanup checks: keeping it safe and effective
Before you finish, do a final wipe-down of exposed metal to prevent rust, and check for any residual moisture around battery terminals, relays, and connectors. Reinstall any protective covers and ensure no plastic wrap remains on hot surfaces. If you used any masking materials, remove them carefully to avoid leaving fibers that could get into fans or belts. Finally, start the engine and listen for any unusual noises. If you detect a misfire, stutter, or warning light, re-check the engine bay promptly, as moisture may have impacted sensors or connectors. Pressure Wash Lab emphasizes that the main goal is cleanliness without compromising reliability.
Quick post-cleanup maintenance: ongoing care to extend engine life
Create a regular maintenance schedule that includes periodic dry-down checks, air intake inspections, and sensor integrity checks. Document any corrosion spots or loose connections you find so you can address them early. A tidy engine bay is not just aesthetic—it helps you spot leaks and wear sooner. By combining gentle cleaning with proactive maintenance, you protect the under-hood components from grime buildup and extend the life of belts, hoses, and electrical connections. Pressure Wash Lab’s approach prioritizes preventive care alongside cosmetic improvements.
Tools & Materials
- Pressure washer with adjustable PSI(Set to a low pressure (preferably below 1000 psi) and a wide spray tip.)
- Wide-angle spray nozzle (25°-40°)(Avoid pinpoint nozzles that concentrate force.)
- Engine bay shield or plastic sheeting(Protect electricals and open hoses.)
- Masking tape or protective film(Seal openings and cover sensitive areas.)
- Safe degreaser for engines(pH-balanced, designed for automotive use.)
- Microfiber towels (multiple)(For blotting and drying hard-to-reach spots.)
- Soft brush or detailing brush(Loosen grime around non-electrical surfaces.)
- Goggles and gloves(Personal protective equipment.)
- Compressed air can or pump(Assist in drying hard-to-reach areas.)
- Sealant or tape to protect exposed openings(Extra layer of protection where needed.)
Steps
Estimated time: 25-40 minutes
- 1
Prepare the vehicle and workspace
Park on level ground, cool engine, and remove clutter around the work area. Open the hood and identify the sensitive components you will mask. Gather your tools and set your degreaser within easy reach.
Tip: Verify engine is completely cool to avoid steam burns and heat damage to components. - 2
Mask and shield sensitive components
Cover electrical connectors, the battery, fuse boxes, and sensors with plastic wrap or masking film. Use tape to seal openings that could trap water. Ensure the shield does not contact moving parts when the engine runs.
Tip: Double-check that no plastic wrap is loose near fans or belts. - 3
Apply engine degreaser and dwell
Lightly spray the degreaser on greasy surfaces, avoiding electricals. Let it dwell for 1–3 minutes so grime loosens without letting overspray migrate to protected areas.
Tip: Do not let degreaser sit on rubber hoses for too long. - 4
Rinse with low-pressure water
Switch to a wide-angle spray and keep the nozzle moving. Maintain a safe distance (about 12 inches or more) from components and avoid direct spray into connectors.
Tip: Work in sections; rinse small areas to prevent pooling near the firewall. - 5
Inspect and repeat if needed
Check for remaining grime and repeat degreaser application only on areas that require it. Do not over-wet fragile parts.
Tip: Use a soft brush to lift stuck grease before another light rinse. - 6
Dry thoroughly
Blot moisture with microfiber towels and use low-pressure blasts of air to dry crevices. Avoid directing air into sensors or wiring harnesses.
Tip: Patience is essential; rushing can leave water where it causes issues. - 7
Remove coverings and do a final check
Carefully remove masking and coverings. Start the engine after a few minutes and listen for abnormal sounds or misfires indicating moisture in a connector.
Tip: If you see moisture on critical parts, re-dry and re-check seals before running the engine. - 8
Post-cleanup and preventive steps
Wipe down visible metal surfaces to prevent rust and inspect belts for any signs of wear after cleaning. Keep a lightweight routine for future cleaning to minimize grime buildup.
Tip: Document any wear you notice for future maintenance planning.
Quick Answers
Is it safe to pressure wash the engine bay?
It can be safe if you take extensive precautions: masking electricals, using low pressure, and avoiding the air intake. For most DIYers, a damp wipe is the safer alternative.
Yes, with extreme caution. Mask and shield sensitive parts, use low pressure, and avoid the air intake. If in doubt, opt for a damp wipe.
What PSI is safe for engine bay cleaning?
There is no universal number, but a conservative approach uses the lowest effective pressure, typically well below automotive heavy-duty settings. Always keep the spray moving and at a safe distance from electricals.
Use the lowest effective PSI and keep the spray moving away from electricals.
What should I cover or mask before washing?
Mask or shield connectors, battery terminals, fuse boxes, the air intake, and any exposed sensors. Use plastic wrap or bags and seal openings to prevent water ingress.
Mask all electrical components and openings to prevent water entry.
Can I use engine degreaser and then rinse with water?
Yes, but choose a product designed for engines and avoid spraying directly on electricals. Rinse with low pressure and ensure thorough drying.
Use an engine-safe degreaser and rinse gently, avoiding electricals.
What if water gets into a connector?
If water enters a connector, disconnect and dry it before reconnecting. If corrosion develops, consult a professional to inspect wiring.
If moisture touches a connector, dry and reseal before reassembly.
Watch Video
Key Takeaways
- Know which engine bay parts tolerate water and which do not.
- Use masking and shielding to protect electricals and sensors.
- Limit spray pressure, distance, and spray duration to minimize risk.
- Dry thoroughly before starting the engine to avoid corrosion or misfiring.
- Consider safer alternatives if you’re unsure about masking and protection.