Can You Use a Pressure Washer in the Shower? Practical Guide
Discover whether a pressure washer can safely clean a shower. This guide covers prep, PPE, setup, step-by-step technique, and maintenance with insights from Pressure Wash Lab to help DIYers avoid damage.

Yes, you can use a pressure washer in a shower, but only with a low-pressure setting, a wide spray nozzle, and steady wand movement while shielding surfaces. Test on a small area first, then follow the step-by-step guide. This approach minimizes damage while removing soap scum and mineral buildup.
Is a Shower Suitable for Pressure Washing?
If you’re wondering can you use pressure washer in shower, the answer is yes—within strict limits. Showers built from ceramic tile, porcelain, glass, and acrylic can tolerate controlled, gentle spray when you keep the wand moving and maintain distance from grout lines, sealants, and edges. According to Pressure Wash Lab, the goal is to remove soap scum and mineral deposits without forcing water behind walls or loosening caulk. Surfaces like ceramic tile with sealed grout and glass doors respond best to light passes from top to bottom. Avoid natural stone, epoxy coatings, or soft plastics that can scratch or wear down with aggressive spray. If you’re unsure about a surface, start with the least aggressive setting and observe any changes before proceeding. This approach protects your shower’s grout, seals, and fixtures while still delivering cleaner surfaces.
Safety First: PPE, Electrical, and Water Containment
Safety is non-negotiable when using any cleaning tool near water. Always wear eye protection, waterproof gloves, and non-slip shoes. Keep a dry area around the shower to prevent slips and have towels ready for drips. Electrical safety is paramount; never spray near outlets, switches, or power cords. If you must use an electric unit indoors, ensure a GFCI-protected outlet and, ideally, a battery-powered model to minimize risks. Pressure Wash Lab emphasizes avoiding gas-powered equipment in enclosed wet spaces due to exhaust and fire hazards. Use plastic sheeting or a shower curtain to contain overspray and protect adjacent fixtures, and ensure adequate ventilation to reduce moisture buildup in your bathroom.
Choosing the Right Setup: PSI, Nozzles, and Accessories
The right setup depends on your shower material and the level of buildup. Opt for a low-psi range with a wide spray pattern to reduce risk of surface damage and grout erosion. A nozzle designed for gentler scrubbing helps maintain even coverage and avoids hotspots that can etch tiles. Consider a surface cleaner attachment for larger, flat areas like shower floors and doors to improve consistency. If you have sensitive seals or caulk, test over a small area first and adjust technique accordingly. Remember, the goal is to loosen soap scum and mineral deposits without forcing water into gaps or behind panels.
Prep Work: Protecting Fixtures, Drainage, and Surfaces
Prep is the difference between a good wash and a costly repair. Cover drains to prevent debris from clogging, remove shampoo bottles and soap dishes, and place a towel or protective cover over metal fixtures. Use painter’s plastic to shield chrome, fixtures, and decision points like soap niches. Ensure the shower door or curtain is closed to reduce spray escape. If your shower has recessed lighting, switch to battery-powered lighting or keep lighting away from direct spray. Proper prep minimizes cleanup and reduces the chance of water intrusion behind tiles or grout.
Surface Care Targets: Tiles, Grout, and Glass
Ceramic and porcelain tiles with sealed grout typically tolerate light, sweeping passes. Glass doors respond well to careful, downward strokes from top to bottom. For grout lines, keep spray perpendicular and avoid blasting directly along the line; this helps prevent grout chipping or loosening. Soap scum tends to accumulate near fixtures and corners, so focus your initial passes there with a broad, even spray. If a surface shows signs of damage (pitting, etching, or loosened grout), stop and switch to manual scrubbing or a gentler cleaner to avoid further harm. After cleaning, rinse thoroughly with clean water to prevent residue that can re-attract soap scum.
Mold, Mildew, and Stubborn Stains
Mildew and mold may require a slightly longer contact time or a second pass, but avoid harsh approaches that can degrade silicone seals. Use a mildew-safe cleaning solution in tandem with gentle spray, and flush the area with clean water to wash away residue. If you notice persistent staining or a musty odor, consider switching to a dedicated bathroom cleaner or consulting a professional for deeper remediation. Pressure Wash Lab notes that stopping mold growth at the source—through ventilation and proper drying—is essential to long-term shower hygiene.
Post-Cleaning Care: Rinsing, Ventilation, and Drying
Rinse all surfaces to remove cleaner residues, then dry with a clean microfiber towel to prevent water spots and mold growth. Open a window or run a bathroom fan to reduce humidity, and keep doors open to improve airflow. Inspect the grout lines and silicone seals for signs of moisture intrusion after cleaning; if you notice any looseness or cracks, address them promptly to prevent further damage. A thorough post-cleaning routine minimizes returns and helps maintain a showroom-clean shower for longer.
Common Mistakes to Avoid
Common mistakes include using high-pressure settings on delicate surfaces, spraying directly at grout lines, and neglecting to mask nearby fixtures. Another frequent error is failing to test a small area first, which can result in chipped tile or damaged seals. Never spray into electrical fixtures or recessed lighting; always prioritize safety and mechanical integrity over speed. Finally, skipping drying and ventilation invites mildew regrowth, undermining the effort and costing more time later.
Alternatives and When to Skip the Washer
For very delicate surfaces, some homeowners prefer manual scrubbing with non-abrasive sponges and bathroom-safe cleaners. Steam cleaners designed for bathrooms may be effective for grout and soap scum without water impacts. If the shower has natural stone, antique hardware, or cracked grout, it’s often safer to avoid pressure washing altogether and use softer cleaning methods or hire a professional. Pressure Wash Lab suggests evaluating surface material, sealant condition, and the risk of water infiltration before deciding to use a pressure washer in a shower.
Tools & Materials
- Pressure washer with adjustable PSI (low range)(Choose a unit that supports gentler, broad spray patterns; avoid high-pressure settings.)
- Wide-angle spray nozzle(Promotes even coverage and reduces risk of surface damage.)
- Surface cleaner attachment (optional)(Helps cover large flat areas like shower floors evenly.)
- Protective coverings (plastic sheeting, painter’s tape)(Mask adjacent fixtures and prevent overspray on walls and fixtures.)
- Non-slip footwear(Keep footing secure on wet surfaces.)
- PPE: goggles, waterproof gloves, and a waterproof apron(Protect eyes, skin, and clothing from splashes and cleaners.)
- GFCI-protected outlet or battery-powered unit(If using electricity near water, prioritize safety and consider battery-powered tools; never use gas-powered units in enclosed wet spaces.)
- Towels or absorbent mats(Use to dry surfaces after rinsing and prevent slips.)
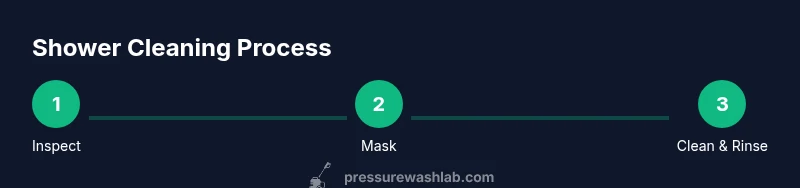
Steps
Estimated time: 25-40 minutes
- 1
Inspect surfaces
Survey the shower to identify sensitive areas like caulk, silicone seals, and stone. Decide where you’ll spray and what you’ll mask. Look for cracks or loose grout that could worsen with spray. This helps tailor your approach to each surface.
Tip: Plan your passes from top to bottom to minimize water dripping behind fixtures. - 2
Prep the area
Mask nearby fixtures with plastic and secure a drop cloth on the floor. Clear out products and ensure good ventilation. If your shower has a drain grate, remove or cover it to prevent debris from entering the drain.
Tip: Keep a towel ready to catch drips and prevent slips as you start spraying. - 3
Set up the washer safely
Attach the wide-angle nozzle and set the unit to a low pressure. Stand to the side of the spray path to reduce exposure to direct spray. If you feel resistance or hear unusual sounds, stop and reassess.
Tip: Test on a small, inconspicuous area first before moving to more visible sections. - 4
Begin cleaning from top
Start at the top edge of the shower and move downward with steady, sweeping motions. Keep the wand in motion to avoid creating hot spots or etched areas. Pause briefly on stubborn soap scum spots to prevent residue buildup.
Tip: Maintain a consistent distance; shorter ranges increase risk of surface damage. - 5
Address grout and glass separately
Use gentle passes on grout lines and avoid direct, high-pressure contact with silicone seals. Glass doors respond best to gradual passes along the surface to avoid streaking or etching. For stubborn mineral deposits, consider a targeted, short pass from different angles.
Tip: If grout shows wear, switch to manual cleaning to avoid further damage. - 6
Rinse and inspect
Rinse with clean water to remove cleaner residues. Inspect for spots you may have missed and re-spray only if surfaces tolerate it. Avoid saturating caulk or drywall adjacent to the shower.
Tip: Use a microfiber cloth to wipe away remaining moisture and prevent water spots. - 7
Dry and aerate
Dry surfaces with towels and ensure the bathroom is well-ventilated to reduce humidity. Leave doors open or run a fan until moisture is minimized. A dry surface is less prone to future mold growth.
Tip: Don’t rush the drying; moisture left behind becomes a mold risk.
Quick Answers
Can I safely use a pressure washer inside a shower?
Yes, but only with low pressure, a wide spray, and careful handling. Protect fixtures, test areas first, and avoid high-pressure contact with grout or seals. If uncertain, consider manual cleaning for delicate surfaces.
Yes, you can, but only with low pressure and careful technique. Test first and protect fixtures before proceeding.
What surfaces are safe to spray in a shower?
Ceramic and porcelain tiles with sealed grout and glass doors can tolerate light spray when done carefully. Avoid natural stone, unsealed grout, and worn seals, which can be damaged by spray.
Ceramic and sealed grout tiles and glass doors tolerate light spray; avoid stone and damaged seals.
What about electrical safety when using a washer in a bathroom?
Use a GFCI outlet or consider battery-powered equipment to minimize risk. Never use gas-powered washers inside bathrooms or enclosed wet spaces due to exhaust and fire hazards.
Use GFCI-protected outlets or battery-powered tools; avoid gas-powered units indoors.
Are there better options than a pressure washer for showers?
For delicate surfaces or uncertain materials, consider manual scrubbing with non-abrasive cleaners or a bathroom steam cleaner. These methods reduce risk while still removing soap scum and mildew.
Manual scrubbing or steam cleaning can be safer for delicate surfaces.
What should I do if grout starts to crumble after washing?
Cease using the washer on that area and transition to gentler cleaning. Inspect the grout for damage and consider regrouting or sealing after cleaning to restore integrity.
If grout crumbles, stop spraying that area and repair the grout condition.
How long should the area air out after cleaning?
Ventilate for 15-30 minutes or longer if humidity remains high. Proper drying reduces mildew risk and helps keep surfaces clean longer.
Ventilate for 15-30 minutes to dry the space thoroughly.
Can I reuse the same nozzle for all shower surfaces?
Yes for most surfaces, but switch to a gentler spray on fragile materials and test first. Avoid aggressive angles that could damage seals or caulk.
You can reuse the same nozzle, but test and avoid aggressive angles on fragile areas.
Should I replace old caulk after pressure washing?
If you notice gaps or looseness, replace caulk after cleaning to maintain a watertight seal. Cleaning will not fix deteriorated caulk.
Replace damaged caulk after cleaning to restore the seal.
Watch Video
Key Takeaways
- Use a low-pressure setting and wide spray for shower cleaning.
- Mask fixtures and protect surfaces to avoid damage.
- Ventilate and dry thoroughly to prevent mildew.
- Test on a small area before full use of the washer.
- When in doubt, opt for gentler methods rather than aggressive spraying.