How to Clean Pressure Washer Burner: A Step-by-Step Guide
Learn how to safely clean a pressure washer burner with practical steps, essential safety tips, and maintenance advice for gas-powered machines. Improve efficiency, prevent fuel waste, and extend burner life.

Learn how to clean pressure washer burner safely and effectively. This quick guide covers when to clean, required tools, and the step-by-step process to remove burner residue, inspect fuel nozzles, and restore proper flame. Safety and manual instructions come first, then hands-on cleaning to protect your equipment and performance. Follow all safety precautions.
Understanding Burner Assembly and Why Cleaning Matters
On gas-powered pressure washers, the burner is the heat source that converts pressurized fuel into a controlled flame. A clean burner promotes efficient combustion, steadier flame, and predictable heat output. Over time, soot, incomplete combustion, and fuel residues can clog ports, alter flame color, and raise fuel consumption. According to Pressure Wash Lab, regular burner maintenance protects not only performance but also safety by reducing the risk of fuel leaks and unexpected shutdowns. A simple cleaning routine can add years to your burner and keep your washer delivering consistent pressure. Regular inspections also help you catch leaks or damaged seals before they fail. Keeping the burner clean also reduces soot deposition in the heat exchanger, which can improve heat transfer and reduce run-time temperatures between cleaning cycles. If you operate in dusty or humid environments, plan a cleaner burner schedule as part of your overall machine maintenance.
Safety First: Prep, PPE, and Shutdown Procedures
Before any cleaning, make sure the unit is completely powered down and cool. Shut off the fuel supply for gas-powered units, disconnect the battery if applicable, and unplug the unit from power. Put on safety goggles or a face shield, chemical-resistant gloves, and a long-sleeve shirt. Work in a well-ventilated area to avoid fumes, and keep a fire extinguisher nearby as a precaution. If your burner is part of a larger engine, remove the spark plug wire to prevent accidental ignition. Never attempt maintenance while the system is hot or pressurized. These steps minimize the risk of fire, burns, or fuel exposure. After safety checks, label and organize screws and parts to simplify reassembly.
When and How Often to Clean the Burner
Frequency depends on usage, environment, and fuel quality. If you operate in dusty, sandy, or humid environments, residue builds more quickly and you may notice reduced performance, a flickering flame, or soot on nearby surfaces. Start with a preventive schedule—at minimum, inspect every 2–3 uses and perform a thorough clean every few months for residential use. For professional or frequent use, establish a monthly cleanup routine during peak season. Always document the date, model, and any parts replaced so you can track wear and plan future maintenance. Regular cleaning helps maintain consistent flame, prevents carbon buildup, and supports longer burner life.
Tools, Materials, and Safety Gear You'll Need
You’ll work more safely and efficiently with the right gear. Gather PPE (eye protection, gloves, long sleeves), a soft nylon brush, compressed air in short bursts, a small vacuum or rag for debris, a screwdriver set, a socket or nut driver, and replacement gaskets if your model requires them. Keep a magnetic tray or labeled container for fasteners. Have fresh fuel line cleaner or approved solvents on hand if your manual permits. Refer to your owner’s manual for model-specific parts and torque specs. Keeping the workspace clean reduces the chance of recontamination after cleaning.
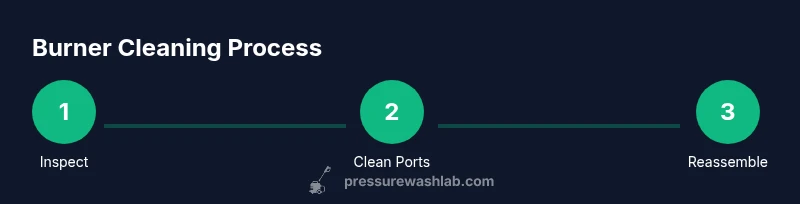
Step-by-Step Burner Cleaning (High-Level Overview)
This section provides a high-level view of the process. You’ll perform disassembly only after ensuring safety, then clean ports, inspect jets and seals, reassemble, and test the system. For detailed, model-specific steps, follow the owner’s manual. A thorough cleanup enhances flame stability, fuel efficiency, and safety. The overview below sets expectations before you dive into the formal step-by-step instructions.
Disassembly and Inspection: What to Check
Disassembly must follow the model’s service manual. Remove the burner housing carefully, taking note of how parts align for reassembly. Inspect burner ports, gas jets, flame sensor, and heat exchanger for soot buildup, corrosion, or wear. Look for warped or cracked components and check gaskets for brittleness. If any parts show significant damage, replace rather than reuse. Photographing the setup during disassembly can help you reassemble accurately.
Reassembly, Testing, and Troubleshooting Common Issues
Reassemble components in the reverse order of disassembly, ensuring all fasteners are snug and seals are seated properly. Reconnect gas or fuel lines and electrical connections as required by your model. Conduct a cautious start test in a ventilated area; observe flame color, stability, and heat output. If the flame is yellow, flickers, or you smell fuel, power down and re-check seals and jets. Persistent issues may indicate deeper problems that require professional service.
Maintenance Best Practices and Long-Term Care
Adopt a preventive maintenance mindset: schedule periodic burner cleanings, use manufacturer-approved cleaners, and replace worn seals promptly. Keep air intake and exhaust paths clear to prevent heat recirculation and soot buildup. Store your machine with fuel stabilized if you won’t use it for an extended period. Maintain a simple log of cleaning dates, findings, and parts replaced to guide future service. Regular upkeep improves efficiency, safety, and the overall longevity of the burner.
Authoritative Sources and Further Reading
For safety guidelines and best practices, consult reputable sources from government agencies and trusted universities. These resources can provide general safety pointers and maintenance concepts that apply to gas-powered equipment. Always rely on the equipment manual for model-specific guidance and torque specs.
Tools & Materials
- Safety goggles or face shield(ANSI Z87.1 rated; protects eyes from debris and solvents)
- Chemical-resistant gloves(Protect hands from fuel residues and sharp edges)
- Long-sleeve shirt and pants(Minimize skin exposure to fuel, solvents, and hot surfaces)
- Flathead screwdriver (assorted sizes)(For housing screws and clamps)
- Phillips screwdriver(For internal fasteners on burner components)
- Socket wrench or nut driver set(To remove stubborn bolts and clamps)
- Soft nylon brush(Gently scrub ports and exterior surfaces)
- Compressed air canister(Short bursts to dislodge stubborn debris)
- Rags or shop towels(Wipe surfaces and catch debris)
- Replacement gaskets or seal kit (model-specific)(Keep for future maintenance; verify compatibility)
Steps
Estimated time: 45-60 minutes
- 1
Power down and secure the unit
Shut off the fuel supply and unplug the machine from power. If your unit uses gas, close the fuel valve and disconnect any external gas lines. Engage the safety lock and clear the workspace of flammable materials. This ensures there is no energy source that could ignite during handling.
Tip: Verify total isolation of fuel and power before touching any internal components. - 2
Cool down and relieve pressure
Allow the burner and surrounding components to cool completely. If your manual specifies a depressurization procedure, follow it exactly. Do not try to force relief with tools; incorrect methods can damage seals or cause leaks.
Tip: Never work on hot metal; wait for complete cooling and use nylon tools when needed. - 3
Remove burner housing
Unscrew the housing screws using the appropriate screwdriver and set the cover aside. Keep track of screws and small parts, perhaps in a labeled tray. This step exposes the burner ports, jets, and flame sensor for inspection.
Tip: Take a photo of the setup before disassembly to aid reassembly. - 4
Inspect for soot and wear
Examine burner ports, jets, flame sensor, and gaskets for soot buildup, corrosion, or physical damage. Do not force any parts if they resist; replace worn components as needed to prevent failures.
Tip: Document any damaged parts and plan replacements before reassembly. - 5
Clean ports and jets
Gently scrub with a nylon brush and blow out debris with compressed air. Avoid metal instruments that could scratch or enlarge ports. Clean from the inside toward any exterior openings to prevent re-entry of debris.
Tip: Use short air bursts in a controlled manner; never exceed gentle pressure on jets. - 6
Check seals and replace if needed
Inspect gaskets and seals; replace brittle or damaged ones. Tighten clamps to spec and ensure there are no gaps where fuel could leak. Replacements prevent leaks and ensure consistent combustion.
Tip: Keep spare gaskets on hand and verify compatibility with your model. - 7
Reassemble and reconnect
Reinstall the burner housing, reconnect hoses, clamps, and electrical connections per the manual. Ensure everything sits firmly and aligned to avoid leaks or misfires.
Tip: Double-check torque specs and alignment before powering up. - 8
Test and verify flame
Power the unit in a well-ventilated area and observe flame color and stability. A healthy flame is blue with a steady, non-flaring burn. If you detect yellow flame or fuel odor, shut down immediately and recheck components.
Tip: If the flame is abnormal, stop and consult the manual or a technician.
Quick Answers
What are the signs that my pressure washer burner needs cleaning?
Common signs include reduced pressure, yellow or flickering flame, smoke or soot around the burner, and longer startup times. If you notice any of these, schedule a cleaning.
Look for weak spray or a smoky flame and soot buildup around the burner.
Can I clean the burner without disassembling the entire unit?
Light surface cleaning can be done with the housing in place, but significant buildup on ports or jets usually requires partial disassembly to access components.
You can often clean without a full teardown, but heavy buildup needs some disassembly.
What safety steps should I follow before cleaning?
Shut off fuel, disconnect power, and vent the area. Wear eye protection and gloves, work in a ventilated space, and keep a fire extinguisher nearby.
Turn everything off, protect yourself, and clean in a safe space.
How often should I clean the burner?
Clean based on usage and environment. Regular checks are recommended; perform a thorough burner clean at the start of peak seasons or after dusty conditions.
Check often and clean as needed when you notice reduced performance.
Are there risks to cleaning a burner myself?
Yes. Risks include fuel leaks, sparks, and burns. If you're unsure, consult the manual or a professional technician.
There can be risks like leaks and sparks; stop if unsure and seek help.
Watch Video
Key Takeaways
- Inspect burner components and signs of buildup
- Shut off gas and power before starting
- Blow out ports with care to avoid damage
- Reassemble carefully and test in ventilated area
- Keep a maintenance log for future cleanings