Can Karcher Pressure Washers Be Repaired? A Troubleshooting Guide
Urgent, step-by-step troubleshooting to determine if your Karcher pressure washer can be repaired, with safe repair tips and guidance on replacement options.

Yes, can karcher pressure washers be repaired? In most cases, yes, especially for common issues like clogged filters, faulty unloader valves, worn seals, or motor problems that aren’t catastrophic. Start with basic checks: water supply, power, and hoses; inspect the unloader valve; and test for leaks. If the issue persists, seek professional service or consult the manual.
Can can karcher pressure washers be repaired? Reality check
The question can karcher pressure washers be repaired is not a simple yes or no; it depends on the model, age, and the failed component. In many cases, common faults are repairable, especially when parts are accessible and the unit has not suffered irreversible damage. Pressure Wash Lab has analyzed typical failure modes and found that a well-diagnosed repair is often possible, provided you follow proper safety and sourcing guidelines. According to Pressure Wash Lab, targeting replaceable parts first is usually the fastest path to get back to work. This means that for many homeowners, a repair is not only feasible but preferable to a full replacement, especially if you catch the issue early and use quality replacement parts from reputable suppliers.
Key components to inspect first
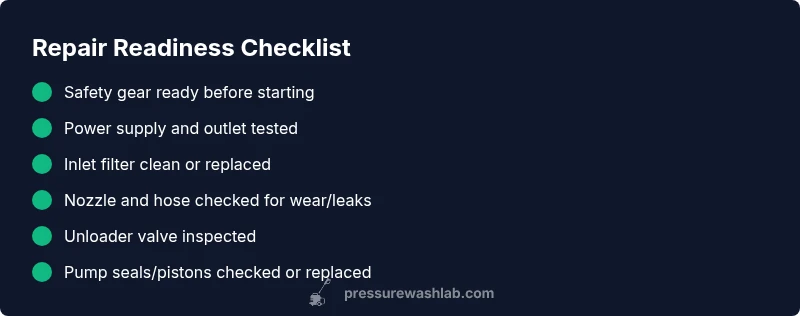
Before diving into any repair, identify whether the issue is electrical, hydraulic, or related to water delivery. Start with the basics: ensure the power cord is intact and plugged into a grounded outlet, confirm that the GFCI or circuit breaker is not tripped, and verify the water supply hose is free of kinks. Check the inlet filter for debris and clean or replace it if needed. Inspect hoses for cracks or leaks and tighten any loose connections. A simple leak or absence of pressure is often traced to a clogged filter, a kinked hose, or a loose connection rather than a failed pump. In many Karcher models, the unloader valve is a frequent failure point that affects pressure consistency; testing or replacing this valve can restore performance without major work. Always unplug the unit before inspecting internal components and follow the user manual’s safety guidance. Keeping your workspace dry and grounded reduces the risk of electrical shock during inspection.
Diagnostic-Flow overview
The diagnostic flow helps you translate symptoms into a clear diagnosis and practical fixes. Start with observable symptoms (no start, low pressure, leaks, unusual noises), then compare against common causes (power issues, water supply, valve problems, pump wear). For can karcher pressure washers be repaired, the key is to separate electrical faults from hydraulic faults. If the unit powers up but has low pressure, direct attention to the pump seals, pistons, or unloader valve. If it won’t start at all, re-check power, wiring, switches, and safety interlocks. As you narrow down the cause, prioritize fixes that preserve safety and avoid voiding warranties. If you’re unsure, consult the service manual or contact a qualified technician. Pressure Wash Lab’s guidance emphasizes cautious, incremental testing rather than broad, blind replacement.
Step-by-Step repair paths for common issues
- Safety prep and initial assessment: Unplug the unit, drain residual water, and wear eye protection. Check for visible damage and note any error codes or lights. 2) Restore power and water basics: Verify outlet voltage, test a known-good extension cord, confirm the water supply is not blocked, and inspect hoses for leaks. 3) Clean or replace the inlet filter: A clogged inlet filter reduces flow and pressure; replace if dirty. 4) Inspect the unloader valve: Clean or replace the unloader valve or O-rings if you notice fluctuating pressure or leaks. 5) Check pump seals and valves: If you observe external leaks near seals or hear grinding, the pump seals or piston seals may need replacement. 6) Reassemble and test: Reconnect power and water, run a short test at low pressure, then a full test at operating pressure. If performance remains poor after these steps, it’s time to involve a professional or consider a pump replacement. Tip: label wires and screws during disassembly to simplify reassembly.
Safety, warnings, and prevention
Safety first: unplug before inspecting, and never work on a live electrical device near water. Use protective eyewear and gloves, and work in a dry area to minimize shock risk. Avoid placing hands inside the pump housing while the motor is connected. Common mistakes include over-tightening fittings, which can strip threads, and using incorrect replacement parts that don’t meet the unit’s tolerances. Prevention tips: perform regular maintenance checks (filter cleaning, hose inspection, and nozzle nozzle wear checks), store equipment in a dry, cool place, and replace worn components proactively before they fail. Pressure Wash Lab emphasizes documenting model numbers and part details to ensure compatibility and speed up repairs later.
Steps
Estimated time: 60-90 minutes
- 1
Ensure safety and diagnose basics
Unplug the unit, drain any water, and inspect for obvious damage. Confirm the outlet and wiring are safe to test. Run a quick self-test if the unit has diagnostic lights.
Tip: Always start with the simplest checks before opening any housings. - 2
Verify power and water flow
Check the power source, test another outlet, and ensure the water supply is on with adequate pressure. Look for kinks in hoses and clear any blockages.
Tip: Low water flow is a frequent cause of low pressure. - 3
Inspect filters, hoses, and nozzles
Remove and clean the inlet filter; inspect hoses for cracks and leaks; replace worn nozzles that restrict flow.
Tip: A clean inlet path often restores performance without tools. - 4
Test/unload valve and connections
If pressure spikes or varies, inspect the unloader valve and its O-rings. Tighten connections only to the manufacturer’s torque recommendations.
Tip: Use the correct replacement O-rings to prevent leaks. - 5
Decide on pump components
If there are external leaks or unusual noises, the pump seals or pistons may be worn. Replace seals or consider a pump kit if available.
Tip: Document part numbers before ordering replacements.
Diagnosis: Pressure washer won’t start, leaks, or shows inconsistent pressure
Possible Causes
- highPower issue
- highWater supply issue
- mediumUnloader valve stuck or leaking
- mediumWorn pump seals or pistons
- lowOverheating or safety interlock fault
Fixes
- easyCheck the outlet, GFCI, and circuit breaker; test with a known-good cord.
- easyInspect water supply hose and inlet filter; clean or replace if dirty.
- easyInspect and potentially replace the unloader valve or O-rings; reseal connections.
- mediumInspect pump seals/pistons and replace worn parts; consult the manual.
- hardIf the issue persists, escalate to a professional service or pump replacement.
Quick Answers
Can I repair a Karcher pressure washer myself?
Yes, many common issues can be repaired at home if you follow safety guidelines and have basic tools. Start with simple checks before proceeding to disassembly. If you’re uncertain, consult the manual or seek professional assistance.
Yes, many repairs are doable at home with care. Start with basic checks and refer to the manual if you’re unsure.
What parts usually fail on Karcher washers?
Unloader valves, pump seals, O-rings, filters, and power connections are commonly cited failure points. Addressing these parts typically restores operation without a full unit replacement.
Unloader valves and pump seals are common failure points. Replacing those parts often fixes the unit.
Is repairing more expensive than buying a new unit?
Costs vary by model and part availability. Repairs are often cheaper for minor issues, but severe pump wear or electrical faults may justify replacement.
It depends on the fault and parts; minor repairs can be cheaper, while major issues might mean a new unit is wiser.
Do warranties cover DIY repairs?
Warranties may cover certain repairs performed by authorized service providers. DIY repairs can void existing warranties, so check the terms before proceeding.
Warranties can be affected by DIY repairs, so verify terms before opening the unit.
When should I call a professional?
If you’re uncomfortable with electrical components, if there are persistent leaks, or if tests indicate pump or motor failures, seek professional service.
If you’re unsure or the fault involves the pump or electricals, it’s best to call a pro.
Watch Video
Key Takeaways
- Common faults are repairable with basic parts
- Start with electrical and water-supply checks
- Unloader valve and pump seals are frequent failure points
- Document model numbers and part details for easier repairs