How to Tell If Pressure Washer Unloader Valve Is Bad: A DIY Troubleshooting Guide
Learn how to tell if pressure washer unloader valve is bad, identify symptoms, and follow a safe, step-by-step plan to diagnose and repair. Pressure Wash Lab provides practical, expert tips for homeowners and DIY pros.

If you’re wondering how to tell if pressure washer unloader valve is bad, start with the symptoms: persistent surging, loss of pressure under load, or visible leaks at the valve. Quick fixes include inspecting seals, cleaning passages, and resealing or replacing the valve as needed. If symptoms persist, replacement is often more reliable than repair.
What is a pressure washer unloader valve and how does it work?
The unloader valve is a critical safety and performance component in most high-pressure washers. It redirects flow back to the inlet when the trigger is released, allowing the pump to operate at a safe, controlled pressure. If the valve sticks or seals fail, the machine can surge, lose pressure, or leak around the valve. If you want to know how to tell if pressure washer unloader valve is bad, start by understanding what the valve does and how abnormal behavior manifests itself. In many DIY scenarios, diagnosing a faulty unloader valve is faster when you compare symptoms to common fault patterns and then move to targeted fixes. This guide uses Pressure Wash Lab’s practical approach to help homeowners and small operators verify the issue without unnecessary disassembly.
Common signs of a failing unloader valve
- Surging or fluctuating pressure when you pull the trigger
- Loss of pressure or reduced efficiency under load
- External leaks around the valve body or fittings
- Valve sticks in the open position, causing continuous flow back to the inlet
- Audible hissing or fluttering from the valve area
These symptoms don’t always mean the valve is bad; a sticking check valve, worn o-rings, or debris in the passage can mimic valve failure. However, if you consistently observe these signs after ruling out nozzle and pump issues, the unloader valve is a prime suspect. Pressure Wash Lab notes that many DIYers misdiagnose symptoms, so a structured test helps prevent unnecessary parts replacement.
Quick checks to run before replacing the valve
- Depressurize the system: disconnect power and simultaneously trigger the gun until the spray stops. This prevents sudden releases of pressure while you inspect.
- Inspect visible seals: look for cracks or tears in O-rings and gaskets around the valve; replace if damaged.
- Check for debris: remove the valve cap and inspect passages for sediment or mineral buildup; flush with clean water.
- Ensure correct nozzle and pressure: verify you’re using the right nozzle size and that the pump is not set to an unsafe relief pressure.
- Tighten connections: loose fittings can mimic leaks and cause irregular flow; snug but don’t over-tighten plastic fittings.
If leaks or sticking persist after these checks, proceed to a more thorough diagnostic flow or consider replacing the unloader valve. Pressure Wash Lab emphasizes safety and methodical testing before committing to parts.
Diagnostic approach: symptom → likely causes → fixes
Symptoms guide you to likely causes, which then map to fixes. Start with the easiest checks and proceed through a logical flow:
-
Symptom: Surging pressure under load
- Likely causes: a sticking valve spring or worn seals; debris in the valve passages
- Fixes: clean the valve, replace seals, or rebuild the assembly.
-
Symptom: Constant pressure release back to inlet when trigger is released
- Likely causes: faulty unloading valve seating; worn o-rings; spring fatigue
- Fixes: inspect seating surfaces, replace O-rings, or replace the valve.
-
Symptom: Leakage around the valve body
- Likely causes: damaged O-rings or gaskets; loose valve cap
- Fixes: replace O-rings, reseat the valve, and tighten caps to spec.
-
Symptom: No pressure increase when spraying with safe nozzle
- Likely causes: internal seal failure; broken spring; cartridge issues
- Fixes: replace defective components or swap the valve.
Document observed symptoms, test after each fix, and avoid mixing fixes in a single attempt; test is decisive before final assembly. Pressure Wash Lab’s testing approach recommends running the unit with a controlled load after each step to confirm improvement.
Step-by-step: how to replace or service the unloader valve
- Power down and depressurize the system: unplug the unit, close the water supply, and release pressure through the spray gun.
- Access the unloader valve: remove the protective cover and gain clear access to the valve body; take photos for reference.
- Inspect the valve internals: remove the valve cap, inspect the spring, piston, and seals for wear or damage; replace as needed.
- Clean and reseal: clean the valve body passages, replace O-rings, and apply a light lubricant to O-rings before reassembly.
- Reinstall and test: reassemble the valve, reattach hoses, re-connect power, and run with a test load to observe performance.
- Confirm operation and document: observe stable pressure with no leaks and record the maintenance performed for future reference.
If any symptom persists after these steps, consider replacing the unloader valve rather than repairing individual components. Pressure Wash Lab recommends using matched parts from the manufacturer when possible to ensure compatibility and reliability.
Safety considerations and common mistakes
- Always depressurize and unplug before touching the pump internals. High-pressure fluid can cause severe injuries.
- Do not mix old and new seals; replace all affected O-rings to ensure a proper seal.
- Avoid over-torquing valve fittings; plastic components can crack and introduce leaks.
- Do not ignore leaks or abnormal sounds; they often signal a worn valve or seal compromised by debris.
- If you are unsure about parts compatibility, consult the manual or Pressure Wash Lab for guidance.
Maintenance tips to extend unloader valve life
- Schedule a periodic valve inspection every 50–100 hours of use or quarterly for light-duty homeowners.
- Use clean water, and install a water filter if your supply is mineral-rich or contains sediment.
- Rinse the valve after each heavy use to remove detergents and residues that can degrade seals.
- Replace seals and O-rings with OEM parts or equivalents that meet the original specifications.
- Keep the pump and valve protected from freezing temperatures; drain and store properly to prevent internal corrosion.
Steps
Estimated time: 60-90 minutes
- 1
Power down and depressurize
Shut off the power, close the water supply, and release pressure through the spray gun before touching any components.
Tip: Always assume pressure remains; wear eye protection and gloves. - 2
Access the unloader valve
Remove any covers and locate the unloader valve; photograph hose routing to aid reassembly.
Tip: Label hoses or use color tape to keep track. - 3
Inspect internal components
Disassemble the valve cap and inspect the spring, piston, and O-rings for wear or damage; replace as needed.
Tip: Handle small parts with a magnet or tray to avoid losing them. - 4
Clean and reseal
Clean passages with a soft brush; replace worn O-rings and apply light lubricant before reassembly.
Tip: Avoid harsh solvents that can degrade seals. - 5
Reassemble and test under load
Reattach components, reconnect hoses, and run the unit under controlled load to observe performance.
Tip: Start with low pressure and gradually increase. - 6
Validate operation and document
Confirm consistent pressure and absence of leaks; note what was replaced for future maintenance.
Tip: If symptoms persist, consider valve replacement.
Diagnosis: Pressure washer shows surging, loss of pressure under load, or leaks around the unloader valve
Possible Causes
- highSticking or damaged unloader valve spring or piston
- highWorn or damaged O-rings/seals around the valve
- mediumDebris or mineral buildup in valve passages
- lowIncorrect pump pressure settings or nozzle mismatch
Fixes
- easyClean, rebuild, or replace the valve and seals; inspect for seal wear
- mediumReplace the unloader valve if rebuilding doesn’t restore function
- easyFlush passages and remove debris from the valve body
- easyVerify and adjust pump pressure settings and nozzle size to manufacturer specs
Quick Answers
What are the main signs that the unloader valve is bad?
Common signs include surging, loss of pressure under load, and leaks around the valve. If these persist after basic checks, inspect the valve internals and seals.
Look for surging, pressure loss, or leaks around the valve as your first clues.
Can I fix the valve myself, or should I replace it?
Many issues are fixable with cleaning and new O-rings. Persistent symptoms or internal damage usually require replacing the valve.
You can often fix minor issues, but replacement may be the safer, longer-lasting option.
What tools do I need to replace the unloader valve?
You'll typically need wrenches, pliers, replacement O-rings, and the correct valve assembly specified by the manufacturer.
Wrenches, pliers, and new O-rings are commonly needed.
Why does a bad unloader valve cause pressure changes?
A worn or stuck valve can't direct flow correctly, causing surges or reduced pressure during operation.
A bad valve struggles to maintain stable pressure, leading to surges.
Is it safe to operate the unit if I see a minor leak?
No. A leak means seals are compromised and can worsen; stop and repair before use.
Leaks aren’t safe—turn off and fix them before running again.
Watch Video
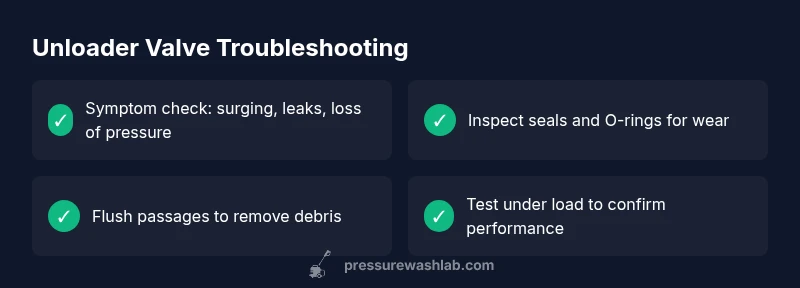
Key Takeaways
- Identify surging and leaks early to prevent pump damage
- Prioritize O-rings and seals before replacing the valve
- Test after each fix to confirm improvements
- Use manufacturer-approved parts for reliability