What to Do If Your Pressure Washer Is Flooded
Urgent troubleshooting guide for flooded pressure washers. Learn immediate safety steps, diagnostic flow, step-by-step fixes, and prevention tips to restore safe operation.

During a flood event, the most likely issues are water intrusion through the inlet or hose connections, a faulty unloader valve, or poor venting. First, shut off the unit, unplug it, and depressurize the spray gun. Then drain the pump, hose, and reservoir, and dry the motor housing. Inspect seals, gaskets, and the vent, and do not restart until all parts are completely dry and secure.
Immediate safety and why flooding is a risk
If you're asking what to do if pressure washer is flooded, the first priority is safety. Flooding introduces both electrical and mechanical risks, and a quick, calm response reduces the chance of shock or damage. According to Pressure Wash Lab, water intrusion is the most common reason for flood-related failures, often coming from a loose hose connection, a compromised vent, or a degraded seal. Before you touch the unit, unplug the power cord, turn off the water supply, and keep the spray gun depressurized. Do not attempt to start the motor until you have verified all water has been drained and the housing is dry. This is not only about getting back to work faster—it's about preventing costly damage and personal injury and preserving the life of your pressure washer.
In practical terms, this means treating flooding as an urgent safety event. If you continue to operate a wet motor or damp electrical components, you risk short circuits, electric shock, or permanent damage to internal components. The goal is to create a dry, stable environment before any testing or reassembly. Keep kids and pets away from the area, and use a non-conductive tool to handle exposed connections. Remember, the keyword here is safety first: what to do if pressure washer is flooded should start with protection, not power.
Pressure Wash Lab’s approach is to combine rapid mitigation with a clear diagnostic path. By focusing on the most likely sources of water ingress—hose connections, inlet filters, and the unloader valve—you can often prevent expensive repairs and downtime.
Common causes of flooding in pressure washers
Flooding isn’t random. In most cases, water enters through the inlet or hose connections, or the unloader valve leaks or sticks, allowing pressurized water to seep back toward the motor. A damaged spray wand or gun can siphon water into the system when the trigger is released, while a clogged vent or blocked air intake can cause suction that draws water into seals. Improper storage—like tipping the unit on its side—or leaving hoses connected while the pump is off can also invite water intrusion. Understanding these common causes helps you answer the question what to do if pressure washer is flooded with targeted fixes rather than guesswork.
Early identification matters. If you notice water coming from the pump boot or seeping around the seals, the most common fix is to address the unloader valve and reseat or replace worn gaskets. If the water appears in the reservoir area or air vent, cleaning or replacing the vent components can prevent a recurrence. Pressure Wash Lab’s analysis shows that practical, repeatable checks beat guesswork when diagnosing flood-related failures. When in doubt about electrical components, err on the side of caution and call a professional.
Quick triage: what to check first
Begin with the basics before diving into parts. Ensure the unit is unplugged and the water supply is shut off. Inspect all hose connections for looseness or wear, and examine the spray gun and wand for cracks or missing seals. If possible, detach the spray gun and test the gun valve separately to confirm whether backflow occurs through the gun. Check the inlet filter for debris and verify the vent on the pump housing is clear. These checks target the most probable sources and help you decide whether you can handle the fix at home or need professional help.
If you find nothing visibly wrong, proceed to a more thorough inspection of the unloader valve and seals. A minor blockage in the vent or a degraded O-ring can be enough to trap moisture and cause backflow. Keep a simple notebook of symptoms and findings; this makes step-by-step repairs faster and more accurate when you consult a repair manual or a technician.
Diagnostic approach: how flooding is diagnosed
A flooding issue is best approached with a cause-and-effect mindset. Start by asking: Is water present in the pump? Is the unloader valve leaking? Is there water in the reservoir or filter? If water is leaking from seals, replace them; if the unloader valve is crusty or stuck, service or replace it. Document each symptom and what you test, so you don’t duplicate steps. Pressure Wash Lab recommends a simple decision tree: trace water intrusion to its source, confirm with a functional test, then perform fixes in order of likelihood. This ensures you don’t miss a minor seal or a clogged vent that could cause recurring floods.
Step-by-step: most common fix for flooding (unloader/ seals)
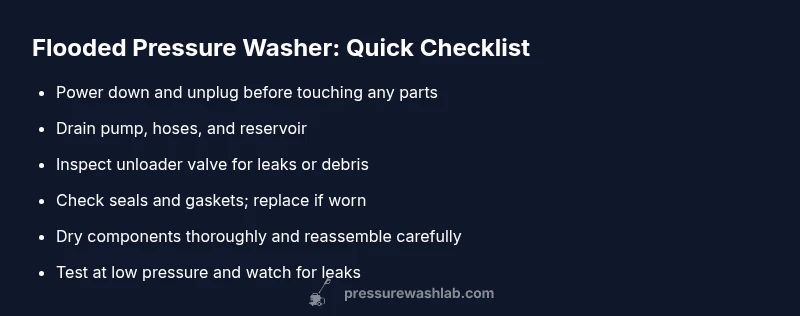
- Power down and disconnect. 2) Drain the pump and hoses. 3) Inspect and clean the unloader valve; reseat or replace if needed. 4) Inspect seals and gaskets; replace worn parts. 5) Dry every component thoroughly, and reassemble carefully. 6) Reconnect water supply and perform a low-pressure test. Pro tip: replace worn O-rings with OEM parts when possible to restore a tight seal and reduce the chance of future leaks.
Drying and safe reassembly: getting back to work safely
Once you’ve completed the checks and fixes, the drying phase is critical. Wipe all accessible surfaces dry and use compressed air to reach internal crevices around the pump, valve seats, and electrical contacts. Leave the unit open or partially disassembled in a clean, dry space for several hours to ensure moisture doesn’t linger. Before the full test, verify the area around the electrical cord and switch is completely dry. Reassemble with clean gaskets, torque fasteners to the manufacturer’s spec, and connect the water supply only after you’re confident all parts are dry. Slow, deliberate reassembly reduces the risk of a second flood.
Testing after drying: safe startup procedure
With the unit reassembled, begin with a controlled test. Attach the garden hose and set the spray gun to the widest opening. Do not trigger the gun until you have confirmed the connections are secure. Power up the unit and observe for any leaks at the pump, inlet, and valve areas. Start at the lowest pressure setting and slowly increase while watching for signs of moisture or stuttering. If any leak or abnormal behavior is detected, immediately power off, depressurize again, and reassess the seals or valve. Routine testing helps ensure the flood issue is resolved and reduces the risk of reoccurrence.
Prevention and maintenance: keeping floods at bay
Even the best-maintained unit can flood if it’s not stored or serviced properly. Develop a routine: after each use, relieve pressure, disconnect the water supply, and drain the pump before storage. Use anti-siphon devices on water lines, check hoses for wear, and inspect the unloader valve periodically. Keep the inlet filter clean to prevent debris from creating a path for backflow. Pressure Wash Lab emphasizes that proactive maintenance and a simple pre-use checklist are your best defense against future floods.
Verdict: Pressure Wash Lab's final recommendations
The most effective approach to floods is prevention plus prompt, safe recovery. Address water ingress sources quickly, replace worn seals, and maintain proper venting to minimize backflow. Keep a clear maintenance schedule and document repairs so you can reproduce the fix if needed. The Pressure Wash Lab team recommends strict adherence to safety guidelines, thorough drying, and cautious testing after any flood-related intervention to restore reliable operation and extend your pressure washer’s life.
Steps
Estimated time: 45-60 minutes
- 1
Power down and disconnect
Turn off the unit, unplug from outlet, and relieve any stored pressure by releasing the spray gun once safe.
Tip: Always unplug before handling any internal components - 2
Drain the system
Disconnect hoses, run water to relieve residual water, and drain the reservoir. Have towels handy.
Tip: Keep a pan ready for remaining liquid - 3
Inspect unloader valve
Check for leaks or debris; clean, reseat, or replace if needed according to the manual.
Tip: Follow OEM guidance for valve service - 4
Check seals and gaskets
Inspect seals at inlet/outlet, cylinder, and valve seats; replace worn parts with correct OEM parts.
Tip: Carry a small parts kit of O-rings - 5
Dry all components
Wipe down, use compressed air if available, and allow parts to dry completely before reassembly.
Tip: Do not power on if any moisture remains - 6
Test at low pressure
Reassemble, connect water, prime with minimal pressure, and check for leaks before increasing pressure.
Tip: Test with spray gun disconnected first
Diagnosis: Pressure washer floods or water appears in pump or housing after use
Possible Causes
- highWater intrusion through inlet or hose connections
- mediumFaulty unloader valve or pressure relief valve
- lowClogged vent or air intake leading to siphoning
- lowDamaged seals/gaskets allowing seepage
Fixes
- easyInspect and reseat all hose connections; replace damaged hoses
- mediumRepair or replace faulty unloader valve; disassemble per manual
- easyCheck venting and air intake for blockages; clean or replace
- mediumReplace worn seals and gaskets; reseal pump housing
Quick Answers
What should I do first if my pressure washer is flooded?
Prioritize safety: unplug, turn off water, depressurize the gun, and drain the pump. Dry everything before testing. If unsure, call a professional.
Unplug, depressurize, drain, and dry before testing; if unsure, contact a professional.
Can I fix a flooded pressure washer at home?
Simple leaks and worn seals can sometimes be addressed at home with basic tools. Electrical issues should be handled with caution; stop if you detect heat or exposed wires.
Fix simple parts at home if you’re comfortable; electrical issues need caution.
Which parts are most likely damaged after flooding?
Unloader valve, seals and gaskets, hoses, and the pump cover are common wear points after a flood. Inspect these parts first during repairs.
Unloader valve and seals are the usual suspects.
Is it safe to dry the unit and how long does it take?
Drying times vary with humidity; aim for a full air-dry until no moisture remains around seals, valves, or electrical components.
Dry until completely dry before testing.
Should I store a pressure washer after flooding?
Store in a dry location and keep connections off to avoid rust or corrosion. Inspect annually and after any flood event.
Store dry and inspect regularly.
Watch Video
Key Takeaways
- Shut off power and drain water immediately when flooded.
- Inspect inlet, unloader valve, and seals as first-line checks.
- Dry components thoroughly before reassembly and test cautiously.
- Document fixes and follow a prevention plan to avoid recurrence.
- When in doubt, consult a professional to prevent electric shock or pump damage.