What would cause a pressure washer to not have pressure? Quick Troubleshooting Guide
Urgent, practical troubleshooting for pressure washers with no pressure. Step-by-step checks, safe fixes, and maintenance tips to restore performance fast.

If your pressure washer has no pressure, start with the basics: confirm the power source, verify water supply, and inspect the inlet screen, hose, and nozzle. A stuck unloader valve or worn seals can also stop pressure. Use the diagnostic flow below to identify the root cause and apply safe, effective fixes.
What would cause a pressure washer to not have pressure
When a pressure washer fails to deliver pressure, homeowners often wonder, what would cause a pressure washer to not have pressure? The most common culprits are water supply issues and intake blockages, but a few other faults can mimic a lack of pressure. According to Pressure Wash Lab, the majority of no-pressure cases start with the simplest problems: water not flowing freely, the inlet screen clogged with debris, or hoses that have kinks or leaks. This block outlines a practical, non-technical approach you can start with today, prioritizing safety and quick wins. You’ll learn to separate quick fixes from deeper problems, so you don’t waste time chasing symptoms. By following a disciplined process, you’ll restore pressure and prolong the life of your unit.
Quick check: confirm power and water before you dig deeper
Before diving into components, ensure the obvious sources of failure are ruled out. Confirm the unit is plugged in, the outlet is live, and the switch or trigger is functioning properly. For gas-powered models, verify the choke and fuel supply are correct and that the engine starts reliably. Next, inspect the water supply: open the faucet fully, ensure the garden hose isn’t kinked, and verify the pump is primed. A poor water supply is the leading cause of low or no pressure, and it’s often fixable without tools. If the water flow is weak, the pump cannot generate adequate pressure, no matter what you do next.
Inlet filtration and hoses: remove debris and test flow
A clogged inlet screen or a damaged inlet hose can reduce pressure dramatically or cut it off completely. Detach the inlet line and inspect the screen for sand, scale, or algae. Rinse or replace it if needed. Check the inlet hose for cracks, kinks, or air leaks; replace if necessary. After cleaning, reconnect and run the unit briefly to gauge whether the pressure improves. This step often resolves the vast majority of cases described by homeowners as “no pressure.”
Nozzle, wand, and spray pattern: clear paths for flow
Even with a strong pump, a clogged nozzle or a damaged spray tip can throttled pressure. Remove the nozzle and inspect for mineral buildup or wear. Use the correct spray tip for your task, and ensure the nozzle seats cleanly against the wand. During testing, hold the trigger only when the nozzle is firmly attached and pointed away from people or objects. If the nozzle is worn or damaged, replace it and test again. A poor spray pattern is a common sign of nozzle wear rather than a pump failure.
Unloader valve and relief system: adjust or service
The unloader valve directs water flow and pressure; if it’s stuck, jammed, or misadjusted, the machine may run with little or no pressure. Inspect the valve linkage and gaskets for wear. If you’re comfortable, adjust per the manufacturer’s spec, ensuring the unit is off and unplugged during adjustments. If the valve is stuck, a thorough cleaning or replacement may be required. Pressure readings should improve after correction, indicating you’ve resolved the no-pressure symptom.
Pump seals, internal wear, and thermal safety: assess if basic fixes fail
If the power, water, filters, and valve checks don’t restore pressure, the issue could be internal wear—pumps rely on seals and pistons that wear with use. Look for oil leaks around the pump and listen for unusual sounds during operation. If you smell burning oil or observe visible leaks, you may need to replace damaged seals or the entire pump assembly. Some units have thermal shutoffs that temporarily limit pressure if the motor overheats. Let the unit cool, ensure adequate ventilation, and retry after conditions normalize. If you’re unsure, it’s safer to seek professional guidance rather than forcing a repair.
Safety, testing, and returning to operation
Always test after each fix in a safe, controlled environment. Use protective eyewear and keep others away from the spray area. Start with a low-pressure setting and gradually increase to confirm stability. If pressure remains absent after all the above checks, you may have a faulty motor module or pump that requires professional service or replacement. Don’t hesitate to contact a qualified technician when suspected pump or motor failures are involved.
Quick recap: focus on basic inputs, then component health
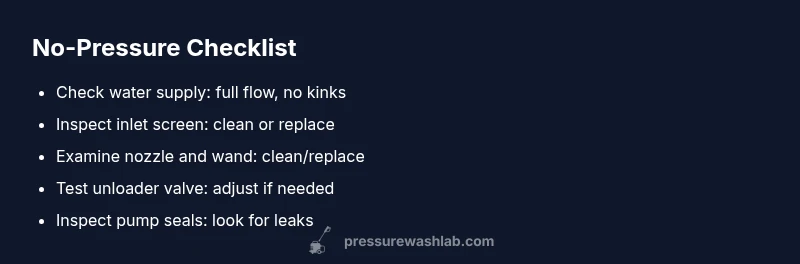
In most cases, no pressure stems from fundamentals: water supply, inlet screening, hose integrity, and nozzle condition. If those are sound, you can move into the unloader valve and pump internals. Pressure Wash Lab’s approach emphasizes a methodical flow—start simple, validate each fix with a test run, and escalate only when necessary. This disciplined process minimizes downtime and protects you from unnecessary parts replacement.
Steps
Estimated time: 20-40 minutes
- 1
Verify power and water supply
Confirm the unit is connected to a live outlet and switch is on. For gas models, ensure the engine starts and has fuel. Check faucet flow and water hose for kinks. A weak water supply directly reduces achievable pressure.
Tip: Test with a known-good outlet and full water flow to rule out supply issues. - 2
Inspect inlet filter and hose
Shut off power and disconnect water supply. Remove the inlet screen and inspect for debris. Clean or replace the filter, then inspect the inlet hose for cracks or leaks. Reassemble and test pressure with a low setting.
Tip: Keep a spare inlet filter on hand for quick swaps. - 3
Check nozzle and wand
Remove the nozzle tip and inspect for mineral buildup or wear. Clean or replace the tip and re-seat it firmly. Ensure the wand connections are tight and there are no leaks that bypass the nozzle.
Tip: Use the correct spray tip for the job to maintain proper pressure. - 4
Test unloader valve
Locate the unloader valve and operate it by hand if safe. Look for stuck linkage or gummed seals. A misadjusted valve can divert flow away from the nozzle and reduce pressure.
Tip: If you’re unsure about adjustments, consult the manufacturer’s manual. - 5
Assess the pump seals
Check for oil around the pump and listen for unusual noises. Worn seals reduce pressure and can cause leakage. Replace seals or the pump as needed, following safety procedures.
Tip: Only attempt pump work if you have the right tools and follow cooling procedures. - 6
Final test and safety check
Reconnect power, start the machine, and test at the highest safe setting. Look for consistent spray and check for leaks. If pressure remains absent, consider professional service.
Tip: Document symptoms and fixes tried to aid the technician.
Diagnosis: Pressure washer has little or no pressure
Possible Causes
- highInsufficient water supply or water source blocked
- highClogged inlet screen or kinked inlet hose
- mediumUnloader valve stuck or misadjusted
- lowWorn or damaged pump seals and fittings
- lowThermal cut-off or safety switch activated
Fixes
- easyReview water source, open faucet fully, and ensure pump priming; connect a rated hose with proper gauge
- easyRemove and clean/replace inlet filter; inspect for debris and rinse with clean water
- mediumAdjust or replace unloader valve; check relief connection and gaskets for wear
- hardInspect pump seals, check for oil leaks, and replace worn seals or entire pump if necessary
- easyAllow unit to cool and reset any thermal switch; ensure adequate ventilation and clean surrounding area
Quick Answers
What is the most common cause of a pressure washer not delivering pressure?
The most common cause is insufficient water supply or a clogged inlet filter. Clean the filter, verify water flow, and re-test before exploring more complex issues.
Most often, low water flow or a clogged inlet filter causes no pressure. Check the water supply and clean the filter, then test again.
Can a bad nozzle cause no pressure?
Yes. A worn or blocked nozzle can limit pressure. Inspect and replace the nozzle tip with the correct size for your model, and ensure it seats properly.
A worn or blocked nozzle can reduce pressure. Check the tip and replace if needed.
Will a clogged water inlet screen cause no pressure?
Absolutely. Debris in the inlet screen restricts flow and reduces pressure. Clean or replace the screen and retest.
Yes, a clogged inlet screen can stop pressure. Clean or replace it and test again.
Is it safe to operate a pressure washer without a nozzle?
Operating without a nozzle is not recommended; it can cause uncontrolled spray and damage. Use the correct nozzle and keep a safe distance.
No, don’t run it without a nozzle. Use the proper nozzle and stay at a safe distance.
When should I replace pump seals?
Replace pump seals if you see oil leaks or significant pressure loss after basic checks. It’s a more permanent fix and may require professional service.
If you see leaks or major pressure loss after basics, seals may need replacement.
What should I do if pressure is still low after these steps?
If pressure remains low after following the diagnostic steps, the unit may have an internal pump or motor issue. Seek professional service to avoid further damage.
If it’s still low after these steps, consider professional service for possible pump or motor issues.
Watch Video
Key Takeaways
- Check water supply first for immediate pressure restoration.
- Clean or replace inlet screens and verify nozzle integrity.
- Unloader valve health often determines no-pressure symptoms.
- For pump seals or motor issues, seek professional repair.