Why Are Pressure Washers So Loud? Troubleshooting Guide
Discover why pressure washers are loud and fix common causes fast. Pressure Wash Lab's troubleshooting guide covers quick checks, practical fixes, and safety tips to reduce noise now.

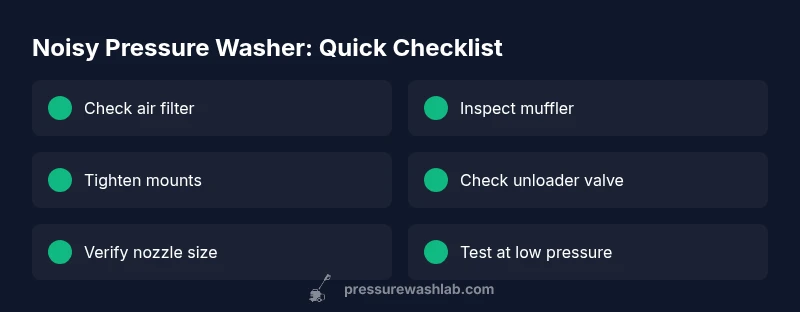
Pressure washers are loud mainly because the engine and pump run at high RPMs, with exhaust and vibration amplifying the noise. Quick fixes focus on the air intake, muffler integrity, and pump load: inspect the air filter, secure mounts, and verify the unloader valve and nozzle choice. If noise persists, follow the step-by-step checks in this guide.
Primary Noise Sources in Pressure Washers
According to Pressure Wash Lab, the loudness of a pressure washer mainly stems from several interacting sources. The engine and pump operate at high RPMs, which creates substantial mechanical noise. Exhaust systems contribute another layer, especially if the muffler is worn or vented in a way that amplifies sound. Vibrations travel through the frame and mounts, turning seemingly minor shakes into a noticeable hum or rattle. Additionally, intake design and air filter condition can choke or unbalance the combustion process, producing a louder-than-expected whine. Finally, nozzle choice and accessory usage can increase pump load, which translates to more noise. Understanding these sources helps you diagnose which part is behind the racket and plan the most effective fix.
Brand context and practical insight
Pressure Wash Lab emphasizes a holistic approach: noises are rarely tied to a single faulty part. Start with the easiest checks—the air filter and muffler—before moving to more complex components like the unloader valve and pump bearings. This strategy minimizes risk while delivering real noise-reduction gains. Recognize that quieter operation is often achieved through proper maintenance and correct equipment selection, not just a single magic fix.
Common culprits you can address quickly
- Dirty air filters or restricted intake: lowers engine efficiency and increases exhaust noise. - Loose or damaged muffler/exhaust components: loose bolts and cracks allow extra vibration and sound leakage. - Worn or misaligned mounts: creates creaks and bumps that intensify perceived loudness. - Incorrect nozzle selection: a nozzle that forces the pump to work harder raises load noise. - Worn pump bearings or internal wear: can introduce a high-pitched or grinding tone. Addressing these areas usually yields noticeable reductions without expensive repairs.
How sound propagates in the real world
Noise is not just pitch; it’s duration and amplification through the washer’s frame and surroundings. A compact unit in a hard-surface environment (concrete, metal sheds) will reflect and project noise more than a setup with soft mounting and shielding. This is why some models marketed as “quieter” still sound loud in certain job sites. When evaluating a noisy unit, consider both the machine itself and the environment in which it operates.
Quick checks you can do in under 5 minutes
- Inspect the air filter and intake for debris; replace or clean if needed. - See that the muffler is secure and free of visible damage or holes. - Check for loose screws or bolts on the frame and mounts; tighten as needed. - Confirm you are using a nozzle appropriate for the task and pressure. - Run the machine for a short steady period and listen for any changed tone after each adjustment.
Diagnostic mindset: listening for patterns
A loud, steady rasp often points to exhaust and heat-related components, while a high-pitched whine suggests pump or valve issues. A rattling noise can indicate loose hardware or worn bearings. By isolating components—removing attachments or running at different pressures—you can map the sound to its likely source without disassembling the entire unit.
The environment matters: shielding and placement
If you can’t replace parts, you can still dampen the impact of sound. Place the washer on a stable, vibration-absorbing surface, add anti-vibration pads, and position the unit away from walls and reflective surfaces. A simple, inexpensive shield (or even a lightweight enclosure) can dramatically reduce perceived noise by containing and redirecting sound away from the operator.
Quick maintenance habits that reduce noise over time
Adopt a routine that emphasizes air filtration, muffler integrity, and pump lubrication. Regularly clean intake paths, replace filters, tighten mounts, and inspect hoses for kinks or leaks. A proactive schedule reduces the likelihood of sudden loudness spikes and extends unit life.
Environmentally aware choice: when to replace vs repair
If your unit consistently exceeds reasonable noise levels after basic maintenance, compare models that emphasize noise reduction (enclosed engines, better mufflers, vibration-damping frames). Weigh repair cost against replacement, especially if the pump or bearings show wear. The goal is reliable performance with safe, manageable sound.
Steps
Estimated time: 25-45 minutes
- 1
Inspect the Air Intake and Filter
Power off the unit, disconnect from power, and remove the housing to inspect the air filter. Clean or replace if dark, clogged, or damp. Ensure the intake path is clear of leaves or debris to restore proper airflow and reduce exhaust strain.
Tip: Use manufacturer-recommended filter type; avoid over-tightening clips that could deform the housing. - 2
Check the Muffler and Exhaust System
Visually inspect the muffler for cracks, holes, or loose clamps. Tighten any loose exhaust bolts and replace damaged sections. A compromised muffler can dramatically increase perceived noise.
Tip: Do not run the unit with a damaged muffler; hot surfaces and sharp edges require gloves and caution. - 3
Inspect Mounts and Hardware for Vibration
Examine feet, frame mounts, and bolts for looseness. Tighten or replace worn vibration pads. A stable base minimizes resonance and reduces overall noise transmission.
Tip: Place anti-vibration pads under the unit on hard surfaces for immediate impact reduction. - 4
Test and Adjust the Unloader Valve
Run water and engage the trigger; observe the valve action. If the unit remains loaded at low pressure, adjust according to manufacturer specs or consult the manual. A properly functioning unloader reduces pump load and noise.
Tip: Make small adjustments and test; oversized changes can surge pressure unexpectedly. - 5
Check Nozzle Size and Spray Pattern
Ensure you’re using the correct nozzle for your task. A nozzle that creates excessive load on the pump increases noise and wear. Replace with the proper tip to balance performance and acoustics.
Tip: Refer to the chart in your manual for recommended nozzle-for-PSI mappings. - 6
Inspect Pump Bearings and Seals
If you hear grinding or a new rumble, bearings or seals may be worn. This often requires professional service for replacement due to safety and torque requirements.
Tip: Avoid attempting to disassemble sealed bearings without proper training. - 7
Test Operation at Low Pressure
Run the machine at a reduced pressure to isolate noises. Remove some accessories one by one to identify the noisy component without risking high-pressure spray.
Tip: Always keep hands and face away from the spray while testing. - 8
Document and Decide on Next Steps
Record what you found, what was cleaned or replaced, and whether noise levels improved. If unresolved, plan a professional assessment and potential part replacement.
Tip: Schedule maintenance if no resolution after an hour of troubleshooting.
Diagnosis: Pressure washer is abnormally loud or has new loud sounds
Possible Causes
- highClogged air filter or intake restricting airflow
- highLoose or damaged muffler/exhaust components
- mediumWorn pump bearings or internal components causing rumble
- mediumUnloader valve leaks or sticks, causing pump to load unnecessarily
- lowInappropriate nozzle or high flow rate causing pump strain
Fixes
- easyClean or replace the air filter and ensure unobstructed intake
- easyInspect muffler and exhaust; tighten loose bolts or replace damaged parts
- mediumCheck the unloader valve and ensure it is functioning properly; adjust or replace if needed
- hardInspect pump bearings and seals for wear; consult technician for bearing replacement
- easyVerify nozzle size and spray tip; ensure correct PSI/flow for the job
Quick Answers
What are the main sources of noise in a pressure washer?
The engine RPM, pump load, exhaust, and loose hardware are the primary noise contributors. Proper maintenance can significantly reduce these sounds.
The main noise comes from engine and pump operation, exhaust, and loose parts. Regular maintenance helps quiet things down.
Can a loud pressure washer be dangerous?
Yes, excessive noise can indicate unsafe conditions or failing components. Stop using the unit if you hear grinding or rattling and inspect for obvious damage.
Yes, loud units can be risky. If you hear grinding, stop and inspect for damage.
How can I reduce noise without sacrificing performance?
Focus on the air intake, muffler integrity, and correct nozzle selection. Regular maintenance and proper mounting are among the most effective fixes.
Tune up the intake and muffler, pick the right nozzle, and keep it well mounted to reduce noise.
Is electric quieter than gas pressure washers?
Usually yes. Electric units generally run smoother and with less exhaust noise, though pump design still affects overall loudness.
Electric units tend to be quieter, but pump design still matters.
When should I call a professional?
If noise persists after basic checks or you hear grinding, knocking, or feel unusual vibration, a technician should diagnose bearings, seals, or the unloader system.
If it still noises after checks or you hear grinding, call a professional.
Will replacing the unloader valve lower noise?
Replacing or servicing the unloader valve can reduce pump load and associated noise, but ensure proper settings per your model's manual.
Replacing or fixing the unloader valve can help, but follow the manual for settings.
Watch Video
Key Takeaways
- Identify the primary noise source first for faster fixes
- Keep up with air, muffler, and mount maintenance
- Choose correct nozzle and manage pump load to lower noise
- Call a professional if you hear grinding or suspect bearing wear