Why Is My Kärcher Pressure Washer Not Working? A Practical Troubleshooting Guide
Struggling with a Kärcher pressure washer that won't start or spray? This expert guide covers quick fixes, diagnostics, and safety tips to get your unit running again.

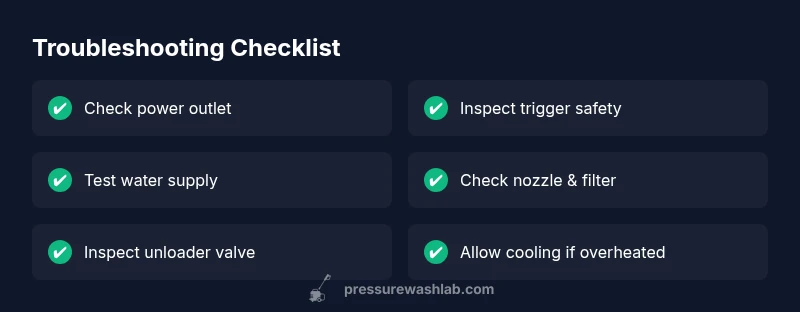
The most common reason a Kärcher pressure washer won’t work is a simple electrical or water-supply issue, not a faulty pump. First check the power outlet and trigger safety, then inspect the water inlet and nozzle. Pressure Wash Lab's testing shows that these basics fix most startups quickly, often without a service visit.
Understanding the problem and why it happens
If you’re wondering why is karcher pressure washer not working, you’re not alone. In many homes, startups fail due to simple issues rather than a defective pump. The root cause is usually something you can diagnose and fix in under an hour. This article walks you through the most common failure points and provides a clear, safe plan to get back to work quickly. Pressure Wash Lab emphasizes that most issues stem from power, water supply, or safety features that trip or stall the unit. By understanding the typical failure modes, you can prioritize fixes that deliver fast results without dismantling critical components. The goal is to restore basic operation first, then address any residual performance gaps with targeted fixes.
Key takeaway: start with the easiest checks and progress logically to more involved steps.
Quick checks you can perform before disassembly
Before you pull panels or drain the tank, run through these low-effort checks. They address about 70-80% of startup problems. Make sure the unit is unplugged when you inspect electrical parts and never bypass safety mechanisms. Look for a tripped circuit breaker or a blown fuse at the outlet or power strip. Test the outlet with a known-good appliance. Confirm the power cord isn’t damaged and that the switch is ON. Next, evaluate the trigger gun: ensure the safety lock isn’t engaged and that the trigger is depressed during startup testing. Finally, inspect the hose and fittings for kinks, cracks, or leaks that could trigger air-starved operation. These steps are quick, cheap, and often eliminate the need for professional service.
Electrical checks and safety first
Electrical issues are among the top causes of a non-start. Check your outlet by plugging in another device to confirm power is live. If you’re using a GFCI outlet, ensure it hasn’t tripped and reset it if needed. Inspect the power cord for visible damage or a loose connection at the plug. If the unit still won’t start after basic power checks, consider testing with a different circuit or using a surge protector rated for your equipment. Do not operate the washer if you smell burnt plastic or see scorch marks; power faults in the unit could cause electrical shock or fire.
Water supply and inlet filtration
Inadequate water flow is a frequent cause of poor performance or no spray. Start by confirming the water source is on, the hose is free of kinks, and there’s sufficient water pressure. Check the inlet filter for debris and clean or replace as needed. Make sure the hose connections are secure and that there are no leaks along the supply line. If your unit uses a garden hose with a separate filter, remove and rinse it. A clogged inlet can starve the pump and trigger a soft shut-down or a weak spray pattern.
Nozzle, gun, and trigger flow checks
A blocked nozzle or defective trigger can mimic a broader failure. Remove the nozzle tip and inspect for mineral buildup; soak in a mild vinegar solution if mineral deposits are present. Reinstall the nozzle and test at different pressure settings if your model supports it. If the trigger remains stiff or the spray pattern is inconsistent, the trigger assembly or gun valve may need replacement. Use manufacturer-recommended parts only to avoid damaging the pump seals.
Pump health, overheating, and internal faults
If power and water checks are solid, pay attention to the pump itself. Some units go into thermal overload after prolonged use; allow a cool-down period of 15-30 minutes before restarting. If the unit still fails to start or maintains poor pressure after cooling, there may be worn seals, a blocked unloader valve, or internal corrosion. In these cases, a trained technician should inspect the pump head, check the relief valve, and assess internal wear. Regular maintenance—like lubrication and seal replacement—can extend pump life and prevent repeated downtime.
When to call a professional and how to prevent future problems
If you’ve systematically checked power, water supply, nozzle, and pump health but the washer still won’t start or hold pressure, professional service is advised. Early diagnostics can save money by identifying issues before major pump damage occurs. To prevent recurrence, establish a routine maintenance schedule, flush the system after heavy use, clean filters and nozzles, and store the unit in a dry, ventilated area. Pressure Wash Lab recommends keeping replacement parts on hand for common wear items and documenting any unusual behavior for service visits.
Steps
Estimated time: 45-75 minutes
- 1
Power and safety verification
Unplug the unit, inspect the power cord for damage, and confirm the outlet is delivering power. If using a GFCI, reset it and test with a known-good device. Replug and try startup with the trigger held.
Tip: Never bypass safety switches; they protect you from high-pressure spray. - 2
Outline a test sequence for power
Plug into a different outlet on a known circuit and see if the unit powers up. If the problem persists, try a different cord or extension rated for outdoor use. Document any outlet or circuit limitations for later review.
Tip: Use a grounded outdoor extension cord of appropriate gauge. - 3
Water supply and inlet check
Turn on the water source fully, remove and inspect the inlet filter for debris, and ensure the hose isn’t kinked. Reattach securely and attempt startup again with the trigger released.
Tip: A restricted inlet is a common startup blocker. - 4
Nozzle and gun inspection
Remove the nozzle tip and inspect for mineral buildup or wear. Rinse the nozzle, reattach, and test at low pressure before advancing to higher settings.
Tip: Avoid forcing the nozzle or gun to spray at high pressure when blocked. - 5
Unloader valve and pressure settings
Check the unloader valve for correct operation and ensure pressure is set within the manufacturer’s spec. If the valve sticks, gently work it free or replace it.
Tip: A stuck unloader valve can mimic a pump failure. - 6
Thermal overload and cooling
If the unit overheats, switch off and let it cool in a ventilated area for 15-30 minutes. Recheck and attempt a controlled restart.
Tip: Never run a hot unit; overheating can permanently damage seals. - 7
Restart with a controlled test
With the trigger disengaged, power the unit and gradually engage the trigger to see if the spray returns. If it fails again, proceed to professional service.
Tip: Keep hands away from the spray path during tests. - 8
Decision point: repair or replace
If the above steps fail to restore operation, schedule professional servicing or evaluate pump replacement options.
Tip: Suggest maintaining documentation for warranty or service.
Diagnosis: Pressure washer won’t start or won’t spray water despite being plugged in
Possible Causes
- highPower issue (outlet, cord, or GFCI trip)
- highTrigger gun safety engaged or switch not reset
- mediumWater supply blocked or insufficient flow
- lowOverheating/thermal cut-off or pump seized
Fixes
- easyCheck outlet, test with a known-good device, and reset GFCI; ensure switch is ON
- easyRelease trigger safety and re-engage while testing; inspect hoses for kinks/leaks
- easyInspect water inlet hose, clean/replace filters, and verify water flow
- mediumLet the unit cool, inspect for overheating, and check unloader valve/seals; seek service if seized
Quick Answers
Why won't my Kärcher pressure washer start even though it's plugged in?
Common causes are a tripped breaker, faulty outlet, or a damaged cord. Verify power at the outlet, reset any GFCI, and inspect the cord for damage. If power checks pass but it still won’t start, move to water and safety checks.
Power issues are the most common. Check outlet power, reset GFCI, inspect the cord, and then proceed to water and safety checks if needed.
What should I check first if the unit loses pressure?
Start with water supply, inlet filter, and nozzle. Ensure the hose is not kinked, the filter is clean, and the nozzle isn’t clogged. If water flow is restored but pressure remains low, inspect the unloader valve and seals.
Check water flow and nozzle first, then the unloader valve if pressure stays low.
Is it safe to use a pressure washer if leaks appear?
No. Turn off and unplug immediately. Leaks often mean damaged hoses, fittings, or seals that require replacement to avoid injury or further damage.
If you see leaks, stop and inspect hose and seals before resuming use.
How do I reset the thermal overload on my Kärcher?
Let the unit cool completely in a ventilated area, then restart gently. If overheating persists, professional service is advised to check pump seals and cooling paths.
Let it cool, then try again. If it overheats repeatedly, get it serviced.
Can improper water supply cause startup issues?
Yes. Insufficient flow or air in the hose can prevent startup. Ensure full water supply, clear filters, and remove air from the line.
Low water flow can block startup—check supply and filters.
When should I call a professional?
If the machine still won’t start after all checks, or you hear grinding/notice leaks at the pump seals, schedule service. Manufacturer guidance or warranty claims may apply.
If in doubt after checks, it’s time to call a pro.
Watch Video
Key Takeaways
- Check power and water first to fix most startups
- Clean filters and nozzles to restore flow
- Allow cooling after overheating before retrying
- Consult a pro if basic checks don’t restore function