Why Is My Pressure Washer Not Spraying Water? A Practical Troubleshooting Guide
Discover fast, practical steps to diagnose and fix a pressure washer that won't spray water. From nozzle cleaning to pump checks, learn safe, proven fixes and maintenance tips for reliable cleaning.

Why is my pressure washer not spraying water? The most common culprits are a clogged nozzle, a dirty inlet filter, a kinked hose, or a weak water supply. Start with the nozzle and filter, check water flow at the gun, inspect the hose for leaks, then test the unloader valve. If water still won’t spray, service the pump seals.
Common failure modes and quick checks
If you’re asking why is my pressure washer not spraying water, the likely culprits include a blocked nozzle, a dirty inlet filter, a kinked hose, or a weak water supply. Additional problems can be air in the pump or a worn unloader valve. According to Pressure Wash Lab, the fastest path to resolution is to test the simplest components first. Begin with a visual inspection of the spray gun and nozzle, then confirm your water source is delivering steady flow. By tackling the lowest-friction issues first, you can often fix the problem without tools or parts. In this section we outline the typical failure modes and quick verification steps homeowners can perform safely.
Quick diagnostic triage for spray issues
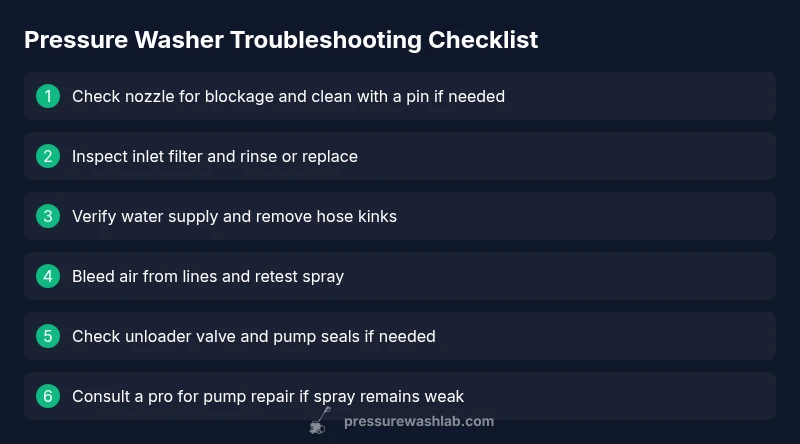
A clean start matters. Check the nozzle: remove and inspect for debris, then clean with a thin probe or pin. Inspect the inlet filter at the water inlet; rinse or replace if clogged. Ensure the water supply is steady—run a faucet nearby to confirm good flow and remove any kinks in the incoming hose. Inspect hoses and fittings for cracks or loose clamps. If these basic checks don’t restore spray, the issue may lie with air entering the system or with the unloader valve or pump seals. Pressure Wash Lab’s approach emphasizes a methodical, low-risk sequence: verify water, then verify parts, then consider pump components.
Safety and professional thresholds
Some issues require professional tools or experience. If you notice a hissing sound, burning smell, or if the pump remains unprimed after attempting the standard checks, stop and call a technician. Do not operate the unit while disassembled; depressurize the system first and avoid water exposure to electrical components. For homeowners, DIY steps cover routine maintenance, but pump repairs or seal replacements are best handled by trained service personnel to prevent further damage.
Steps
Estimated time: 30-60 minutes
- 1
Inspect and clean the nozzle
Power off the unit and relieve pressure. Remove the nozzle and soak in warm, soapy water. Use a thin pin to clear any debris, then rinse and reattach. Re-test at the wand to see if spray improves.
Tip: Always depressurize before disassembly to avoid injury. - 2
Check the inlet filter and water source
Disconnect from the water supply and locate the inlet filter. Rinse it under running water or replace if damaged. Reconnect to a reliable water source and ensure the flow is steady before re-testing.
Tip: A weak water supply is a frequent culprit; even small air gaps matter. - 3
Bleed air and test for improved flow
With the gun slightly open, run water to push air out of the hose and pump. Close the gun and squeeze the trigger to check for a stable spray.
Tip: Bleeding air helps restore prime and consistent pressure. - 4
Inspect hoses and fittings for damage
Check all hoses and fittings for cracks, bulges, or leaks. Tighten clamps and replace any damaged sections. A leaky hose reduces pressure and spray performance.
Tip: Even small leaks dramatically reduce effective pressure. - 5
Evaluate the unloader valve and pump seals
If spray remains weak or inconsistent after basics, inspect the unloader valve for sticking or improper relief. Signs of seal wear require professional servicing to prevent pump damage.
Tip: Do not force components; use the proper replacement parts. - 6
Test and reassemble cautiously
After each fix, reassemble securely and test with a full, clean water supply. Confirm a full, consistent spray and listen for unusual sounds indicating deeper issues.
Tip: If in doubt, pause and seek expert help to avoid further damage.
Diagnosis: Pressure washer won't spray water
Possible Causes
- highNozzle blockage or dirty tip
- highDirty or clogged inlet filter
- highWeak or inconsistent water supply
- mediumAir in the system or leaks in hose
- lowWorn/unloader valve or failing pump seals
- lowDamaged hose or fittings
Fixes
- easyRemove nozzle, soak and scrub, re-test with clean water source
- easyRinse/replace inlet filter and check for debris in water inlet
- easyInspect hose for kinks or leaks; straighten or replace as needed
- easyBleed air from the lines by running with gun open and water on full; re-test
- mediumInspect unloader valve and pump seals; replace if signs of wear
- hardSeek professional service for pump-related failures or complex repairs
Quick Answers
What is the most common cause of a pressure washer not spraying water?
The most common causes are a clogged nozzle and a dirty inlet filter, often compounded by a weak water supply. Start by cleaning the nozzle and filter, then verify water flow. Most spray issues resolve at this level.
The most common cause is a clogged nozzle or dirty filter; start there and check water flow.
Can low water pressure cause poor spray even with a healthy nozzle?
Yes. Insufficient water pressure reduces spray performance and may feel like a nozzle problem. Check the water source, hose for kinks, and the inlet screen to ensure adequate flow.
Low water pressure can mimic nozzle problems; check the water source and hose first.
How do I clean a clogged nozzle safely?
Power off and relieve pressure, remove the nozzle, soak it in warm soapy water, and use a pin or nozzle-cleaning needle to clear debris. Rinse thoroughly before reattaching and testing.
Turn off the unit, clear the nozzle with a needle, and rinse well before testing.
When should I replace the unloader valve?
If the unloader valve sticks,Relieve pressure and inspect for wear or misadjustment. Replacement is advised if spray remains inconsistent or you hear abnormal noises after basic troubleshooting.
Replace the unloader valve if it sticks or spray is inconsistent after basic checks.
Is pump repair a DIY job, or should I hire a pro?
For pump seals, leaks in the pump body, or internal wear, professional service is recommended. Basic nozzle, filter, and hose fixes are safe DIY tasks with proper precautions.
DIY is fine for nozzle and hose work, but pump repair is best left to a pro.
Watch Video
Key Takeaways
- Start with nozzle cleaning and water supply checks
- Bleed air and inspect hoses before pump work
- Replace worn filters, hoses, or fittings promptly
- Seek pro help for unloader valve or pump seal issues