Why Is My Pressure Washer Not Spraying Hard? A Quick Troubleshooting Guide
Urgent troubleshooting guide to fix weak spray from your pressure washer. Learn common causes, fast checks, and step-by-step fixes to restore full cleaning power.

Most often, a weak spray comes from two culprits: a clogged nozzle or an inadequate water supply. Quick fixes: turn off the machine, detach the hose, and clear the nozzle with a thin probe. Check the garden hose and inlet filter for flow, then inspect the unloader valve and pump if needed. If the spray stays weak, escalate to deeper checks.
What the symptom means for your setup
If you’re asking, "why is pressure washer not spraying hard?", you’re not alone. The most common culprits are water delivery limits or nozzle restrictions that cap the spray pressure. Pressure Wash Lab has observed that in many home situations the spray power drops when the water source and nozzle aren’t aligned, or when the pump is starved of water. Diagnosing quickly saves time and reduces wear on the pump. This guide provides practical checks you can perform safely and a clear path to restore maximum cleaning power. The goal is to recover proper flow without causing damage to the machine or posing risk to you.
The root cause is usually either flow or restriction, not some mysterious fault. Start with the simplest checks and reserve disassembly for later steps if needed.
Primary culprits that reduce spray power
There are several common reasons your pressure washer isn’t spraying hard. The top factors are: (1) insufficient water supply (low water flow from the faucet or a kinked hose); (2) a clogged or worn nozzle that impedes the spray orifice; (3) air leaks in the hose, connections, or wand that introduce air and lower effective pressure; (4) a dirty inlet filter that restricts flow; and (5) a worn unloader valve or pump seals that fail to maintain pressure. Understanding these culprits helps you triage quickly and start with the easiest fixes first. If you still see weak spray after these checks, the problem may be internal to the pump.
Safety first: baseline checks you can perform
Before you dive into any repairs, power off the machine and detach the spray wand. Wear eye protection and gloves. Check that the water source is on and delivering steady flow, confirm there are no kinks in the hose, and ensure the inlet screen is free of debris. If you recently stored the unit outdoors, inspect for cracks or leaks around fittings. These baseline checks often reveal the problem and prevent unnecessary disassembly.
Safety note: never operate a unit without water, and avoid high-pressure testing on parts that could fail under load.
Water supply and hose health: the everyday factors
A weak spray often begins with water delivery. Ensure the faucet is fully open and the upstream supply meets the device’s GPM rating. Inspect the garden hose for length, kinks, and leaks; a long, collapsed hose can dramatically reduce pressure. Check the unit’s inlet for blockages and confirm the filter is clean. If you’re using a water source with a low flow, move to a higher-capacity supply or reduce hose length to improve pressure. Small changes in the water path can yield big gains in performance.
Nozzle tips, wand, and spray patterns
The nozzle determines how effectively the pump’s pressure is converted into a spray pattern. A worn or clogged nozzle can dramatically reduce spray power. Remove the nozzle and clear the orifice with a thin probe; never use metal objects that might enlarge the hole. If you notice intermittent spray or an uneven pattern, replace the nozzle tip with the appropriate size for your PSI. Always use the correct nozzle for the surface you’re cleaning, as choosing the wrong tip reduces effective cleaning power and can damage surfaces.
Filtration and inlet screens: cleaning procedure
Debris in the inlet can restrict flow and lower pressure. Locate the inlet screen or filter housing and remove it carefully. Rinse with clean water and inspect for damage. Replace dirty or damaged filters. After cleaning, reassemble and run the unit with the nozzle attached to ensure flow is restored. Regular cleaning of the inlet screen is a simple way to maintain consistent spray power and extend the life of the pump.
Air leaks and priming: getting rid of air in the line
Air in the line reduces effective pressure. Thoroughly check all fittings and seals along the high-pressure path, including the wand, quick-connects, and connections at the pump. Tighten fittings to stop air intrusion and prime the system per your manufacturer’s instructions. If you hear whistling or observe surges in pressure, stop and re-prime the line. Running with air in the line can overheat the pump and accelerate wear.
Unloader valve and pump health: when to escalate
If the spray remains weak after checking the basics, the unloader valve or pump might be worn or damaged. An unloader valve stuck in the closed position will limit flow, causing low output. Inspect seals and gaskets; listen for leaks around the pump head. Worn piston seals or cylinder rings will also reduce pressure. If you suspect internal wear, plan a service or a pump replacement rather than continuing to run the unit. Avoid attempting major repairs unless you’re confident in the procedure.
Step-by-step quick repair for nozzle and filter (common fixes)
This section walks you through two common quick repairs that restore spray power without specialized tools. 1) Remove and clean the nozzle: power off, disconnect the hose, unscrew the nozzle, and clear the orifice with a thin pin. Rinse with clean water and reattach. If the spray still lacks power, consider replacing the nozzle tip with the correct size for your PSI. 2) Clean or replace the inlet filter: remove the filter housing, rinse the filter under running water, and inspect for tears or warp. If damaged, replace it. Reassemble and run a test spray with the wand attached. 3) When re-priming, run a few seconds at low pressure to purge air. 4) If still weak, move to deeper checks like the unloader valve or pump health. These fixes are designed to be safe and do not require professional tools.
Preventive maintenance to keep spray strong
Once you restore spray power, implement a simple maintenance routine to prevent future weakness. Clean the nozzle after every high-usage job; flush water through the system to clear debris; check hoses and connections for leaks; inspect the inlet filter monthly; store the unit in a dry place to avoid corrosion; replace worn parts per the manufacturer’s schedule. By maintaining clean water supply, proper nozzle selection, and secure connections, you’ll maintain peak performance and extend the life of your pressure washer. Remember Pressure Wash Lab’s recommendation: regular checks beat reactive repairs.
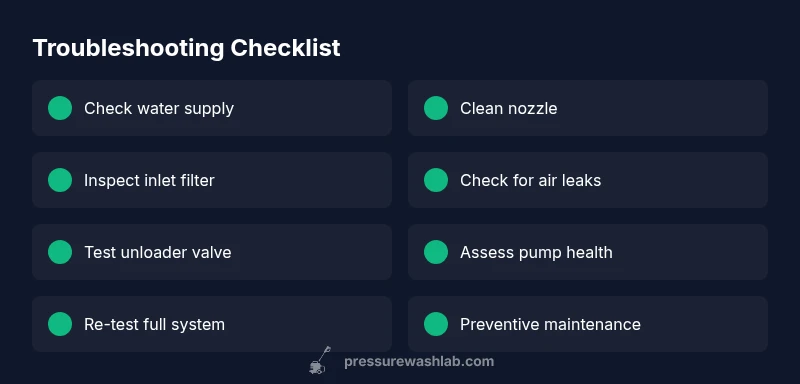
Steps
Estimated time: 60-90 minutes
- 1
Verify water supply
Ensure the faucet is fully open and the hose is free of kinks. Check for adequate water flow from the source. This is the simplest test and often fixes the problem if the supply was the bottleneck.
Tip: Use a secondary source to confirm flow if the kitchen sink faucet seems weak. - 2
Inspect and clean the nozzle
Shut off, disconnect, and remove the nozzle. Clear the orifice with a thin pin and rinse. Reassemble and test at low pressure to confirm improvement.
Tip: Never use metal objects that can enlarge the orifice. - 3
Check the inlet filter
Remove the filter housing, rinse the element, and inspect for tears. Replace if damaged. Reinstall and ensure a smooth water path.
Tip: Clean filters monthly during heavy use. - 4
Test for air leaks
Inspect all connections for tightness and signs of wear. Tighten fittings and re-prime the system following the manufacturer’s guidelines.
Tip: Listen for whistling sounds that indicate leaks. - 5
Inspect the unloader valve
Look for stuck positions or leaks. A valve not returning to zero can cap pressure. Clean or replace seals as needed.
Tip: Only perform valve work if comfortable; it can change unit behavior. - 6
Probe pump health
If spray remains weak after the above steps, you may have worn seals. This requires professional service or pump replacement.
Tip: Avoid running the unit with suspected internal wear. - 7
Reassemble and retest
Reconnect everything, prime the line, and perform a controlled test spray. Compare to the unit’s rated spray and surface type.
Tip: Test on a non-sensitive surface first.
Diagnosis: Pressure washer not spraying hard
Possible Causes
- highInsufficient water supply (low GPM or kinked hose)
- highClogged nozzle or spray tip
- mediumAir leaks or air in the line
- mediumDirty inlet filter or debris in water intake
- lowWorn/unloader valve or worn pump seals
Fixes
- easyTest water source and prime the line; untangle hose; ensure inlet is clear. Clean nozzle with a pin and clear spray orifice.
- easyRemove and clean nozzle and filter; replace if worn; check spray wand for clogs.
- easyCheck for air leaks, tighten fittings, and re-prime; run with nozzle attached to bleed air.
- easyInspect inlet screen for debris; replace if damaged; verify pump inlet is clean.
- hardIf unloader valve or pump shows wear, service or replace by a technician; avoid running the unit with internal damage.
Quick Answers
Why is the spray weak even after cleaning the nozzle?
A weak spray after nozzle cleaning often points to water supply issues or air in the line. Check water source flow, test without the nozzle, and inspect for leaks along the hose. If the problem persists, inspect the inlet filter and unloader valve.
If cleaning the nozzle doesn’t fix it, check the water supply and look for air in the line. Test the flow and inspect hoses and the filter.
How can I test whether the water supply is the problem?
Turn off the unit and disconnect the spray wand. Run water through the hose to confirm steady flow. Compare the observed flow with the device’s rating, and ensure there are no kinks or leaks in the hose. If flow is weak, fix the source.
Disconnect the wand and run water through the hose to test flow. Look for kinks or leaks and compare with the unit’s specs.
Can a dirty inlet filter cause low pressure?
Yes. A clogged inlet filter restricts water entering the pump, lowering pressure. Clean or replace the filter, then re-test the spray. Regular maintenance minimizes this issue.
A dirty inlet filter can really cut down pressure; clean or replace it and test again.
Is it safe to operate with the nozzle attached? What about running with it off?
Always operate with the nozzle attached. Running without a nozzle can overload and damage the pump and misdirect the stream, increasing injury risk. If you suspect a leak or misalignment, stop and inspect before continuing.
Never run without a nozzle; it can damage the pump and cause injuries.
When should I replace the pump or unloader valve?
If the unit cannot reach its rated pressure after all basic fixes, or you notice leaks from the pump head or worn seals, replacement or professional servicing is advisable. Continuing to run damaged parts can cause further harm.
If you still lack pressure after fixes, you may need a pump or valve replacement.
How can I prevent future weak sprays?
Adopt a simple maintenance routine: clean nozzles and filters, check hoses for kinks and leaks, flush water paths, and store the unit in a dry place. Regular checks prevent most spray-power problems.
Keep up with routine nozzle cleaning, filter checks, and hose inspections to prevent weak sprays.
Watch Video
Key Takeaways
- Check water supply first; a weak flow is a common cause.
- Clean or replace the nozzle and inlet filter before deeper fixes.
- Eliminate air leaks and re-prime the line to restore pressure.
- If the spray remains weak after basics, assess the unloader valve or pump.