Best Way to Pressure Wash Concrete: A Practical Guide
Discover the safest, most effective method to pressure wash concrete, with gear lists, step-by-step instructions, and practical tips from Pressure Wash Lab.

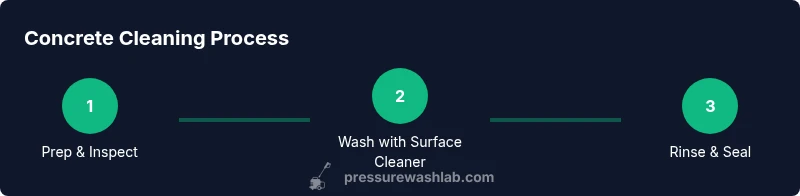
Master the best way to pressure wash concrete with a safe, effective, and repeatable approach. This guide covers prep, nozzle choice, cleaning techniques, and post-clean care to avoid staining or damage. Start with gentle settings, use a surface cleaner for flat areas, and finish with sealing for long-lasting results. Take time to plan and protect nearby plants.
Why the Best Method Matters
Cleaning concrete effectively isn't just about blasting dirt away. The best way to pressure wash concrete focuses on avoiding surface damage, preventing water intrusion, and achieving a uniform look that lasts. According to Pressure Wash Lab, the best method combines proper prep, the right equipment, and disciplined technique. A structured approach reduces streaking, pits, and edge wear, and it minimizes water run-off that could affect nearby landscaping.
Start by assessing the surface: new concrete can be more forgiving than aged, porous slabs that have oil stains, efflorescence, or previous sealants. Note any cracks, trees, or shrubs near the area, and plan to protect them with plastic sheeting or a spray bottle. Gather the necessary tools and cleaners before you begin so you stay organized and efficient. Having a plan helps you maintain a consistent distance from the surface and prevents over-cleaning one spot while neglecting another. The goal is a clean, even finish without noticeable difference between lines and sections. When done right, your driveway or patio will look brighter, feel smoother, and be less prone to staining in the weeks after washing.
Safety First: Prep, PPE, and Site Preparation
Safety should come first in any pressure washing project. Wear eye protection, gloves, long sleeves, hearing protection, and non-slip footwear. Use a stable ladder only if needed and keep electrical outlets and power cords away from water. Inspect the pressure washer for leaks, ensure the surface is free of loose debris, and cover nearby plants or sensitive landscaping with plastic or a shield. Before you start, wet the area lightly to reduce dust and check for delicate coatings, such as wax or sealant. If you encounter old coatings, perform a small test in a hidden corner to ensure the cleaner and spray won’t cause peeling. Remember to never aim the nozzle at people, pets, or electrical outlets, and avoid working in direct sunlight on extremely hot days, which can dry cleaners too quickly and cause streaks.
Equipment and Surface Care: Nozzles, Cleaners, and PSI
Selecting the right nozzle is critical. Use a wide fan nozzle for flat surfaces and move to a narrower spray only for tough stains, maintaining a safe distance to avoid etching the concrete. A surface cleaner attachment can dramatically speed up the process on large areas while delivering an even finish. Choose a biodegradable concrete cleaner for oil stains, and always test a small area first to confirm it won't damage the surface. If your washer has adjustable GPM (flow), prioritize lower flow for delicate areas and higher flow for heavy staining, keeping the surface cool and preventing splash-back. Keep hoses off the ground to reduce tripping hazards and use a wide, stable stance when guiding the wand.
Add-ons like a spray wand extension can help reach tight edges without stepping on the wet surface, and a stiff-bristled brush is useful for stubborn corners after washing. Finally, plan for water runoff: direct it away from foundations, and be mindful of local regulations regarding drainage.
Cleaning Strategies: Surface Cleaners vs. Aggressive Techniques
On smooth, large surfaces, a surface cleaner is often the best first choice. It provides a uniform pattern and reduces the risk of chasing dirt with a narrow spray, which can leave streaks. For stubborn oil stains or heavy algae growth, a targeted approach using a gentler nozzle with careful distance can be effective, but avoid aggressive patterns that risk gouging the concrete. For sealed or painted surfaces, test a small area to ensure the cleaner won’t strip the coating. When choosing cleaning solutions, prefer biodegradable, non-caustic cleaners and avoid chlorine bleach near metal fixtures or plants. Always work in shaded or cooler parts of the day to prevent rapid drying, which can leave soap scum behind.
Remember to rinse thoroughly after any cleaner application, working from the highest point to the lowest to prevent dirty runoff from re-soiling areas you’ve already cleaned. A two-pass approach—one broad pass with light pressure, followed by a targeted pass for remaining stains—often yields the most even result.
Common Mistakes and How to Avoid Them
Failing to test in a hidden area is a common error that leads to irreversible surface damage. Always test a small patch before committing to the entire area. Using excessive pressure near edges, cracks, or near vegetation can cause chipping or ground disturbance; keep the wand at a safe distance and use slow, steady passes. Skipping a pre-wet or pre-soak step can cause staining and uneven cleaning, especially in porous concrete. Rushing the rinse step leaves residual cleaner that can cause spotting or discoloration over time. Finally, not considering runoff and drainage can lead to lawn or garden damage and may violate local regulations.
Maintenance After Cleaning: Sealing and Curing
After washing, allow the surface to dry completely before applying any sealant or coating. Sealing helps protect against future staining and makes future cleanup easier. Choose a sealant compatible with your concrete and climate, and follow the manufacturer’s instructions for application and curing time. If you live in a damp or freeze-thaw region, consider a breathable sealer to reduce moisture buildup. Periodically re-evaluate the surface for cracks and plan timely repairs to extend the life of your concrete. Maintenance also includes storing equipment properly: drain residual water, clean spray tips, and store cleaners in a cool, dry place away from children and pets.
Tools & Materials
- Pressure washer with adjustable PSI and interchangeable nozzles(Look for a machine with a wide fan nozzle and a surface-cleaning attachment.)
- Surface cleaner attachment(Ideal for large flat areas to prevent streaking.)
- biodegradable concrete cleaner or degreaser(Choose a non-caustic, environmentally friendly option.)
- Extension wand(Helpful for edges without stepping on wet surface.)
- Stiff-bristled brush(For stubborn corners after washing.)
- Hose with enough length and a backflow preventer(Ensure water supply is steady.)
- Personal protective equipment (PPE)(Goggles, gloves, hearing protection, non-slip boots.)
- Plastic sheeting or drop cloths(Protect nearby plants and furnishings.)
Steps
Estimated time: 60-120 minutes
- 1
Inspect and plan the workspace
Survey the concrete area for cracks, fragile coatings, or nearby plants. Create a plan detailing sections to clean, the order of passes, and safety checkpoints. This prep minimizes surprises mid-project and helps maintain consistent results.
Tip: Walk the area first to map clean paths and identify hazards. - 2
Prepare equipment and protect surroundings
Check that the pressure washer is free of leaks, connect hoses, and attach the appropriate nozzle. Cover plants and nearby fixtures with plastic to prevent chemical contact and runoff contamination.
Tip: Test spray on a hidden patch before starting large sections. - 3
Pre-wet and apply cleaner if needed
Lightly dampen the surface to reduce dust and improve cleaner penetration. Apply a biodegradable cleaner to stained spots or entirely if needed, following label directions.
Tip: Let the cleaner sit 5–10 minutes but do not let it dry. - 4
Start with a broad pass using a surface cleaner
Use a surface cleaner on large, flat areas to minimize streaks and speed up progress. Keep the tool moving steadily to avoid gouges and maintain an even distance from the surface.
Tip: Overlap each pass by 1–2 inches for uniform coverage. - 5
Tackle stubborn stains with targeted passes
Switch to a wide fan or gentle propulsive spray for tough stains, maintaining a safe distance. Concentrate on problem areas with short, deliberate passes.
Tip: Avoid lingering on one spot to prevent etching. - 6
Rinse thoroughly and inspect for residue
Rinse all cleaned areas from top to bottom to prevent dirty runoff re-soiling. Revisit any missed patches and ensure there’s no cleaning solution left behind.
Tip: Check corners and edges where dirt collects. - 7
Dry and assess before sealing
Allow the surface to dry completely, typically 24–48 hours depending on conditions. Inspect for remaining stains or etching; address any issues before applying a sealant.
Tip: Touch test: surface should feel dry to the touch. - 8
Seal and store equipment
Apply a compatible sealant if desired once the surface is dry, following product instructions. Clean and store all tools, drain hoses, and secure cleaners away from children.
Tip: Keep sealant can sealed and upright to avoid spills.
Quick Answers
Is pre-wetting necessary before washing concrete?
Pre-wetting helps control cleaning solutions and reduces dust. It’s generally recommended before applying cleaners.
Yes—pre-wetting helps control the cleaner and keeps dust down.
Can I use bleach or other harsh chemicals on concrete?
Avoid chlorine bleach and harsh chemicals near metal fixtures or plants. Use biodegradable cleaners and test compatibility with your surface.
Avoid bleach near plants and metal; choose safe, biodegradable cleaners.
What about plants near the washing area?
Cover or shield plants and direct runoff away from gardens. Use a containment plan to protect landscaping.
Protect plants and direct runoff away from them.
Can I pressure wash newly poured concrete?
New concrete should cure fully before aggressive washing. Start with gentle cleaning and test areas first.
Wait for full cure, then clean gently and test.
Will pressure washing remove sealant from concrete?
Pressure washing can strip sealants if used with high pressure. Plan to reseal after cleaning and drying.
You may remove sealant; plan to reseal when finished.
Do I need to hire a professional for large areas?
For very large areas, stubborn stains, or delicate surfaces, a professional may provide safer, more efficient results.
For big jobs, a pro can save time and avoid damage.
Watch Video
Key Takeaways
- Plan and prep before washing
- Use the right nozzle and surface cleaner
- Test a small area first and rinse thoroughly
- Seal after drying for lasting protection