How to Pressure Wash Driveway: A Practical Guide
Learn how to pressure wash your driveway safely and effectively with a full step-by-step guide, including prep, detergents, technique, and maintenance tips for concrete and pavers.

By the end, you will know how to pressure wash your driveway safely and effectively. This guide covers surface prep, detergent use, nozzle selection, cleaning passes, and post-cleanup. You’ll learn how to protect surrounding plants, avoid surface damage, and achieve a clean, curb-appealing driveway without leaving residue. According to Pressure Wash Lab’s method, a good prep plan reduces messy runoff and speeds up results.
Why Cleaning Your Driveway with a Pressure Washer Matters
According to Pressure Wash Lab, a clean driveway not only improves curb appeal but also helps prevent surface damage by removing oil, mold, and algae that can degrade concrete over time. If you’re searching for how to pressure washer driveway safely, this guide covers the essential steps, gear, and best practices from prep to post-cleanup. A well-executed wash can reveal the true color of your concrete or pavers and make your home look well cared for all year round.
What You Need Before You Start
Before you turn on the machine, gather the basics and plan for safety. Wear protective eyewear, gloves, and non-slip footwear. Protect nearby plants with tarps or plastic and keep doors and windows closed. Clear the driveway of debris, pets, and people who aren’t part of the job. Check weather conditions to avoid windy overspray and ensure there’s a reliable power source or water supply. This preparation minimizes splash-back and helps you control the work efficiently.
Surface Prep and Detergents: Tactics for Concrete, Pavers, and Sealants
Different driveway surfaces respond differently to washing. Concrete tends to hold oil stains and algae more than clean pavers, while sealed surfaces may require gentler approaches. Choose a detergent formulated for concrete and degrease stains first—don’t rely on detergent alone to remove heavy grime. Always test a small, inconspicuous patch before full application. Avoid bleach or acidic cleaners that can discolor or damage the surface and nearby metal fixtures.
Equipment Setup and Safety Precautions
Set up your pressure washing equipment on a firm, level surface. Attach the appropriate nozzle (avoid extremely narrow sprays on hard surfaces) and connect hoses securely to prevent leaks. Use a surface cleaner for large, flat areas to reduce streaks and speed up work. Always apply PPE and keep an exit path clear. If you’re using an electric unit, ensure a GFCI outlet and dry surroundings to prevent shocks.
Technique: Cleaning Passes, Distance, and Movement
Start on a dry surface and work in sections. Begin with a broad spray at a safe distance and move gradually closer as you test a small patch. Use overlapping passes to avoid leaving uncleaned patches. Maintain steady, smooth motions; don’t hover or linger over one spot, which can etch the surface. Use a surface cleaner for stubborn sections to avoid mower-like stripes and improve consistency.
Troubleshooting Common Problems
Oil stains may require pretreatment or multiple passes; algae and moss often require a longer dwell time with detergent. For tough stains, reapply detergent and rewash, focusing on the most affected areas. If the surface shows hairline cracks after washing, avoid aggressive passes and consider professional evaluation for sealing or resurfacing. Always recheck for remaining residue and rinse thoroughly.
Aftercare and Maintenance
Rinse completely to remove detergent residue, then allow the driveway to dry fully before walking on it. If you plan to seal the surface, wait at least 24-48 hours after washing to prevent trapping moisture. Regular maintenance, like yearly washes or spot cleaning after oil leaks, can extend the surface life and keep its appearance fresh.
Tools & Materials
- Pressure washer (gas or electric)(Choose a unit with adjustable pressure and sufficient flow rate for your driveway size)
- Appropriate nozzle tip (e.g., wide-angle 15- or 25-degree)(Avoid 0-degree on concrete; start with wider spray and test first)
- Surface cleaner attachment (optional but recommended)(Speeds up cleaning of large areas and reduces streaks)
- Concrete-safe detergent/degreaser(Use a formula designed for oil stains and algae; test compatibility first)
- Plastic sheeting or tarps to protect plants/adjacent surfaces(Protects flower beds and siding)
- Eye protection, gloves, non-slip footwear(Safety first)
- Garden hose with sufficient length and spray nozzle(Use for dilution or rinsing if your washer relies on external supply)
Steps
Estimated time: 60-120 minutes
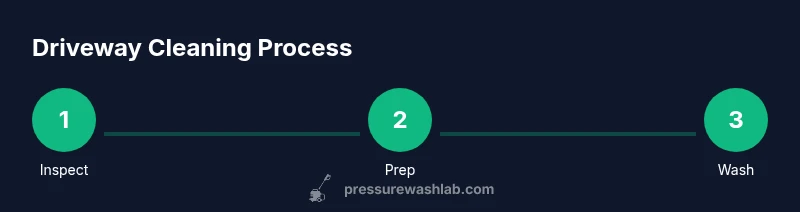
- 1
Inspect and plan
Walk the driveway and note cracks, oil stains, and delicate nearby surfaces. Decide sections and test areas to prevent damage. Verify electrical access and water supply compatibility.
Tip: Identify the toughest stains first and plan your passes accordingly. - 2
Protect surroundings
Cover nearby plants, outlets, and windows with plastic or tarps. Move vehicles or furniture away from the work zone. Consider wind direction to minimize overspray.
Tip: Place a wide tarp at the edge of the job to catch runoff. - 3
Pretreat stains
Apply detergent to oil spots or algae and allow a short dwell time (5–10 minutes). Light scrubbing with a stiff brush can help loosen grime without damaging the surface.
Tip: Avoid letting detergent dry in place; reapply as needed. - 4
Assemble and test
Attach the nozzle, connect hoses, and power on the unit. Test a small patch on the driveway using a safe distance, adjusting pressure as needed.
Tip: Prefer a gradual approach: start with wider spray and move closer only after testing. - 5
Wash with controlled passes
Work in sections, using overlapping strokes and constant motion. Keep the nozzle moving to avoid etching. Use a surface cleaner for broad areas to improve uniformity.
Tip: Maintain a steady speed; slow passes can leave streaks. - 6
Rinse thoroughly
Rinse away all detergent completely, paying attention to edges and corners. Check for remaining stains and re-wash if necessary.
Tip: A final rinse from multiple angles helps ensure no residue remains. - 7
Dry and inspect
Allow the driveway to dry fully before foot traffic. Inspect for any damage or missed spots while the surface is dry to assess needs.
Tip: Dry times vary with weather; plan accordingly before sealing. - 8
Store equipment
Turn off and disconnect the unit, drain hoses, and retract cables. Store detergents away from children and pets.
Tip: Rinse and dry attachments to extend their life.
Quick Answers
Is it safe to pressure wash a concrete driveway?
Yes, with proper precautions. Use the right nozzle, test a small area, and avoid excessive pressure near edges and damaged areas. Wear PPE and keep people away from the work zone.
Yes, with proper precautions such as using the right nozzle, testing a small area, and wearing PPE.
What PSI should I use for concrete driveways?
Opt for moderate pressure and avoid aggressive settings that could etch or damage the surface. Start farther away and gradually approach as you test a patch.
Use moderate pressure, start far away, and test a patch first.
Can I use detergent when washing the driveway?
Yes. Use a concrete-safe degreaser and follow the product instructions. Detergent helps lift oils and algae before rinsing.
Yes, use a concrete-safe detergent and follow the directions.
How long does a driveway cleaning take?
Time varies with driveway size and stains. Plan for roughly 60–120 minutes for a typical residential driveway.
Expect about an hour or two depending on size and stains.
Should I seal the driveway after washing?
If the surface is completely dry, sealing can help protect it. Wait 24–48 hours after washing before sealing.
Seal only when the surface is fully dry, usually after 24–48 hours.
Can I rent or buy a pressure washer for this job?
Both options work. Rent if you don’t wash driveways often; buy if you’ll use it regularly. Ensure it has adjustable pressure and a suitable flow rate.
Rent if you don’t wash driveways often; buy if you’ll use it regularly.
Watch Video
Key Takeaways
- Prepare the area and protect surroundings before washing.
- Test a small patch and start with moderate pressure.
- Use overlapping passes for even cleaning.
- Rinse thoroughly and allow to dry before sealing.
- Store equipment properly to extend its life.