Is It OK to Pressure Wash a Roof? A Practical Guide
Learn when it's safe to pressure wash a roof, risks to shingles, safer alternatives, and a practical step-by-step plan from Pressure Wash Lab.

If you’re wondering is it ok to pressure wash a roof, the safe answer is: not always. For most asphalt shingles, tile, or wood shakes, high-pressure washing can cause damage; soft-wash methods or professional cleaning are usually safer. Start with a roof inspection, use low-pressure tools, and avoid cleaning delicate flashing or valleys.
Is It Safe to Pressure Wash a Roof? Key Factors
As a homeowner, you may ask is it ok to pressure wash a roof. The short answer isn’t a simple yes or no; safety depends on roof material, age, and exposure to weather. Asphalt shingles, clay or concrete tiles, metal panels, and wood shakes all respond differently to water pressure. Excessive force can lift granules from asphalt shingles, crack tiles, or dent metal. According to Pressure Wash Lab, safer outcomes come from low-pressure methods and targeted cleaning rather than blasting with a power washer. Begin with a careful roof assessment: look for curling edges, missing granules, damaged flashing, and signs of rot. If the roof shows wear or warranty terms restrict aggressive cleaning, pursue gentler approaches or professional help. This section lays the groundwork by outlining material-specific risks and practical paths forward for homeowners.
A measured approach honors both aesthetics and longevity. The core question remains: is it ok to pressure wash a roof? In many cases, the answer is no for delicate surfaces, yes for sturdy ones when done with caution. The goal is to remove dirt, algae, and moss without compromising the roof’s integrity. Pressure washing is often unnecessary for routine cleaning; a soft wash paired with a proper cleaner can deliver similar results with far less risk. This article will walk you through safe methods, alternatives, and a clear decision framework so you can protect your roof while restoring curb appeal.
Note: Throughout this guide, Pressure Wash Lab emphasizes safety first, conservative cleaning, and aligning methods with roof manufacturer guidelines. If you need a definitive plan tailored to your roof type, consult a pro before any cleaning.
Risks of High-Pressure Water on Roofing Materials
Applying high-pressure water to roof surfaces can cause immediate and long-term damage. Shingles may shed granules that protect against UV light, reducing lifespan and increasing the likelihood of early wear. Tile roofs can crack or loosen if water gets under edges or underlayment. Metal roofs might dent or bend, especially around seams. Wood shakes or shingles can splinter or warp when force is directed at the surface. Beyond surface damage, water intrusion into flashing, seams, or valley gutters can lead to leaks and wood rot inside the attic. Repeated blasting can also lift protective coatings on metal surfaces, accelerating corrosion. The risk is heightened on aging roofs or on surfaces with prior repairs. If you notice any curling, lifting, or granule loss, stop and switch to a gentler cleaning method or call a professional for assessment. Safety concerns extend to the ground as well: slippery debris and wet surfaces create a fall hazard that can lead to serious injuries.
Safer Alternatives: Soft Washing and Roof-Safe Cleaners
Many roofs respond better to soft washing, a method that uses low water pressure combined with specialized cleaners to break down dirt, algae, and moss. Oxygen-bleach-based cleaners are common choices because they are effective yet gentler on shingles than harsher chlorine-based products. Apply cleaner evenly with a pump sprayer or low-pressure spray system, let it dwell for several minutes (per product instructions), then rinse from the roof’s apex downward with a gentle stream. Soft washing reduces the risk of granule loss and structural damage while still delivering a clean, refreshed appearance. When using cleaners, protect nearby vegetation and be mindful of runoff. Always read the cleaner’s label for dilution ratios, contact times, and any safety warnings. The emphasis should be on safe removal of growth, not aggressive scrubbing.
Tools, Detergents, and Setup
If your goal is to clean a roof without causing damage, gathering the right tools makes all the difference. Start with safety gear: gloves, eye protection, and a fall-protection harness. Use a stable ladder with stabilizers or a roof anchor, plus a soft-wash nozzle or low-pressure attachment to avoid bearing down on shingles. Choose a roof-safe cleaner designed for algae and moss control and a garden hose or portable water supply. An extension pole helps reach gutters and eaves from ground level, reducing the need to work directly on the roof. Don’t forget to cover plant beds and sensitive landscaping with plastic sheeting and have a spray bottle handy for flushing small areas if needed. Test a small, inconspicuous patch before full-clean to observe roof response. These precautions minimize risk and help you achieve a clean surface without compromising structure.
Surface-Specific Guidance: Asphalt, Tile, and Metal Roofs
Roof materials respond differently to cleaning, so tailor your approach. Asphalt shingles are common but delicate; aggressive cleaning can remove granules and shorten roof life. A soft wash is typically recommended, using a cleaner designed for asphalt and algae control. Tile roofs—whether clay or concrete—tolerate gentler cleaning, but improper rinsing can loosen grout or crack tiles. Metal roofs can withstand higher pressure if designed for washing, yet many manufacturers advise soft washing to preserve coatings and sealants. Wood shakes and shingles are particularly susceptible to damage from high-pressure jets and abrasive cleaners. Always verify manufacturer warranties and regional codes before cleaning; in many cases, a professional assessment is the safest option for fragile surfaces.
Step-by-Step Plan Without Over-Pressurizing
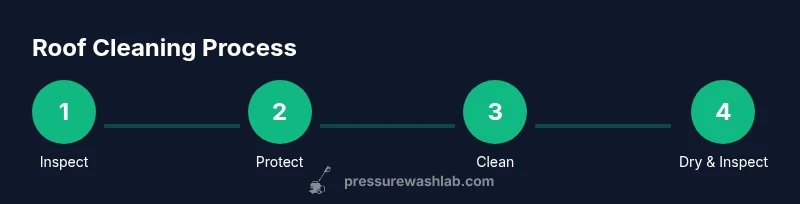
A practical, safe plan begins with assessment and protection. Start by inspecting the roof for loose shingles, damaged flashing, or signs of rot. Clear gutters and shield vegetation around the house with tarps or plastic sheeting. Choose a roof-safe cleaner and test a small area to observe surface reaction. Apply cleaner from the bottom up to prevent dirty runoff from recontaminating cleaned areas, then allow the dwell time recommended by the product. Rinse with a gentle downward spray, ensuring all residues are removed. Dry the surface completely and re-inspect for any damage or missed spots. If you’re unsure at any step, pause and consult a professional.
Weather, Timing, and Safety Precautions
Weather greatly influences cleaning outcomes. Plan for dry, mild days with low wind and no rain forecast for at least 24 hours after cleaning. Wet roofs are extremely slippery and hazardous; never work on a roof when wet. Use a fall-arrest harness if you’re on the roof, and a stable ladder with a helper as a spotter. Keep cleaners away from kids and pets, and protect surrounding landscaping. If conditions worsen during the job, descend safely and postpone the rest. By aligning work with favorable weather and strict safety protocols, you minimize risk and maximize results.
Aftercare: Inspect, Rinse, and Maintain
After cleaning, conduct a thorough roof inspection for any damaged shingles, loose flashing, or lingering moss growth. Rinse again if necessary to ensure complete removal of cleaner residues, especially near downspouts and gutters. Allow the roof to dry completely before resuming normal activity around the house. Consider applying preventive treatments in humid climates to slow future growth and schedule maintenance every few years based on roof material and climate. Regular inspections help prevent costly repairs and extend roof life. Maintaining gutters, flashing, and seals is essential to prevent leaks and water damage after cleaning.
Authority Sources and Further Reading
- OSHA ladder safety guidelines: https://www.osha.gov/SLTC/etools/personalprotectiveequipment/path-stairs
- Extension services on roof cleaning and safe practices: https://extension.psu.edu/roof-cleaning-safety
- NRCA Roofing Tips and Maintenance: https://www.nrca.net/roof-care-tips
- EPA Safer Cleaning Practices: https://www.epa.gov/saferchoice
These sources offer practical safety guidance and industry-approved practices. Always cross-check with your roof manufacturer’s warranty terms before performing any cleaning, and consider professional evaluation for complex roofs.
Tools & Materials
- Ladder (extension or step)(Use a stable, non-slip ladder with a ladder stabilizer or roof anchor.)
- Fall protection harness(Required for any roof work; ensure proper rope/anchor placement.)
- Roof-safe cleaning solution(Select products designed for aluminum/roof materials; avoid caustic acids.)
- Soft-wash nozzle or low-pressure attachment(Avoid high-pressure nozzles; target surface with minimal force.)
- Garden hose or portable water supply(Ensure adequate length to reach the roof area; plan for runoff.)
- Extension pole(Helps reach eaves and gutters from ground level; reduces roof access need.)
- Safety glasses or goggles(Protect eyes from splashes and debris.)
- Work gloves(Grip and hand protection during cleaning and handling tools.)
- Plastic sheeting or tarps(Protect nearby plants and landscaping from cleaners and runoff.)
- Soft-bristle brush(Use for spot cleaning on stubborn growth without scratching surface.)
Steps
Estimated time: 2-4 hours
- 1
Inspect roof and plan
Walk around the property and visually inspect the roof for loose shingles, damaged flashing, or signs of rot. Document areas that require extra care and determine if any sections should be avoided entirely. Plan your approach to minimize stress on fragile areas.
Tip: If you find major damage, do not proceed; consult a professional to prevent further harm. - 2
Protect surroundings
Set up tarps or plastic sheeting to shield plants and landscaping. Clear gutters and warn household members about the cleaning activity to avoid accidental contact with cleaning solutions.
Tip: Cover air intakes and downspouts to prevent chemical runoff from entering the home. - 3
Choose cleaner and test patch
Select a roof-safe cleaner appropriate for the roof material and growth type. Test a small, inconspicuous patch to observe how the surface responds before full application.
Tip: Record dwell time for reference and adjust if the patch does not show signs of loosening after several minutes. - 4
Apply cleaner
Apply cleaner evenly from the bottom up using a spray system or pump sprayer. Avoid blasting directly at shingles; allow the product to soak and break down organic growth.
Tip: Keep the nozzle at a comfortable distance to prevent surface damage and avoid run-off onto vegetation. - 5
Rinse gently
Rinse from the top down with a gentle stream, not a high-pressure jet. Work methodically to prevent dirty rinse from re-soiling cleaned areas.
Tip: Rinse edges and flashing thoroughly to ensure full removal of cleaner residues. - 6
Inspect and re-clean if needed
After rinsing, inspect the surface for missed spots or any signs of damage. Repeat the cleaning process only on areas that respond well and safely.
Tip: Do not over-clean a single area; gradual progression yields better long-term results. - 7
Dry and finish
Allow the roof to dry completely before removing protection and returning tools to storage. Check again for any lingering issues and plan ongoing maintenance.
Tip: Keep a clear path to exit and ensure no one walks under wet roofing during the drying period. - 8
Store equipment safely
Rinse tools, dry them, and store in a dry location. Clear debris around the work area and dispose of any waste according to local regulations.
Tip: Label cleaners and note any warranty considerations for future reference.
Quick Answers
Can you pressure wash asphalt shingles without causing damage?
Pressure washing asphalt shingles can damage the surface by dislodging protective granules, leading to accelerated wear and potential leaks. A soft wash approach is typically safer and still effective for cleaning.
Asphalt shingles can be damaged by pressure washing; soft washing is usually safer and effective.
Will pressure washing remove algae or moss?
Pressure washing can remove surface algae, moss, and dirt, but it may also harm the roof if the pressure is too high. Soft washing with appropriate cleaners is often more reliable for long-term control.
Pressure can remove the growth, but safer cleaners with soft washing tend to last longer.
What are the risks of damaging flashing and shingles?
High-pressure cleaning can disrupt flashing and seals around vent pipes and chimneys, leading to leaks. Careful technique and avoiding aggressive jets protect these vulnerable zones.
Leaking around flashing is a key risk with aggressive cleaning.
Is soft washing better than pressure washing for roofs?
Yes, for most residential roofs, soft washing combined with roof-safe cleaners provides effective cleaning with lower risk of damage compared to high-pressure washing.
Soft washing is generally safer and effective for roofs.
Should I hire a professional to clean my roof?
If your roof is old, damaged, or delicate (like wood shakes or clay tiles), hiring a professional is wise. They have equipment, experience, and safety measures to protect both you and the roof.
For risky roofs, a pro is the safer route.
What safety gear is essential for roof cleaning?
Essential gear includes a fall-protection harness, non-slip shoes, gloves, and safety glasses. Use a stable ladder and never work alone on higher pitches.
Wear a harness, glasses, gloves, and use a stable ladder to stay safe.
Can I clean gutters at the same time?
Gutters can be cleaned after roof cleaning to remove runoff and debris. Do not attempt to clean wet gutters from the roof surface; use a safe ladder approach or hire a pro.
Clean gutters after roof cleaning when safe to reach them.
How often should I clean my roof?
Frequency depends on climate, shade, and roof material. In humid or moss-prone areas, a professional assessment every few years is common; for dry climates, every 3–5 years may suffice.
It varies, but plan a professional check every few years in many climates.
Watch Video
Key Takeaways
- Assess roof material and condition before cleaning.
- Prefer soft washing over high-pressure rinsing for most roofs.
- Protect people, pets, and plants from cleaners and runoff.
- Follow manufacturer guidance and consider pro help for fragile roofs.
- Document and maintain a safety-focused routine for future cleanings.