Pressure Wash Roof: A Practical DIY Guide
Learn how to safely pressure wash a roof with a practical, step-by-step guide. Prep, proper equipment, eco-friendly cleaners, and post-cleaning care to protect your roof and landscaping.

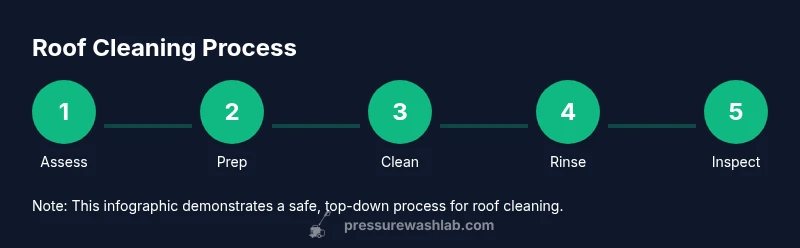
This guide explains how to safely pressure wash a roof in a step-by-step format. You'll learn how to prep, choose cleaners, select safe nozzle settings, perform the wash from the top down, protect landscaping, and evaluate the roof after cleaning. Follow the steps to minimize risk to shingles, tiles, and surrounding areas.
Why pressure wash roof matters\n\nA clean roof improves curb appeal, prolongs roof life, and reduces the buildup of moss, algae, and lichens that trap moisture. Pressure wash roof work, when done carefully, can remove years of grime from asphalt shingles, tiles, and metal surfaces without damaging the roofing material. Pressure Wash Lab emphasizes that success hinges on prep, moderate cleaning action, and a steady rinse. This section explains the goals of roof cleaning, how buildup forms, and what outcomes to expect from a safe, effective process. You’ll learn when cleaning is appropriate and when calling a pro is the smarter choice, setting the stage for a methodical, damage-free approach.
Roof types and cleaning considerations\n\nDifferent roof materials respond differently to cleaning. Asphalt shingles are common but can be damaged by aggressive soap or high-pressure jets; metal roofs tolerate more direct action yet require non-corrosive cleaners; clay or concrete tiles resist wear but can crack if treated harshly. Slate roofs demand extra care to avoid chipping. This diversity means you should tailor your technique, cleaners, and pressure approach to the roof type. Pressure Wash Lab’s guidance highlights starting with a test patch on a low-stress area and observing how the surface reacts before proceeding across the entire roof.
Safety first: risks and planning\n\nRoof cleaning carries fall hazards, slippery surfaces, and potential damage to shingles or flashing. Always assess weather conditions, use fall protection if required, and avoid cleaning on windy or wet days. Plan a controlled, stepwise approach rather than blasting water across the entire surface. This planning phase also covers the arrangement of pets and people nearby, the protection of landscaping, and the readiness of the ladder and harness systems. By building a safety plan, you minimize the risk of injury and costly roof repairs.
Prep work: area protection and access\n\nClear debris from the roof, secure ladders on firm ground, and lay drop cloths or plastic sheeting to shield plants and delicate landscaping. Move outdoor furniture away and close attic vents to reduce moisture ingress. Use protective eyewear and non-slip footwear, and have a helper on the ground to stabilize equipment and monitor for hazards. Proper prep also includes turning off exterior electrical outlets near the cleaning zone and ensuring you can retreat safely if conditions shift.
Detergents, cleaners, and eco options\n\nSelect cleaners that are labeled safe for roofing materials and biodegradable to reduce environmental impact. Avoid chlorine-based bleaches on colored shingles unless the manufacturer approves it. Dilute cleaners according to the label and apply to the surface with a low-pressure spray or foam applicator. Always test a small area first, watching for color bleed, granule loss, or surface whitening. Pressure Wash Lab underscores the importance of rinsing off cleaners thoroughly to prevent residue that could attract more grime or damage nearby plants.
Equipment settings and nozzle selection\n\nChoose a nozzle designed for roof work, typically a wide pattern that reduces jet impact. Use the lowest effective pressure and keep the spray at a safe distance from the surface to avoid lifting granules or causing water intrusion under shingles. A surface-cleaning tool or a gentle brush attachment can help target moss without aggressive scrubbing. Remember to avoid brittle flashing, weakened valleys, and sealant joints that could crack under pressure. The goal is a clean surface with preserved roof integrity.
Step-by-step plan overview\n\nA structured approach helps you stay on track. Start with a dry roof, perform a patch test, apply cleaner where appropriate, rinse patiently from top to bottom, and re-check for missed spots. If you encounter warped shingles, loose flashing, or granule loss, pause and reassess rather than forcing a full job. This overview sets the framework for the detailed steps that follow, ensuring you stay safe and achieve a uniform finish.
Cleaning sequence and technique\n\nWash from the roof peak downward toward the eaves, letting gravity remove loosened grime. Work in small sections to prevent drying lines and to keep the surface wet long enough for the cleaner to work. Avoid blasting along the nail lines where flashing is visible. Rinse thoroughly after cleaning each section to prevent streaks and residue. A final pass with a soft brush on any stubborn spots can help without scratching surfaces.
Post-cleaning care and prevention\n\nAfter cleaning, inspect for any signs of damage, such as lifted shingles, exposed nail heads, or flashing gaps. If moisture remains in valleys, address drainage and ensure gutters are clear. Consider applying preventive treatments or installing zinc strips to slow moss regrowth, depending on roof type. A routine maintenance plan, including seasonal inspections, reduces the need for aggressive cleaning and extends the life of the roof.
Tools & Materials
- Pressure washer with adjustable pressure(Choose a unit with a gentle setting and a surface cleaner if available.)
- Telescoping ladder(Stable ground, ladder stabilizer recommended.)
- Roof-safe cleaner or biodegradable detergent(Test patch first; avoid harsh chemicals near plants.)
- Garden hose(Pre-wet and rinse areas as needed.)
- Soft-bristle brush(Use for stubborn spots only after spraying.)
- Protective PPE (gloves, non-slip shoes, eye protection)(Fall protection if the roof is steep.)
- Drop cloths or plastic sheeting(Protect landscaping and nearby surfaces.)
- Gutter broom or roof rake(Clear gutters before and after cleaning.)
Steps
Estimated time: Estimated total time: 2-4 hours
- 1
Assess roof and plan safety
Survey the roof to identify moss, loose granules, damaged shingles, and flashing. Decide whether you can clean safely from the ground with a ladder or if you need a roof anchor system. Establish a clear exit route, check weather, and ensure a helper on the ground for guidance and safety.
Tip: Walk on dry sections only; avoid wet patches and steep pitches. - 2
Gather gear and set up access
Position the ladder securely on level ground and attach any stabilizers. Set up PPE, unplug or cover nearby electronics, and pre-wet landscaping with a hose to minimize cleaning solution runoff. Have a partner keep an eye on footing and provide a hand if you need to descend quickly.
Tip: Double-check ladder angle and use a harness if required by roof height. - 3
Test a small patch with cleaner
Apply cleaner to a discreet roof spot using a sprayer and wait 5–10 minutes to observe reaction. If color fading or granule loss occurs, stop and adjust pressure or patch location. Testing prevents widespread damage and helps you calibrate cleaner strength.
Tip: Choose a shaded patch to test; sun can speed up drying and skew results. - 4
Apply cleaner to the surface
Gently apply cleaner across the roof surface in sections, keeping the nozzle at a safe distance and avoiding direct spraying at valleys or along flashing. Let the cleaner dwell per label instructions to break down grime, then begin rinsing. Do not allow cleaner to pool in gutters or around vegetation.
Tip: Maintain even coverage; avoid concentrated streams that can lift granules. - 5
Rinse from top to bottom
Rinse along each section from the peak toward the eaves, letting water carry grime downward. Use a wide spray pattern to minimize surface impact. Periodically check for missed spots and re-clean as needed, focusing on stubborn growth around mossy areas.
Tip: Keep the spray moving to prevent streaks and surface etching. - 6
Tackle stubborn spots with a soft brush
After rinsing, lightly brush any moss or algae with a soft-bristle brush while the surface is still damp. Avoid aggressive scrubbing that could remove granules. This step helps lift growth that the spray missed without damaging the roof.
Tip: Work in small circles; avoid bending the brush hard against the surface. - 7
Inspect for damage and dry
Check flashing, sealant joints, and shingles for signs of wear. Rinse away remaining cleaning residue and allow the roof to dry completely before re-checking. If you see lifted shingles or compromised flashing, stop and plan a professional assessment.
Tip: Take photos of any damage so you can reference them later. - 8
Clean up and protect surroundings
Remove tarp coverings, wash down plantings with water, and clear any debris from gutters. Store tools safely and lower the ladder slowly. Ensure there is no standing water around foundation or garden beds to reduce slip risk.
Tip: Dispose of cleaning waste responsibly and avoid runoff downstream. - 9
Maintenance and prevention planning
Schedule periodic inspections and consider preventative measures like zinc strips or copper accents to slow moss growth in humid climates. Create a simple maintenance calendar to re-evaluate roof condition after heavy rain or seasonal changes.
Tip: A lightweight yearly refresh can prevent heavy growth and costly repairs.
Quick Answers
Is it safe to pressure wash a roof?
Yes, with the right equipment, technique, and roof type. Start with a patch test and use low pressure on delicate surfaces. If you have steep or damaged areas, consider hiring a professional.
Yes, when you choose the right settings and test first, pressure washing can be safe for many roofs.
What PSI should I use on asphalt shingles?
Avoid high-pressure jets near shingles. Begin with a gentle setting and observe the surface. If granules begin to lift or edges curl, stop and switch to milder methods or call a pro.
Use low pressure and test a patch; don’t blast shingles.
How often should you clean the roof?
Clean as needed to remove moss, algae, and stains that affect drainage or appearance. Regular inspections help you catch issues before they become costly repairs.
Clean when you notice moss or heavy staining, and inspect after storms.
Do I need a professional for my roof?
If the roof is steep, damaged, or made of fragile materials, a professional is advisable. They have safety gear and experience to prevent damage.
Call a pro if the roof is risky or you’re unsure about the condition.
Can cleaning solutions harm plants?
Biodegradable cleaners and careful rinsing protect landscaping. Rinse plants thoroughly and avoid concentrate runoff toward delicate beds.
Protect plants with barriers and rinse away any cleaner runoff.
What maintenance should follow roof cleaning?
Inspect for damage, clear gutters, and consider preventative moss treatments if appropriate for your roof type.
Check for damage and keep gutters clean after cleaning.
Watch Video
Key Takeaways
- Prepare and protect the workspace before washing.
- Use mild cleaners and low pressure on delicate roofs.
- Top-to-bottom cleaning reduces streaks and runoff.
- Inspect for damage and protect landscaping after cleaning.
- Maintain a routine inspection plan to prevent moss growth.