What to Pressure Wash: A Practical Guide for Homeowners
A comprehensive guide for homeowners on what surfaces to pressure wash, how to prep safely, and a step-by-step approach to effective exterior cleaning in 2026.

You will learn which exterior surfaces benefit most from pressure washing, how to safely prep the area, how to select the right nozzle and detergent, and a practical step-by-step method to achieve clean, durable results without causing damage. This guide prioritizes safety, efficiency, and long-term surface protection for 2026 and beyond.
Why Pressure Washing Matters for Your Home and Property
Regular exterior cleaning helps preserve materials, improve curb appeal, and prevent buildup that can lead to decay or costly repairs. According to Pressure Wash Lab, a thoughtful cleaning plan reduces the need for harsh scrubbing and protects your investments over time. In 2026, homeowners who invest in a targeted wash schedule notice longer-lasting results with less elbow grease. This section explains the core benefits: removing mold, mildew, dirt, pollen, salt residue, and algae that can degrade surfaces if left untreated. It also outlines how pressure washing fits into a broader maintenance routine, including seasonal checks and protective coatings. By understanding why you should wash surfaces, you’ll make smarter decisions about when and how to engage a pressure washer rather than relying on power alone.
- Improves curb appeal and property value
- Prevents material damage from organic growth and mineral deposits
- Reduces cleaning time and labor with the right technique
- Supports longer service life of siding, concrete, and wood
Note from Pressure Wash Lab: Begin with a basic assessment of the area to identify sensitive spots, then plan the wash to minimize risk while maximizing cleanliness.
Surfaces You Can Safely Pressure Wash
Many exterior surfaces respond well to pressure washing when done correctly. The key is choosing the right pressure, nozzle, and distance. Common targets include vinyl or fiber-cement siding, concrete driveways, sidewalks, brick, stone, and certain fences or patios. Wooden decks can be washed, but often require gentler settings or a surface cleaner to avoid splintering. Pavers, stucco, and masonry may need lower pressure or alternative cleaning methods to prevent damage. Always start on a low setting and test on a small, inconspicuous area before expanding.
- Exterior siding (vinyl, fiber cement, composite)
- Driveways and sidewalks (concrete, pavers, brick)
- Wooden decks and fences (with care)
- Patios and foundations (stone, brick)
- Stone features and landscape walls (gentle passes)
Pro tip: Test in a hidden corner first and monitor for any cosmetic changes as you work. A mild approach often yields the best long-term results.
Surfaces to Avoid or Where Extra Caution Is Needed
Not every surface is suitable for high-pressure cleaning. Delicate materials, old paint, or surfaces with weathered coatings can suffer damage from aggressive spray. Avoid washing near electrical outlets, windows, and soft wood that can gouge or splinter. Soffits, eaves, and roof edges require particular care to prevent water intrusion. For painted surfaces, consider using detergent and lower pressure to minimize peeling. If you’re unsure, consult manufacturer guidelines or test on a small area before broader use. Safety remains the top priority when planning any wash.
- Avoid high-pressure on soft wood, old stucco, and painted surfaces that may peel
- Do not spray electrical fixtures, outlets, or exposed wiring
- Be cautious around roofing edges and skylights to prevent leaks
- For delicate materials, opt for detergent or a soft cleaning method
Pressure Wash Lab tip: When in doubt, start with the gentlest effective setting and step up only after confirming there’s no damage.
Planning and Prep: Build a Safe, Efficient Plan
A successful wash starts with planning. Assess the area, identify surfaces, and set priorities based on dirt level and material sensitivity. Check weather conditions to avoid washing in wind, rain, or extreme heat. Prepare water supply, power source, and extension cords if needed, ensuring the breaker can handle the workload. Protect nearby plants, outlets, and furniture with tarps or plastic sheeting. Clear the area of pets and children and move vehicles away from the work zone. With a clear plan, you’ll save time and reduce the risk of mistakes while achieving consistent results.
- Inspect surfaces for loose paint or cracks before washing
- Schedule around weather with mild temperatures and low wind
- Protect plants, outlets, and delicate landscaping
- Ensure you have a reliable water source and power access
Pressure Wash Lab reminder: Plan for safety and efficiency together; a well-prepared job reduces rework and protects your property.
Step-By-Step: Prep, Cleaning, and Post-Care
While the detailed, step-by-step instructions are provided in the dedicated STEP-BY-STEP block, this section gives a practical overview to complement that guide. Start by selecting the right nozzle and pressure. Stand at a safe distance to avoid damage and hold the wand with both hands for stability. Work from top to bottom, moving in smooth, overlapping strokes to prevent streaks and missed patches. If you encounter stubborn stains, switch to a wider spray or apply a detergent designed for outdoor soils first. After washing, rinse thoroughly and allow surfaces to dry naturally, ideally in a shaded area to prevent rapid water absorption or surface blooming. This approach minimizes risk while achieving even, thorough cleaning across diverse materials in 2026’s typical home environment.
- Top-to-bottom washing promotes uniform cleaning and prevents dirt from cascading onto cleaned areas
- Maintain a safe, consistent distance to avoid gouging or forcing water under siding
- Use detergents only when needed, following label instructions precisely
- Allow natural drying and check for missed spots while surface remains damp for rewash opportunities
Safety, Common Mistakes, and Quick Troubleshooting
Safety is non-negotiable in any pressure washing task. Always wear protective eyewear and gloves, and keep bystanders away. Never aim at electrical outlets, windows, or fragile trim. A common mistake is using too high pressure on soft surfaces like older wood, painted surfaces, or weathered masonry, which can cause chipping or watermarking. If you observe paint peeling or surface damage, lower the pressure and switch to a wider angle or deterge solution. For persistent grime, pause to chemically pre-treat soils for 5-10 minutes before rinsing, then re-wash. Always test a small area first and follow the manufacturer’s instructions for detergents and equipment.
- Wear safety gear and keep pets/people away from the work zone
- Start with a wide spray and reduce pressure only if necessary
- Test on inconspicuous areas before broader use
- Don’t spray directly at windows, outlets, or roof edges
Maintenance After a Wash: Protecting Surfaces and Extending Clean
After washing, protect surfaces by inspecting for damage, resealing where appropriate, and planning a maintenance schedule. Clean surfaces dry faster in shade, and consider applying a protective coating or stain suitable for the material after it’s fully dry. Regular cleaning reduces buildup and extends the life of exterior surfaces. Document the areas washed and any repairs or observations to inform future maintenance tasks. If you’re tackling decks or fences, reapply finish or sealant to preserve wood and prevent future staining.
- Allow surfaces to dry fully before applying coatings or sealants
- Schedule periodic washes based on climate and nearby pollution
- Use surface-appropriate sealants or coatings for longer life
- Record maintenance notes to track wear and plan future cleanings
Conclusion: Making Pressure Washing Work for You in 2026
This guide equips homeowners with a practical framework for deciding what to pressure wash, how to prepare, and how to execute a safe, effective clean. By focusing on the right surfaces, protective prep, and disciplined technique, you’ll achieve superior results without risking damage. As you gain experience, you’ll refine your approach to maximize efficiency and surface longevity. The Pressure Wash Lab team recommends starting with a small project to build confidence before expanding to larger areas, and always prioritizing safety and surface integrity.
Tools & Materials
- Pressure washer(Gas or electric; aim for 1500-3000 psi for exterior cleaning; check flow rate (GPM) as needed)
- Nozzle tips(Start with 25-degree; avoid 0-degree on most surfaces)
- Detergent or exterior cleaner(Choose a cleaner rated for outdoor use and compatible with your surface)
- Hose and water source(Ensure adequate length and pressure; use a shutoff valve if available)
- Surface cleaner attachment(Optional for large flat surfaces to improve consistency)
- Protective gear(Safety goggles, gloves, and closed-toe shoes; consider ear protection)
- Tarps/plastic sheeting(Protect plants, outlets, and delicate items nearby)
- Ladder or stabilization aids(Use a stable ladder or pole system when cleaning higher areas)
- Stiff-bristle brush(For stubborn spots after rinsing or pre-soaking)
Steps
Estimated time: 45-90 minutes per area
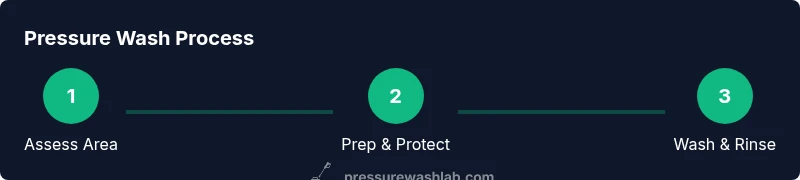
- 1
Assess and plan
Survey the area to identify surfaces, dirt levels, and any fragile finishes. Determine which areas will need detergent and which can be cleaned with water only. Create a simple plan outlining the order of surfaces and required PPE to keep everyone safe.
Tip: Do a quick test on a hidden patch to confirm the surface handles the chosen pressure. - 2
Protect and prep the site
Move furniture, cover plants and outlets, close doors and windows, and remove loose debris. Ensure hoses and cords are clear of trip hazards and unplug devices not designed for water exposure.
Tip: Use tarps to shield shrubs and ornamental plants from spray and runoff. - 3
Choose nozzle and pressure
Start with a wide spray (roughly 25 degrees) and the lowest effective pressure. Keep the wand at a safe distance (usually several inches away) and avoid direct hits on delicate areas.
Tip: Never use the zero-degree nozzle on exterior surfaces; it can gouge wood and loosen paint. - 4
Apply detergent and pre-soak
If using detergent, apply according to the label and allow a short dwell time for soils like mold or algae. Rinse from top to bottom to prevent dirty runoff from re-soiling cleaned areas.
Tip: Test a small area first and follow label directions for dwell time to prevent surface damage. - 5
Wash and rinse thoroughly
Move methodically in overlapping passes, working from the top down. Rinse surfaces completely to avoid streaks and remaining cleaner residue.
Tip: Pause at edges to avoid water infiltration into seams or under trim. - 6
Inspect and dry
Check for missed spots and adjust technique if needed. Allow surfaces to air dry or dry with a clean, non-abrasive cloth in shaded areas to prevent rapid moisture retention.
Tip: After drying, inspect for any damage and reseal or repaint if required.
Quick Answers
What surfaces should I pressure wash first?
Begin with low-risk areas such as sidewalks and driveways, then move to higher surfaces like siding. Prioritize areas with heavy mold or mildew, but avoid delicate finishes until you’ve tested a small spot.
Start with the easiest areas like sidewalks, then move to siding after confirming the surface can handle the spray.
Is siding safe to pressure wash?
Siding can be pressure washed, but you should use low to moderate pressure and test first. Avoid aggressive angles that can loosen siding panels or peel paint. When in doubt, consult the manufacturer’s guidelines.
Yes, but test first and use gentle pressure to protect the siding.
Detergent or water only?
Detergents help break down tough grime and organic growth. Use exterior cleaners designed for your surface and follow label directions. If the grime is light, water alone may suffice.
Detergents can make stubborn dirt easier to remove; follow the product directions.
How often should I pressure wash?
Frequency depends on climate, surroundings, and surface type. Most homes benefit from an annual or biennial wash, with additional sessions after severe storms or heavy mildew growth.
Most homes do a yearly wash, more often if you notice mold or heavy dirt.
Can pressure washing damage surfaces?
Yes, using too high pressure or incorrect angles can gouge wood, strip paint, or erode masonry. Always test, start with wide spray, and back off if you see fiber tearing or surface dulling.
There is a risk if you push too hard; test first and use gentler settings.
What is the best PSI for home use?
For most home tasks, a range of 1500-3000 psi works well, depending on surface. Start lower and adjust gradually, keeping safety and material integrity in mind.
Aim for a moderate psi and adjust as needed after testing on a small area.
Watch Video
Key Takeaways
- Identify surfaces that benefit most from washing.
- Protect surrounding items and choose safe nozzle settings.
- Wash top to bottom with steady motion for even results.
- Test areas first and monitor drying to prevent damage.
- Document maintenance and plan future cleanings.