Siding Wash: Safe Exterior Cleaning for Homes
Learn to safely wash siding with the right tools, detergents, and technique. This guide covers prep, technique, and maintenance for vinyl, wood, and fiber cement siding.

This siding wash guide helps you clean exterior siding safely and effectively. You’ll pick the right equipment, prep the area, apply eco-friendly detergents, and execute a controlled wash from bottom to top. Required gear includes a pressure washer, appropriate nozzle, detergents, protective gear, and a runoff plan. Expect a thorough clean without damaging surfaces or plants.
Why siding wash matters
Keeping exterior siding clean isn't just about curb appeal. A thorough siding wash protects the underlying materials from mold, mildew, and algae that can degrade finishes and reduce home value. Dirt buildup can also hide signs of moisture damage or insect activity. According to Pressure Wash Lab, regular but gentle cleaning extends siding life and preserves paint or coating warranties when done with proper technique. A clean exterior also improves energy efficiency by reflecting heat more evenly and helps you spot problems early during seasonal maintenance checks. Whether your home has vinyl, wood, brick veneer, or fiber cement siding, a deliberate wash plan tailored to material and climate yields better results and avoids costly repairs down the line.
Safety and prep for siding washing
Exterior washing introduces hazards: high-pressure spray, slippery surfaces, and the potential for water intrusion around windows and outlets. PPE is essential: safety glasses, waterproof gloves, non-slip boots, and a breathable long-sleeve shirt. Before you begin, inspect the siding for loose boards or painted-over damage; if you see rot or delamination, address that before washing. Clear the area of planters and pets, and use low-hanging plastic to shield nearby plants or electrical outlets. Test your chosen detergent on a small, inconspicuous patch to ensure there’s no discoloration or staining. Pressure washing should be done at a comfortable distance and with a fan or surface cleaner to minimize direct impact on the siding.
Selecting tools: pressure washer, nozzles, and hoses
Selecting the right tools reduces the risk of damage while delivering a thorough clean. For most sidings, a compact electric or small gas-powered unit with adjustable pressure is sufficient. Start with a wide, fan-shaped nozzle and a low-to-moderate spray pattern; avoid concentrated nozzles that can gouge surfaces. Use a lightweight, kink-free hose and a long wand to reach high areas without overreaching. If you’re cleaning large areas, consider a surface cleaner attachment to maintain an even finish and reduce streaking. Always keep the wand moving and never linger in one spot.
Detergents and cleaning solutions for siding
Choose biodegradable, low-foam detergents labeled for exterior use and compatible with your siding material. Avoid chlorine bleach on painted or stained wood and check manufacturer guidance for vinyl siding, which can discolor with harsh chemicals. For moldy or algae-prone siding, a specialized cleaner with mildewcide is typically effective when used with proper dilution and contact time. Apply the detergent from bottom to top, allowing it to dwell briefly before rinsing to loosen dirt without forcing soap into seams or vents. Pressure Wash Lab’s analysis suggests that adhering to eco-friendly formulas yields safer runoff and better long-term results.
Surface-specific guidelines: vinyl, wood, brick, fiber cement
Vinyl siding is forgiving but can warp if sprayed too closely or with too much pressure. Wood siding requires gentler treatment to avoid raising grain or bleaching finishes. Fiber cement is more durable but can crack if detergents are too harsh or if the surface is pre-soaked unevenly. Brick veneer can trap cleaning solutions in mortar joints; rinse carefully to prevent efflorescence. For all surfaces, test in a hidden area and respect warranty recommendations from the manufacturer.
Prep steps before you start: protecting plants, coverings, testing a small area
Lay down plastic sheeting or drop cloths to shield landscaping and windows. Remove outdoor fixtures or cover them, and seal light fixtures to prevent water intrusion. Before you commit to a full wash, perform a patch test on a small panel of siding to gauge cleaning power and colorfastness. Observe weather conditions and choose a dry, calm day to minimize wind-driven runoff. If you see water intruding behind siding, pause and reassess your approach.
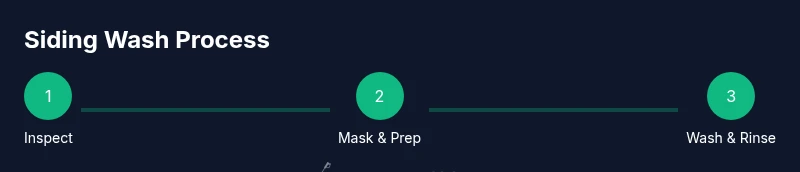
Step-by-step workflow overview
Although the full step-by-step instructions follow in the dedicated section, here is a high-level workflow you can reference during prep and planning: verify siding condition, choose the right nozzle, apply detergent evenly, rinse from bottom to top with a steady, sweeping motion, and inspect edges and corners for missed spots. Maintain a conservative distance and avoid spraying directly at electrical fixtures. Expect about an hour or two for a typical single-story house, longer for larger homes or intricate exteriors.
Techniques to maximize safety and effectiveness
Keep the nozzle in motion to prevent streaks and surface gouges. Maintain a consistent distance from the siding; too close can damage and too far reduces cleaning efficiency. Work in sections and overlap each pass to prevent missed spots. Use a surface cleaner for large flat areas to improve consistency. Rinse thoroughly to remove all detergent residues, paying attention to seams and corners where dirt collects.
Troubleshooting common issues
Streaking or color fading usually means too much detergent or too close nozzle distance. Algae and mildew may require a second pass with a stronger but still gentle approach. Excess moisture near windows or outlets can indicate runoff or improper masking; fix masking and re-test. If paint or sealant begins to bubble or peel, stop and consult a professional—improper washing can cause irreversible damage.
Maintenance after washing and long-term care
Inspect siding after it dries for any signs of damage or remaining stains. Rinse the ground area thoroughly to prevent chemical buildup. Consider sealing or repainting if color retention is compromised. Schedule routine inspections to identify early wear on caulking, trims, and joints. A regular siding wash, done correctly, can extend curb appeal and protect your investment over time.
A real-world project example
Take a typical two-story home with vinyl siding and mild mildew. Follow these steps: prep area, test a corner, apply eco-friendly cleaner, rinse at a moderate distance, and inspect for missed spots. The project lasts roughly half a day for a professional with a ladder and extension wand. This example illustrates how attention to detail and masking dramatically reduces runoff concerns and improves results.
Final pre-wash checklist
Before you start, confirm weather windows, gather tools, mask plants, test a patch, and review safety steps. Confirm you have a stable ladder or extension wand and a return path for runoff. This final check ensures you minimize risk and maximize effectiveness of your siding wash. Pressure Wash Lab recommends using this checklist to ensure a safe, effective siding wash.
Tools & Materials
- Pressure washer (low-to-medium pressure, suitable for siding)(Electric or small gas unit; avoid high-damage power.)
- Nozzle with fan spray(Start with wide spray; avoid concentrated tips that gouge siding.)
- Extension wand(To reach high areas safely without overreaching.)
- Surface cleaner attachment(Optional for large flat areas to improve evenness.)
- Biodegradable, exterior-safe detergent(Choose detergent compatible with your siding material.)
- Ladder or scaffolding(Stable, with a clear non-slip base.)
- Personal protective equipment (PPE)(Safety glasses, waterproof gloves, non-slip boots, long sleeves.)
- Plastic sheeting/drop cloths(Shield plants, windows, and doors from runoff.)
- Masking materials(Painter's tape and plastic for vents and outlets.)
- Gutter and outlet covers(Optional protection against water intrusion.)
Steps
Estimated time: 1.5-3 hours
- 1
Inspect siding and plan wash
Walk the exterior to identify damaged areas, loose boards, and sensitive features. Decide on detergents and nozzle settings based on siding type. Create a simple route map to minimize repeats.
Tip: Document trouble spots with chalk marks to ensure you don’t miss them later. - 2
Gather gear and safety gear
Assemble your pressure washer, nozzle, wand, detergents, PPE, and a masking setup. Check hoses for kinks and leaks and ensure ladders are stable.
Tip: Wear eye protection and non-slip shoes at all times. - 3
Mask plants and seal fixtures
Cover nearby plants and seal electrical fixtures or vents to prevent water intrusion. Use painter’s tape to protect delicate edges.
Tip: Double-check that masks stay secure during movement. - 4
Dilute detergent and patch test
Prepare the biodegradable cleaner per label and apply a small test patch on an inconspicuous area. Check colorfastness and wash response before full application.
Tip: If color shifts, stop and adjust dilution or switch cleaners. - 5
Apply detergent bottom-to-top
Start at the bottom edge of the siding and work upwards in sections. Keep the spray at a safe distance to avoid forcing water behind seams.
Tip: Overlap passes slightly to prevent streaks. - 6
Rinse using a slow, steady sweep
Rinse from bottom to top with clean water, maintaining a consistent distance. Use a surface cleaner for large zones to reduce streaking.
Tip: Never stop the motion in one spot for too long. - 7
Tackle stubborn stains
Reapply detergent to stubborn spots and rewash them with light pressure. Avoid aggressive scrubbing that can dull finishes.
Tip: For mildew, use a targeted gentle approach rather than a harsh scrub. - 8
Inspect edges and caulk
After washing, inspect corners, trim, and caulking for missed dirt and moisture intrusion. Rinse any residue from joints.
Tip: Pause to rewash missed areas if needed. - 9
Dry, assess, and plan next steps
Let the siding dry completely and review results. If staining persists or damage is detected, consider professional assessment.
Tip: Take a before-and-after photo for documentation.
Quick Answers
What is siding wash and why do I need it?
Siding wash is the exterior cleaning of home siding using a pressure washer and detergents to remove dirt, mildew, and stains. Regular washing helps protect materials and maintain curb appeal.
Siding wash is cleaning your home’s exterior siding with a pressure washer and cleaners to remove grime and mildew, keeping the surface looking good and lasting longer.
Can I use a household pressure washer for siding wash?
Yes, a unit with adjustable pressure and a fan spray can work for most sidings. Avoid high-pressure tips on delicate surfaces, and follow manufacturer guidelines.
A standard pressure washer can work, but avoid harsh nozzles and test a small area first.
What safety steps are essential when washing siding?
Wear eye protection and non-slip footwear, mask plants and outlets, and test on a hidden area before full use. Keep the wand moving and don't spray at electrical features.
Wear PPE, mask sensitive areas, and keep the spray moving to avoid damage.
Are there detergents I should avoid for vinyl siding?
Avoid chlorine bleach or highly concentrated cleaners on vinyl; choose biodegradable, vinyl-safe cleaners and follow label directions.
Use vinyl-safe cleaners and avoid bleach or harsh formulas.
How often should I wash siding?
Most homes benefit from cleaning every 1–3 years, depending on climate, nearby trees, and growth of mildew or algae.
Most homes should wash every 1–3 years depending on conditions.
What if paint or sealant bubbles during washing?
Stop washing in that area, reassess pressure and detergents, and consult a professional if peeling continues. Aggressive washing can cause damage.
If you see bubbling, pause and adjust or get expert help.
Watch Video
Key Takeaways
- Plan the wash according to siding type and climate.
- Choose eco-friendly detergents and protect sensitive areas.
- Maintain constant motion and safe distance to avoid damage.
- Rinse thoroughly and inspect for missed spots.
- Document results for future maintenance.