Pressure Washer on Vinyl Siding: A Practical How-To Guide
Learn a safe, effective method to clean vinyl siding with a pressure washer. This step-by-step guide covers setup, technique, stain removal, and maintenance to protect your home exterior.

With the right approach, you can safely clean vinyl siding using a pressure washer. This guide shows how to choose the correct pressure, nozzle, and cleaning solution, plus a step-by-step process to avoid damage. You’ll learn prep, technique, and post-cleanup routines to protect your siding and preserve curb appeal while minimizing water intrusion and protecting nearby plants.
Safety First: Preparing for a Pressure Washer on Vinyl Siding
Cleaning vinyl siding with a pressure washer can be safe and effective when you follow best practices. This section introduces the key safety steps and emphasizes why proper prep matters. According to Pressure Wash Lab, starting with low pressure and a wide nozzle minimizes risk and protects siding while delivering clean results. Before you turn on the machine, remove obstacles, cover nearby plants, and ensure outdoor outlets are protected. Inspect the exterior for loose panels or damaged trim; do not pressure wash over cracked areas. You should also verify that you have a clean water source and proper drainage to prevent run-off from harming your landscape. Finally, wear protective eyewear, gloves, and non-slip footwear to stay safe on wet surfaces.
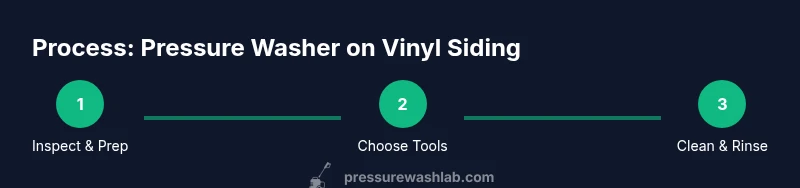
Inspect the Siding and Plan Your Cleaning Path
Vinyl siding is durable but not indestructible. Start with a visual inspection: look for cracks, loose panels, or areas where paint is peeling. Plan a cleaning path that minimizes backtracking and avoids spraying directly at seams from too close. The goal is to remove surface dirt without forcing water behind the siding. Identify any areas that require pre-treating, such as mold or mildew, and decide whether a detergent solution is appropriate. If you find deterioration or soft spots, skip those sections and consult a professional. Spraying near electrical fixtures, outlets, or hose bibs can cause damage or create hazards. With a clear plan, you’ll achieve even results and reduce the risk of damage.
Choosing the Right Setup: PSI, Nozzle, and Cleaning Solutions
For vinyl siding, start with low to moderate pressure and a broad spray pattern. Use a wide-angle nozzle to spread the water and reduce concentrated impact. If you need cleaning solution, choose a detergent designed for exterior siding and apply it according to the label. Avoid bleach-based products unless absolutely necessary and compatible with vinyl; test first in a hidden area. Keep the nozzle moving and hold it at a safe distance from the surface (a few inches to a few decimeters depending on your setup). Do not linger on any single spot; this approach minimizes streaks and prevents water from seeping behind joints.
Cleaning Techniques: How to Move the Spray for Even Results
A steady, overlapping pass is key to an even finish. Begin at the top of a section to avoid newly loosened dirt running down onto still-clean areas. Maintain a 45-degree angle relative to the siding and keep the spray moving rather than pausing. Short, controlled bursts are safer than sustained blasts. Work in a methodical grid pattern, keeping track of what’s already cleaned. If you encounter stubborn areas, switch to a soft brush or a cleaning pad and re-wet the area rather than forcing water through the surface. After rinsing, check for any remaining stains and reapply your solution as needed, then rinse again. This technique reduces the risk of gouging or water intrusion.
Dealing with Mold, Mildew, and Algae on Vinyl Siding
Mold and mildew on exterior vinyl siding respond to a gentle approach combined with a cleaning agent. For surface mold, a mild detergent and water or oxygen bleach solution can help. Always test any cleaner on a small, inconspicuous patch. Apply the solution and let it sit for a short period (per label); avoid letting cleaners dry on siding. Rinse thoroughly with clean water, using the spray pattern described earlier. For persistent mildew, you may repeat the treatment, but do not over-wet corners or windows. Remember that stubborn growth may require professional assessment if it persists after several attempts.
Rinsing, Drying, and Protecting Your Investment
Rinsing removes cleaner and dislodged dirt. Start from the top and move downward in even passes, overlapping slightly. Keep the nozzle at a safe distance and avoid direct contact with joints. After rinsing, allow siding to dry completely before assessing final cleanliness. If you notice water pooling at the bottom of panels or behind trim, inspect for gaps or improper drainage. Protect nearby plants with tarps or plastic and avoid spraying near flower beds or garden soil. Drying times vary with sun and humidity, so plan for a few hours of drying before rain risks washing away your freshly cleaned surface.
Maintenance and Long-Term Care for Vinyl Siding
Regular maintenance helps vinyl siding look its best for years. Schedule seasonal inspections for loose panels, cracks, or caulking gaps. Gentle cleaning once or twice a year, using the same technique, can keep grime at bay without causing wear. Consider rinsing with plain water after any incidental staining to minimize residue. Keep gutters clean and ensure splash zones are free of obstructions that can redirect spray back onto the siding. When storing your equipment, drain hoses and relieve pressure to prevent leaks. By investing a little time now, you’ll extend the life of your siding and reduce the cost of future repairs.
When to Call a Pro and What to Expect
If you notice any peeling, warping, or loose panels, it’s wise to step back and consult a professional. A contractor can assess the structural integrity of the siding and determine whether cleaning alone will suffice or if repairs are needed. For most homeowners, a cautious approach with proper setup and technique will yield satisfactory results, but some stains or mold growth may require specialized equipment. Pressure washing is not a one-size-fits-all solution. Pressure settings, detergent choices, and spray angles should be tailored to your specific siding and climate. If in doubt, contact Pressure Wash Lab Team for guidance.
Quick Reference Checklist Before You Start
- Inspect for damaged siding; do not pressure wash over cracked panels.
- Gather tools: pressure washer, wide-angle nozzle, mild detergent, garden hose, tarp, PPE.
- Test in a hidden patch and follow label instructions for cleaners.
- Pre-wet, treat, rinse, and dry; never spray near outlets or windows.
- Protect plants and outdoor features; allow drying time before rain.
Tools & Materials
- Pressure washer (adjustable PSI)(Use the lowest effective pressure; do not exceed safe limits for vinyl.)
- Wide-angle nozzle (e.g., 25-degree or wider)(Start with the widest angle to minimize impact.)
- Mild detergent or cleaning solution compatible with vinyl siding(Follow label instructions; avoid harsh chemicals unless approved.)
- Garden hose with adjustable nozzle(Pre-wet areas and rinse after cleaning.)
- Extension wand or pole(Useful for high sections without a ladder.)
- Sturdy ladder or step stool(Place on stable, level ground; use a buddy for safety.)
- Soft brush or sponge(For spot cleaning without high pressure.)
- Protective gear (safety glasses, gloves, non-slip footwear)(Keep yourself safe from splashes and slips.)
- Drop cloths or plastic sheeting(Protect plants, doors, and windows from runoff.)
- Test patch area(Check a hidden area first to gauge siding reaction.)
Steps
Estimated time: 2-4 hours (including drying)
- 1
Prepare the area and safety gear
Clear the workspace, remove obstacles, and put on eye protection, gloves, and non-slip footwear. Cover nearby plants and protect outlets. Do a visual check for damaged siding and take note of any areas to avoid.
Tip: Always perform a small test patch first to gauge siding response. - 2
Set up equipment and choose the nozzle
Attach a wide-angle nozzle and connect the hose to a clean water source. Start with the lowest safe pressure and ensure the spray is not directed at seams or electrical fixtures. Extend reach with a wand if needed.
Tip: Keep the nozzle at a safe distance (start around 6–12 inches) from the siding. - 3
Test a hidden patch
Spray a small, inconspicuous area at the chosen distance and observe for any streaking, discoloration, or damage. If signs of damage appear, stop and reassess your setup.
Tip: If there’s any adverse reaction, switch to a softer approach or different cleaner. - 4
Rinse and prepare to clean
Rinse the area gently to remove loose dirt before applying cleaner. Apply cleaning solution to the most soiled sections using a broad spray, avoiding direct hits on seams.
Tip: Work in sections and maintain a consistent pattern for even results. - 5
Clean with overlapping passes
Move the nozzle in a steady, overlapping pattern, maintaining a 45-degree angle. Do not linger on one spot; keep the spray moving to prevent water from penetrating joints.
Tip: Pause briefly only to re-wet persistent stains; avoid forced scrubbing with high pressure. - 6
Rinse thoroughly
Rinse from top to bottom with overlapping strokes to wash away detergent and loosened dirt. Ensure all cleaner residue is removed to prevent streaking.
Tip: Check for any missed spots as you go and re-rinse as needed. - 7
Inspect for stubborn stains
Revisit any stubborn areas with a soft brush and light scrubbing, then re-rinse. Do not use aggressive scrubbing that can scratch vinyl.
Tip: If staining persists after multiple passes, consider a specialty cleaner or professional advice. - 8
Dry and protect
Allow siding to air dry completely. Remove protectants from plants and surfaces and store equipment with hoses drained and depressurized.
Tip: Avoid rain exposure for several hours after cleaning to prevent new dirt from settling.
Quick Answers
Is it safe to use a pressure washer on vinyl siding?
Yes, when you use the correct pressure, a wide nozzle, and proper technique. Avoid spraying at seams or fixtures and always test a small patch first.
Yes, but only with the right setup and care. Start with low pressure and test first.
What PSI should I use for vinyl siding?
Use low to moderate pressure with a wide-angle nozzle. Begin at the lowest effective setting and adjust gradually while testing on an inconspicuous area.
Start with low pressure and test on a hidden area first.
Can I use bleach or strong cleaners with a pressure washer on vinyl siding?
Harsh cleaners and bleach can damage vinyl. Use mild detergents or cleaners recommended for siding, and test first.
Avoid strong cleaners unless the manufacturer approves it.
How do I prevent water from getting behind the siding?
Keep the nozzle at a safe distance, use a broad spray, and avoid spraying direct hits on seams or gaps. Move in clean, overlapping passes.
Keep the spray off joints and seams and don’t linger.
Should I hire a pro if I see damage to the siding?
Yes. If you notice peeling, warping, or loose panels, consult a professional to assess damage and determine next steps.
Yes—if you see damage, get a professional opinion.
How long does vinyl siding maintenance take?
Time depends on house size and weather. Plan a few hours for typical cleaning plus drying time.
It varies, but set aside a few hours plus drying time.
Watch Video
Key Takeaways
- Test a patch first before full cleaning.
- Start with low pressure and a wide nozzle.
- Keep the spray at a safe distance with overlapping passes.
- Rinse top-to-bottom and allow drying time.
- Protect plants and outdoor features during cleaning.