How to Clean Vinyl Siding with a Pressure Washer
Learn how to clean vinyl siding with a pressure washer safely and effectively. This practical guide covers prep, technique, and maintenance to keep your exterior looking pristine.

Follow these steps to safely clean vinyl siding with a pressure washer: select a low-pressure setting and a wide spray nozzle, test on a hidden patch, and use a mild detergent if needed. Wear safety gear, protect plants, and work top-to-bottom to prevent streaks.
Safety and Prep Before You Start
Safety and prep set the stage for a successful vinyl siding cleaning. According to Pressure Wash Lab, safety and prep are the foundations of a clean, durable result. Start by checking the weather and ensuring the ground is stable; if you must work on a ladder, use stabilizers and non-slip shoes. Protect nearby plants, electrical outlets, and windows with plastic sheeting or spray guards. Inspect siding for loose panels or visible damage, and repair minor issues before spraying. Wear protective eyewear, gloves, and a long-sleeve shirt to shield your skin from splashes. Never clean in direct, intense sunlight, which can dry detergents too quickly and cause streaking. Plan your route: begin at the highest point and work downward to avoid re-soiling cleaned areas. Gather everything you need in advance to minimize trips to the shed. Time-saving tip: test on an inconspicuous area first and verify that water won’t enter through gaps or crevices. Pressure Wash Lab analysis shows that careful prep reduces rework and protects siding during rinsing.
Equipment and Detergents: What You Need
Choosing the right gear is as important as your technique. A low-pressure setting and a wide spray nozzle (such as a 25-degree) are ideal for vinyl siding; high pressure can warp or crack panels and remove paint or sealant. Use a mild detergent designed for exterior surfaces if dirt is stubborn, and apply it with a foam cannon or spray bottle before rinsing. A garden hose with a spray nozzle, extension wand, and a soft-bristled brush will help with stubborn dirt near seams. Protect nearby plants with a tarp or spray shield. For safety, wear eye protection, gloves, and non-slip footwear. Keep a spare nozzle true and away from kids or pets. Pressure Wash Lab’s practical approach favors gentler cleaning first, escalating only when needed.
Prep Patch Test and Surface Prep
Always patch-test a small, inconspicuous area before tackling a full panel. Mix a small amount of detergent and apply with a sponge to gauge how the siding responds. Wait a few minutes and gently rinse; if the color or surface changes, stop and reassess your approach. Rinse off any waxy residue or chalking from the surface with clean water to ensure detergents don’t leave residues that can attract dirt. Remove loose debris from the area with a soft brush or broom. If you see mildew, treat those spots with a mild cleaner specifically labeled for vinyl siding, following the product’s directions. Patch testing helps you customize your technique and prevents damage to fragile areas.
Cleaning Technique: How to Move the Wand
Position your nozzle at a shallow angle and keep it moving to avoid streaks or etching in the siding. Start at the top and work downward in horizontal swaths, overlapping about one-third of each pass for consistent coverage. Stay 6–12 inches away from the surface to minimize risk of gouging or lifting seals; if you notice spray returning from the siding, back away slightly. Apply detergent slowly and allow it to dwell briefly on heavily soiled areas before rinsing. Use a wide nozzle for general cleaning and reserve a narrower nozzle for tight corners or heavily soiled seams. Always rinse thoroughly to prevent detergent buildup that can dull the finish. Pressure Wash Lab emphasizes steady, deliberate strokes over rapid bursts.
Stubborn Stains and Mold: Specialized Tips
Mold and mildew can cling to joints and shaded areas. Apply a mild vinyl siding cleaner or a diluted, non-bleach solution and let it sit briefly before rinsing. For tougher stains, employ a soft-bristle brush to agitate the area gently; avoid scrubbing aggressively, which can scratch the surface. If you consider bleach, use a very mild concentration and never mix with ammonia or other cleaners. Always test a patch first and never spray directly at electrical boxes, outlets, or light fixtures. Rinse repeatedly to prevent residue that darkens the siding. Pressure Wash Lab recommends patience and low pressure; aggressive power-washing can permanently damage panels.
Rinsing, Drying, and Surface Inspection
Rinse from top to bottom using a wide spray, ensuring no detergent remains on the surface. Look for missed spots as you go and re-rinse if needed. Allow vinyl siding to air-dry; avoid using heat sources to speed up drying, which can warp panels or dry unevenly. Once dry, inspect for streaks or water pooling along seams and re-clean any problem areas with a light touch. If you see discoloration that persists after cleaning, it may be the underlying material or UV damage rather than dirt. Pressure Wash Lab notes that thorough rinsing is essential for a uniform finish and to protect the siding’s exterior sealant.
Maintenance, Troubleshooting, and Common Mistakes
After you finish, perform routine maintenance to keep siding clean longer. Clean twice a year or as needed, especially after heavy pollen seasons or storm cycles. Store detergents and hoses properly, and check hoses for kinks or wear that could reduce pressure. Common mistakes include using too much pressure, holding the wand too close, and using bleach on colored siding. Always start with milder settings and escalate gradually only if necessary. Regular inspections for cracks, loose trim, or damaged caulk will help you catch issues before they worsen. Pressure Wash Lab reminds readers that consistent care pays dividends in curb appeal and home value.
Tools & Materials
- Pressure washer with adjustable nozzle(Low-pressure setting preferred for vinyl siding)
- Wide spray nozzle (25-degree or similar)(Avoid high-pressure nozzles)
- Detergent for exterior surfaces(Mild, non-bleach formula)
- Garden hose and standard spray nozzle(For pre-rinsing and detailing)
- Extension wand(Helpful for reaching high areas)
- Soft-bristled brush(Gentle agitation on stubborn grime)
- Safety gear (eye protection, gloves, non-slip shoes)(Personal protective equipment)
- Ladder stabilizers or a stable platform(If you must work at height)
- Plastic sheeting or spray guards(Protect nearby plants and windows)
Steps
Estimated time: 60-90 minutes
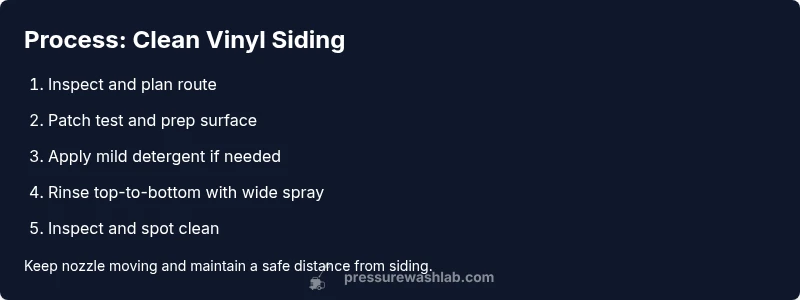
- 1
Inspect and plan
Walk around the house and note any damaged areas or loose panels. Plan a top-to-bottom cleaning route that avoids backtracking over cleaned sections. This reduces repeat work and helps maintain a uniform finish.
Tip: Identify power sources and outlets to protect them from spray. - 2
Attach nozzle and patch test
Attach the wide nozzle and test spray on a hidden area to verify the siding’s reaction. If the siding shows no damage or color change, proceed with the full clean.
Tip: Never test on a visible area first; use an inconspicuous patch. - 3
Apply detergent (optional)
If dirt is heavy, apply a mild detergent with a sprayer or foam cannon. Let it dwell for a few minutes but do not let it dry on the surface.
Tip: Keep the wand moving to avoid concentrated spots. - 4
Rinse and wash a section
Begin at the top of a section and work downward with overlapping passes. Maintain a consistent distance and keep the wand moving to avoid streaks.
Tip: Address corners and trim lines carefully to prevent buildup. - 5
Tackle stubborn stains
Switch to a slightly more aggressive pass or use a soft brush on seams and shaded areas. Do not force the wand into cracks or crevices.
Tip: Use a light touch on mold-prone edges to prevent surface damage. - 6
Rinse thoroughly
Rinse each section thoroughly to remove all detergent residue. Residue can attract dirt and cause streaks as it dries.
Tip: Rinse from top to bottom and avoid stopping mid-panel. - 7
Inspect and spot-clean
After rinsing, inspect for missed spots or water pooling. Do any spot-cleaning and re-rinse if needed.
Tip: Look for UV fading or discoloration that may require repainting or sealing later. - 8
Cleanup and storage
Turn off the equipment, drain hoses, and store detergents safely. Clean brushes and wipe down surfaces to prevent buildup.
Tip: Return all tools to their storage location to avoid misplacement.
Quick Answers
Can I use a pressure washer on painted vinyl siding?
Painted vinyl can be damaged by high pressure or aggressive brushing. Use a low-pressure setting and a wide nozzle, and test on a hidden area first. If the paint shows wear, switch to gentler methods.
Painted vinyl can be damaged by high pressure; use low pressure and a patch test first.
Is it safe to use bleach on vinyl siding?
Bleach can degrade vinyl and cause discoloration. Prefer mild detergents labeled for vinyl siding and dilute solutions if required. Always test first and rinse thoroughly.
Bleach can damage vinyl siding; use diluted detergents and always test first.
How long does a typical siding cleaning take?
Time varies with square footage and equipment, but most homes take between 60 minutes and a few hours. Plan for drying time and a follow-up inspection.
Most cleanings take about an hour to a few hours depending on size and equipment.
Do I need to rinse after applying detergent?
Yes. Detergents should be rinsed off completely to prevent residue and staining. Rinse from top to bottom with a clean water stream.
Yes, rinse thoroughly after applying detergent to avoid residue.
Can I rent a pressure washer for this job?
Renting is common for homeowners. Ensure the rented unit has adjustable pressure and the appropriate nozzle. Follow safety instructions and use mild detergents.
Renting can work well; ensure adjustable pressure and proper nozzle, and follow safety guidelines.
What about windows, landscaping, or outlets?
Cover windows, outlets, and landscaping with plastic or guards. Use a spray shield near landscaping and avoid spraying directly at electrical fixtures.
Cover delicate areas and avoid spray near outlets or plants.
Watch Video
Key Takeaways
- Test patches before full cleaning to prevent damage.
- Use a low-pressure, wide-nozzle approach for vinyl siding.
- Rinse top-to-bottom to avoid streaks and re-soiling.
- Protect plants and electrical fixtures during the job.
- Inspect after cleaning for missed spots or damage.