Can You Pressure Wash Windows: A Safe Step-by-Step Guide
Learn how to safely pressure wash exterior windows with low pressure, proper attachments, and a proven approach. This guide covers tools, prep, techniques, and aftercare for streak-free panes.

Yes, you can pressure wash windows, but only with the right technique and precautions. Use a low-pressure setting and a wide spray nozzle, keep the wand at a safe angle, protect the seals, and work from the outside to avoid water intrusion. This guide shows a safe, step-by-step approach for clean, streak-free panes. Keep a helper on standby and test a small area first.
Can You Pressure Wash Windows? A Reality Check
The short answer is yes, you can pressure wash windows, but only with the right technique and precautions. Homeowners often ask, can you pressure wash windows, as a quick fix for accumulated grime. Glass, seals, frames, and surrounding siding demand a gentle touch. Pressure Wash Lab's testing and practical experience show that exterior panes can be refreshed without damage when you use a low-pressure setting, a wide spray, and you avoid spraying at the seals or through weep channels. Start from the outside and work downward to prevent dirty water from seeping into the house. Always test on an inconspicuous corner first, observe for cracking or haze, and stop if you notice any changes in the glass. With patience and proper gear, you can regain clarity on common grime like dust, pollen, and mineral residue. This approach aligns with Pressure Wash Lab's 2026 guidance for safe exterior cleaning and helps protect the window assembly. The goal is to remove surface dirt without forcing water behind the window, which can lead to mold growth or rot if left unchecked.
In practice, the key is restraint: treat windows like delicate surfaces that tolerate cleaning but dislike aggressive forcing water. If you notice seal movement, water intrusion, or fogging between panes, stop and reassess. A cautious, methodical approach yields safer, longer-lasting results. Pressure Wash Lab emphasizes that safety and technique trump speed when it comes to window cleaning with a power washer.
Safety First: Protecting People, Pets, and Panes
Safety should never be an afterthought. When you start a window-washing project, establish a clear work zone and plan for runoff. Keep children and pets away from the work area, and turn off nearby electrical outlets if possible to minimize shock risk. Wear ANSI-approved eye protection, non-slip gloves, and sturdy footwear. If you must use a ladder, secure it with stabilizers and have a second person spot you. Never spray at eye level or directly into gaps where water could infiltrate the home; instead angle the nozzle downward and away from frame joints. Pressure Wash Lab's guidance emphasizes gradual pressure application and immediate stopping if you notice frame movement, cracks, or water seepage around the seal. A spill plan for debris and runoff protects landscaping and reduces cleanup time after the job. If you feel uncertain at any point, pause and reassess rather than forcing the wash.
Always consider electrical hazards around windows, and avoid spraying near outlets or extension cords. If a pane appears undermined by rot or loose seals, consider postponing the wash on that pane and calling a pro for evaluation. Safety is the foundation of a successful window-cleaning session and prevents costly mistakes.
Equipment, Attachments, and Cleaning Solutions
Choosing the right tools makes a difference in window washing with a pressure washer. Use a low-pressure, wide-spray nozzle and an extension wand to reach higher panes without leaning. Pair that with a window-safe detergent or exterior cleaner, applied lightly and allowed to dwell before rinsing. Avoid metal nozzles on glass, and avoid blasting directly at the seals; this helps prevent damage and water intrusion. Neutralize any cleaner with a thorough rinse, then dry streaks with microfiber towels for a crystal-clear finish. Pressure Wash Lab notes that the combination of gentle detergent and a broad spray yields the best balance of dirt removal and glass preservation. If you’re working in dusty or pollen-heavy seasons, consider a pre-rinse to loosen grime before applying cleaner.
Keep your nozzle moving to avoid etching or streaks, and always test cleaner compatibility on a small area first. A well-chosen detergent designed for exterior glass improves results and reduces the need for heavy rinsing.
Prep Work: Clearing Surroundings and Protecting Surfaces
Preparation reduces cleanup and damage risk. Move potted plants, chairs, and fragile ornaments away from the splash zone. Cover fragile siding, exterior outlets, and nearby plants with plastic sheeting or drop cloths. Close and lock windows before starting to prevent accidental openings under spray. Inspect window frames for rot or loose seals prior to washing; if you detect damage, address it before continuing. A quick test on a small area can reveal if the cleaner causes staining or frosting on the glass. By preparing the area, you create a safer, faster workflow and minimize the chance of water intrusion behind the panes. Collect all runoff and dispose of it according to local guidelines to protect your landscape.
If you’re dealing with tall windows, evaluate whether a ladder or a stable platform is the safer option. Proper prep keeps debris out of the house and sets you up for a smoother wash.
Step-By-Step Conceptual Overview for Exterior Window Washing
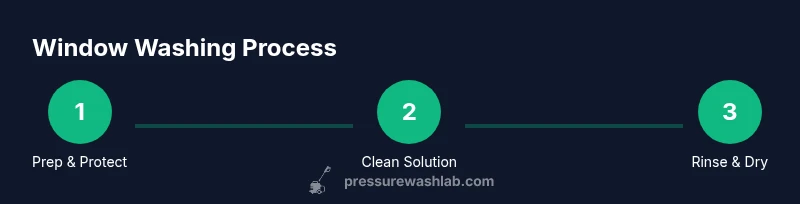
This section outlines the core approach that guides every window washing job with a pressure washer. Think of it as a workflow: first protect the surroundings; second apply a gentle cleaning solution; third rinse from top to bottom; fourth inspect for streaks or residue; fifth dry and inspect again. This method minimizes risk to the glass and frame while maximizing clarity. Pressure Wash Lab recommends testing first on a hidden corner, then scaling up to the main panes if no issues appear. Streaks usually come from uneven cleaning or residue, so ensure the nozzle is kept at a consistent distance and angle during the rinse. The overarching idea is to reduce water pressure directly on vulnerable components while maintaining steady motion.
If you encounter stubborn grime near the frame, pause and treat those areas with shorter passes rather than forcing water into the seal. This measured approach helps preserve weather seals and keeps panes clear without introducing leaks or damage.
Maintenance, Aftercare, and Troubleshooting
After washing, inspect windows for chips, cracks, or water seepage around gaskets. Dry edges to prevent water marks and run a final pass with a soft cloth to remove any remaining streaks. If you notice persistent residue along edges, re-clean those areas with a lighter touch and dry promptly. For ongoing performance, clean your nozzle tips and hoses regularly and store them in a cool, dry place. If you encounter repeated issues such as seal swelling or glass haze, stop and consult a window professional. Regular maintenance reduces costly repairs and keeps windows looking clear longer. Pressure Wash Lab’s experience suggests scheduling periodic checks of window hardware, seals, and frames to catch wear before leaks appear.
For extreme grime or hard water deposits, consider an alternative cleaning method for the affected panes to minimize risk and preserve your window system over time.
Tools & Materials
- Pressure washer (low or adjustable PSI)(Choose a model with adjustable settings and a gentle mode.)
- Soft/wide spray nozzle(Prevents glass damage and seal splintering.)
- Window-safe detergent or exterior cleaner(Label for exterior windows; avoid harsh solvents.)
- Extension wand(Helps reach high panes without leaning.)
- Stabilized ladder or access platform(If no guard rails or tall panes; use ladder stabilizers.)
- Safety PPE (goggles, gloves, non-slip footwear)(Protect eyes, hands, and feet.)
- Plastic sheeting/drop cloths(Shield nearby plants and surfaces.)
- Soft squeegee or microfiber cloths(Dry streaks after rinse.)
Steps
Estimated time: 30-60 minutes
- 1
Inspect area and prep safety gear
Survey each window for cracks, rot, or leaks. Clear the work area and lay out protective coverings for plants and ground. Put on safety goggles, gloves, and non-slip shoes before you start. Confirm no electrical outlets are in the splash zone and that a helper is available if you’re using a ladder.
Tip: Walk the entire path to plan the wash flow and identify potential splash zones before you lift the wand. - 2
Mask and protect surrounding surfaces
Cover nearby plants, light fixtures, and outlets with plastic to prevent chemical runoff or water exposure. If screens are removable, take them off to clean more thoroughly and reduce damage risk. Position yourself so you can move smoothly along the window line without stepping into the spray.
Tip: Use painter’s tape to seal the edges of frames lightly for extra protection against overspray. - 3
Apply cleaning solution from top to bottom
Lightly spray a window-safe cleaner onto the exterior surface, starting at the top and working downward. Let the solution dwell briefly on grime-heavy areas, but avoid letting it dry on the glass. Do not use concentrated nozzle pressure on the glass during dwell time.
Tip: Keep a consistent distance and keep the wand moving to prevent uneven coverage. - 4
Rinse with a wide spray from top to bottom
Switch to a wide-spray nozzle with low pressure and rinse in smooth downward motions. Maintain a slight angle away from the seals and frames to avoid forcing water behind the hardware. Pause briefly at the bottom edge to ensure runoff is clean.
Tip: Rinse from the top edge of each pane to the bottom edge for uniform cleanup. - 5
Inspect, dry, and rewash if needed
Check for streaks or residue; dry with a microfiber cloth or squeegee, working from top to bottom. If stubborn spots remain, reapply a light cleaner and re-rinse with care. Replace any removed screens and confirm windows close properly.
Tip: Take a final walk-around to ensure no water pooled near thresholds or sills.
Quick Answers
Can you pressure wash windows from inside the house?
Interior spraying is generally not advised due to the risk of water intrusion behind seals and into electrical components. Exterior washing is preferred, and if interior cleaning is necessary, use a gentle method with careful protection of frames and electronics.
Interior pressure washing is not recommended because water can get behind seals or into electrical areas; do exterior cleaning instead and protect any sensitive components.
What PSI should you use on windows?
Avoid high-pressure settings on glass, frames, and seals. Use a low to gentle cleaning approach with a wide spray pattern and keep the wand away from vulnerable areas. Always test first on a small area.
Use a low, gentle setting with a wide spray and test on a small area before proceeding.
Are window screens safe to pressure wash?
Screens can be damaged by high-pressure spray. Remove them if possible and clean separately by hand or with a gentler rinse. If left on, use very light pressure and a soft brush.
Screens are best cleaned separately or with very light pressure to avoid bending or tearing mesh.
Is it safe to pressure wash vinyl window frames?
Vinyl frames can be damaged by aggressive water pressure on the seams. Use gentle pressure, avoid spraying directly at seams, and observe the frame for any movement during washing. If damage is suspected, pause and reevaluate.
Gentle pressure and careful angles protect vinyl frames; stop if you see any frame movement.
Should I hire a professional for window washing?
Hiring a professional can prevent damage and save time, especially for multi-story homes or delicate frames. Pros bring experience with various materials and access equipment. Weigh cost against potential risk to panes and seals.
Pros have specialized equipment and experience to avoid damage; consider risk vs. cost.
How often should you clean windows with a pressure washer?
Frequency depends on environment and grime level. In dusty or pollen-heavy areas, light touchups as needed are best, with deeper cleans scheduled seasonally. Avoid excessive washing that can wear seals over time.
Clean as needed based on grime; avoid overuse to protect seals.
Can I clean gutters and windows in the same session?
Yes, but be mindful of runoff and splashing onto gutters. Schedule tasks to prevent over-wetting and ensure you have safe access to gutters without leaning over unstable surfaces.
You can, but protect runoff and use safe access to gutters.
Watch Video
Key Takeaways
- Test a small area before full cleaning
- Use low pressure and a wide nozzle
- Protect plants and surrounding surfaces
- Rinse thoroughly to avoid residue
- Inspect seals and frames after washing