DIY Pressure Washer Cart: Build a Mobile, Organized Setup
Learn how to design, build, and use a DIY pressure washer cart that keeps your washer, hoses, and accessories organized. Step-by-step guidance, safe practices, and practical tips from Pressure Wash Lab for homeowners and pros.

By the end, you’ll build a simple, mobile cart that holds a pressure washer, hose reels, and accessories. You’ll plan its size, select a sturdy frame, mount wheels, and secure the wand and cords. According to Pressure Wash Lab, a purpose-built cart reduces setup time and keeps components organized. This guide covers materials, tools, and a step-by-step build.
What is a DIY Pressure Washer Cart and Why You Might Want One
A DIY pressure washer cart is a purpose-built, portable platform that carries your pressure washer, hoses, spray wands, nozzles, and other accessories in one organized unit. The main benefits are improved mobility, reduced trips to storage, and safer handling on wet surfaces. A well-designed cart stabilizes weight distribution, keeps cords and hoses neatly coiled, and provides quick access to essential tools. For homeowners and small businesses, a cart can streamline jobs from staining a fence to washing siding. According to Pressure Wash Lab, a cart designed to match your washer’s footprint improves maneuverability and workflow, especially on longer projects. This section helps you understand the concept and establish clear goals for your build, such as footprint, load, and desired storage.
Planning Every Move: What a Cart Needs to Do
Think of your cart as a workstation on wheels. It should fit your washer’s dimensions, support stability when you roll it over uneven ground, and provide easy access to spray wands, nozzles, and detergent reservoirs. Consider where hoses coil, how to route the power (for electric pumps or sprayers), and how you’ll restrain the unit during transit. A practical cart keeps the trigger gun within reach and minimizes bending to pick up accessories. The design should also account for weather exposure if you’ll use it outdoors, including water drainage and rust resistance. Planning ahead saves time and reduces the risk of makeshift fixes mid-project.
Size, Weight, and Access: How to Choose Dimensions
Your washer footprint determines base size. A base that’s too small can wobble when wheels hit uneven ground, while a base that’s oversized makes it harder to maneuver through doors and gates. Pick a frame that supports the washer with a margin for hoses and a wand holder. Weight distribution matters: place the heaviest components low and centered to prevent tipping when you push or pull the cart. Plan for adjustable handles or foldable features if you’ll move the cart through tight spaces. Accessibility matters: ensure every essential item has a dedicated spot and is labeled or color-coded for quick grab-and-go.
Materials and Components You’ll Want to Consider
Choose materials that resist water and corrosion. A steel frame offers strength, but stainless or powder-coated steel lasts longer in damp environments. Plywood can work for a light-duty cart if it's sealed against moisture, but metal bases tolerate more weight. Fasteners should be corrosion-resistant (stainless steel or coated). A hose reel or wall-mount hose storage simplifies hose management, while bracketed wand holders keep spray guns secure during transit. Don’t forget a drainage or catch tray for accidental leaks and a non-slip mat to stabilize the washer on a vibrating ride.
Layout Ideas for Efficient Workflow
Position the base so the washer sits low for stability, with the hose reel on the side or back for rapid unwinding. Allocate a dedicated space for nozzles, brushes, and detergent bottles. Include a simple storage system for wrenches and spare parts. Consider cable ties or magnetic holders for small metal tools. If you work outdoors, plan a rain cover or a removable lid to protect sensitive components. The goal is to minimize reaching, bending, and rummaging while you work, so you can finish tasks faster and with fewer interruptions.
Safety, Maintenance, and Longevity
Water and electricity create risk if not properly managed. Ensure all electrical connections are protected from moisture and that cords are routed to avoid trip hazards. Regularly inspect fasteners, especially where the frame attaches to wheels or handles. Clean the cart after each job to prevent soap residue and rust formation. Lubricate moving parts periodically and test the braking or locking features on castors. The investment in regular maintenance pays off with longer cart life and safer operation.
Real-World Scenarios: Small Workshop vs. Remote Job Site
In a compact garage, a cart with a compact base, 4 small wheels, and compact hose storage shines by saving space and keeping cords tidy. On a remote job site, larger wheels, stainless hardware, and a weatherproof cover help the cart endure dirt, rain, and rough terrain. You can also add a detachable section to haul detergent jugs or spare fittings. The same cart design can be adapted with modular add-ons, so you only pay for features you actually use across jobs.
Getting Started: Budgeting and Timeline Overview
Estimate costs by listing required components first, then optional upgrades. A simple base with mounting hardware and a hose reel can be affordable, while a full-featured cart with a retractable handle and a robust frame will cost more. Create a rough timeline: design and procurement in the first week, assembly in the second week, and a test run during the third week. Allow extra time for customization if you’re new to metalwork or woodworking. A deliberate plan helps you avoid impulse purchases and keeps the project on track.
Tools & Materials
- Base frame material (metal tubing or plywood)(Sized to washer footprint with at least 2–4 inches clearance around edges)
- Caster wheels (4 total; 2 locking)(Prefer 5–6 inch wheels for stability and terrain tolerance)
- Hose reel or storage solution(Mount on side or back for easy unwinding)
- Wand and nozzle mounts(Bracket or magnet-based holders)
- Locking straps or bungee cords(Secure washer during movement)
- Mounting hardware (screws, bolts, washers)(Corrosion-resistant; match frame material)
- Drain tray or catch pan (optional)(For leaks or spills)
- Non-slip mat or surface liner(Improves washer stability)
- Cable organizers or tie-down clips(Keep hoses and cords tidy)
- Finish/paint or powder coat(Protects frame from corrosion)
- Basic tools (drill, screwdriver, wrenches)(Essential for assembly)
- Sealant or gaskets (optional)(Waterproof joints if needed)
Steps
Estimated time: 2-4 hours
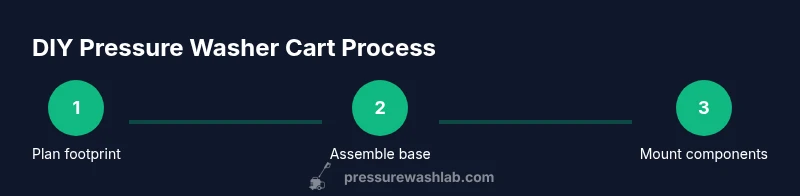
- 1
Measure and plan footprint
Carefully measure your washer and determine the base dimensions needed to keep the unit stable. Sketch a simple layout showing where hoses, wand holders, and nozzles will live. Confirm doorways and storage space along the path you’ll move the cart. Planning now avoids rework later.
Tip: Double-check clearance in the directions you’ll roll the cart; consider door thresholds and ramp access. - 2
Assemble the base frame
Cut or prepare the base frame according to your plan, then mount it on a stable surface. Attach crossbars to support the washer and keep weight balanced. Use stainless or powder-coated fasteners to resist moisture.
Tip: Tack welds or strong rivets can help with rigid joints, but ensure you can disassemble if needed. - 3
Attach caster wheels
Bolt on four wheels, ensuring two are lockable. Align wheel positions to balance front-to-rear weight and prevent tipping when loaded. Test roll carefully on a flat floor before continuing.
Tip: Lock the wheels during positioning to avoid movement while you drill. - 4
Mount hose reel and wand holders
Secure the hose reel on a convenient side or back panel. Install wand and nozzle mounts within easy reach of the washer trigger. Use soft grommets to reduce rattling.
Tip: Leave a small excess hose length to accommodate tight turns without kinking. - 5
Secure washer and accessories
Place the pressure washer on the base and anchor it with straps or brackets. Add compartments or bins for nozzles, brushes, and detergents. Route cords and hoses to minimize snagging.
Tip: Test fit all items before final tightening; adjust as needed for clearance. - 6
Add safety and finishing touches
Install a drain pan or tray if you expect leaks, and apply a moisture-resistant finish to protect metal. Add non-slip padding to the top surface and label control areas for quick use.
Tip: Keep a spare kit of fasteners and a basic tool set on the cart for on-site adjustments. - 7
First test run and adjustments
Do a full test with the washer powered and connected to hoses. Check for wobble, clearances, and any rubbing on moving parts. Make final adjustments to mounts and routing based on the test.
Tip: Walk around and push/pull the cart in a realistic path to identify potential issues.
Quick Answers
Do I need a special pressure washer to use a cart?
Most standard pressure washers can be mounted on a cart with the right mounting hardware. Check the washer’s footprint and weight, then tailor the base and fasteners to fit. Always verify stability before moving.
Most standard washers work on a cart as long as you match the footprint and secure the unit properly.
What is the best wheel size for a diy pressure washer cart?
Four wheels with two locking casters are typical. A larger wheel helps roll over small thresholds and gravel, while keeping weight manageable.
Four wheels with two locks work well; bigger wheels improve outdoor maneuverability.
Can I use a ready-made cart frame instead of building one from scratch?
Yes, a ready-made frame can save time, but ensure it supports your washer’s weight and provides secure mounting points for hoses and wands. You may still need to add mounts and storage solutions.
A premade frame can work, just verify weight support and add mounting fixtures as needed.
How do I secure the pressure washer on the cart to prevent tipping?
Use stout straps or brackets that hold the washer firmly but still allow for quick release when needed. Place the heaviest items lowest and centered to maintain balance.
Strap the washer down firmly and keep the weight low and centered.
What maintenance does a cart require?
Regularly inspect fasteners, wheel bearings, and brackets. Clean off soap residue to prevent corrosion and lubricate moving parts as recommended by the manufacturer of your hardware.
Check bolts, keep it clean, and grease moving parts occasionally.
Is a DIY pressure washer cart safe for outdoor use?
Yes, with weather-resistant materials and proper shielding for electrical connections if your washer is electrically powered. Ensure drainage and stability to handle wind and rain.
Outdoor use is fine with weatherproofing and proper setup for stability.
Watch Video
Key Takeaways
- Plan footprint and storage before cutting materials
- Balance weight for safe mobility across terrains
- Choose moisture-resistant hardware and finishes
- Test and adjust after a dry run and wet run