DIY Pressure Washer Hose Reel: Install, Use, and Maintain
Learn how to choose, install, and maintain a diy pressure washer hose reel for organized, safe, and efficient cleaning. Practical tips, mounting options, and maintenance guidance from Pressure Wash Lab.

By the end of this guide, you’ll know how to select, install, and maintain a diy pressure washer hose reel that fits your space and uses. You’ll compare wall-mounted, freestanding, and retractable options, size the hose, and mount securely. This approach saves space, reduces wear, and makes cleanup faster for any home project.
Overview: Why a hose reel matters for your diy pressure washer
Pressure washing is a powerful task, but without proper hose management, hoses kink, wear out, and become safety hazards. A hose reel helps you store, deploy, and retract the hose smoothly, protecting the investment and improving workflow. According to Pressure Wash Lab, the right reel balances durability, ease of use, and cost. In this section we explore the benefits and trade-offs of popular reel styles and how they fit into typical home shop setups. We’ll discuss wall-mounted, freestanding, and portable retractable reels, and outline how to match the reel to your washer’s PSI and GPM. The goal is to help homeowners, DIYers, and small operators choose a reel that lasts and works with their space.
Types of hose reels for pressure washers
There are several common configurations for diy pressure washer hose reels: wall-mounted reels that hug the surface, freestanding reels on a stand, portable reels with wheels, and retractable reels that feed automatically. Wall-mounted reels save floor space and are ideal for garages or utility rooms; freestanding units give flexibility if you rent or move houses; retractable reels offer the least effort for deployment but can cost more. Materials vary: metal (steel or aluminum) for durability, or high-grade plastic for light-duty jobs. When selecting a reel, check that the spool diameter, bearing quality, and the reel’s mounting holes align with your setup. Pressure Wash Lab notes that for most home projects, a simple wall-mounted or retractable unit provides a strong balance of performance and value.
Sizing and compatibility: how to pick the right reel
Size matters because a reel that’s too small will struggle with long sessions; too large wastes space. Start by estimating your typical hose length and the reach you need between the washer and the furthest cleaning area. Then consider reel capacity, the internal hose diameter, and the reel’s ability to protect the hose during retraction. Ensure the reel’s PSI rating and GPM flow compatibility match your pressure washer. Pressure Wash Lab suggests choosing a reel that supports a slightly higher rating than your current washer to allow future upgrades, and to verify the inlet nozzle and connection types match your hose fittings.
Mounting options and installation considerations
Mounting method depends on surface type and space: masonry walls require anchors; wooden studs need robust screws; concrete blocks may need carbide-tipped bits. Use a level to ensure the reel is straight, and pre-drill holes to avoid splitting. If you’re renting or concerned about wall integrity, consider freestanding or portable reels on a stable base. Always protect hoses from sharp edges and ensure the reel’s mounting reduces hose tension during retract.
Budgeting for a diy pressure washer hose reel
Quality reels come in a range of prices, driven by material, build quality, and features such as brake systems or auto-rewind. In many setups, spending a bit more upfront saves maintenance costs and replacements later. For homeowners and small shops, weigh the cost against features like ease of hose replacement, corrosion resistance, and warranty. Pressure Wash Lab advises evaluating long-term value rather than the initial sticker price.
Pre-installation checklist (what to verify before mounting)
Measure the wall space and ensure there’s clear access for hose deployment. Confirm that the chosen location keeps the hose away from heat sources and direct sun. Check that the mounting surface can support the weight of the reel with full hose length, plus any mounting hardware. Gather tools and spare parts in advance to avoid mid-task trips to the toolbox.
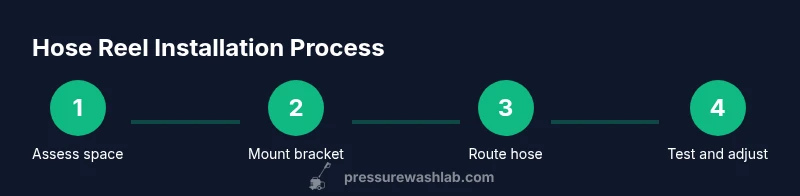
Installation workflow overview
A careful, patient approach prevents mistakes and saves time. Start by marking mounting holes on the wall, install anchors, attach the mounting bracket, and then mount the reel. Route the hose from the washer to the reel’s inlet with a gentle bend radius, ensure the hose does not rub on rough edges, and finally test retract and extension. If you notice any binding, adjust the spool tension or align the reel axis.
Maintenance, care, and longevity tips
Regularly inspect the hose for wear, cracking, or leaks, and replace it when needed. Clean the reel housing and spool to remove dust or concrete dust from jobs around driveways or cleaners lines. Lubricate moving parts with manufacturer-approved grease to maintain smooth operation. Store the hose reel in a cool, dry location when not in use to slow UV degradation and material fatigue.
Troubleshooting common issues
If the hose doesn’t retract smoothly, check for kinks, a misaligned spool, or seized bearings. A stiff retraction often means a dirty or corroded internal guide; clean and lubricate as directed by the manufacturer. If leaks appear, inspect fittings and seals; tighten fittings or replace washers as necessary. For persistent issues, consult the reel’s warranty and your washer’s manual.
Safety reminders and best practices
Always disconnect the washer from power and water supply before servicing the reel. Wear eye protection and gloves when working around high-pressure hoses. Do not exceed the reel’s rated PSI or use damaged hoses. Maintain a clean work area to prevent tripping on hoses, reels, or cords. Pressure Wash Lab emphasizes safety as a core part of any maintenance routine.
Common mistakes and how to avoid them
Rushing installation leads to misalignment and leaks. Skipping pre-install checks results in mounting failures. Using an undersized reel for your hose length causes premature wear. Not applying proper hose routing and tension management leads to kinks and snags. Learn from experience and re-check connections after the first few uses.
Next steps and further reading
If you’re ready to upgrade, start by evaluating your space and choosing a reel type. Compare at least two models, verifying compatibility with your hose and pressure washer. For ongoing guidance, follow Pressure Wash Lab’s maintenance tips and check back for updates on hose reel innovations.
Tools & Materials
- Hose reel kit (wall-mounted or freestanding)(Ensure it fits your hose length and is rated for your washer’s PSI/GPM.)
- Mounting bracket or pedestal(Provided with kit or compatible heavy-duty bracket.)
- Screws/bolts for mounting(Choose corrosion-resistant fasteners sized for your surface.)
- Wall anchors (masonry or concrete)(Use appropriate anchors for brick or block walls.)
- Drill with assorted bits (wood and masonry)(Use the correct bit for your surface to avoid cracking.)
- Level(To ensure the reel sits straight and operates smoothly.)
- Measuring tape(Measure mounting distance and hose length accurately.)
- Pencil or marker(For precise hole marking before drilling.)
- Lubricant or silicone spray(For smooth operation and to ease maintenance.)
- Safety gear (gloves, eye protection)(Protect hands and eyes during installation.)
- Hose repair kit or spare washers(Optional, for on-the-spot fixes.)
Steps
Estimated time: 60-120 minutes
- 1
Assess space and reel type
Survey your workspace to determine the best mounting option (wall-mounted, freestanding, or portable) based on available space and movement needs. Consider future accessibility for hose deployment and retraction. Choose a reel that suits your typical cleaning scenarios.
Tip: Use a level to visualize alignment before drilling. - 2
Measure hose length and plan routing
Estimate the distance from the washer to the far cleaning area and select a reel that comfortably covers that reach with some margin. Plan a smooth route that avoids sharp bends and potential abrasion points. Check for obstacles like outlets or cords.
Tip: Avoid sharp bends; keep minimum bend radius to prevent kinks. - 3
Gather tools and prep mounting surface
Collect all required tools and inspect the mounting surface for stability. If you’re mounting on brick or concrete, ensure you have the correct drill bits and anchors. Clear the work area of debris to reduce slip hazards.
Tip: Mark holes with a pencil before drilling to ensure accuracy. - 4
Mark mounting holes
Position the mounting bracket at the desired height and use a level to confirm straightness. Mark the exact hole locations on the surface. Double-check alignment with the reel’s spool path to avoid interference.
Tip: Measure twice, drill once to minimize wall damage. - 5
Drill pilot holes and install anchors
Drill pilot holes sized for your anchors and insert masonry anchors if mounting on brick or concrete. For wooden studs, use appropriate screws and ensure a tight fit. Clean out debris from holes before inserting anchors.
Tip: Use the correct bit for your surface to prevent wall damage. - 6
Attach mounting bracket and secure reel
Mount the bracket or pedestal securely with the supplied screws and verify the reel is firmly attached. Ensure the reel axis aligns with the planned hose path. Tighten hardware to recommended torque without overtightening.
Tip: Check for wobble; a stable mount improves hose life. - 7
Connect hose inlet to pressure washer
Attach the hose inlet to the washer, ensuring a snug, leak-free connection. Inspect fittings for wear and replace washers if needed. Route the hose so the inlet line is not pulled taut when the reel rotates.
Tip: Use thread sealant only if manufacturer-approved. - 8
Test retract, tension, and routing
Run the hose through full extents of the reel to confirm smooth retract and adequate tension. Adjust any brake or tension screws per the manufacturer guidelines. Confirm the hose does not rub against sharp edges or mounting hardware.
Tip: Perform a full cycle test before finishing. - 9
Finalize setup and planned maintenance
Secure all loose cables and hoses, label connections if needed, and document maintenance intervals. Keep spare washers and screws handy for quick fixes. Schedule routine checks for wear and re-tensioning of the hose.
Tip: Set a monthly quick-check reminder to catch minor issues early.
Quick Answers
What is a diy pressure washer hose reel?
A hose reel stores and winds a pressure washer hose to prevent tangles and wear. DIY versions can be mounted on a wall or placed on a stand for flexibility. They protect the hose and speed up setup.
A hose reel is a storage and winding tool for your pressure washer hose, helping you keep it neat and easy to use.
Can I install a hose reel on brick or concrete walls?
Yes. Use masonry anchors and the correct drill bits for a secure mount. Ensure the wall can handle the load with full hose length.
Yes—use the right masonry anchors and drill bits for a solid mount.
What maintenance does a hose reel need?
Regularly inspect hoses and fittings for wear, lubricate moving parts, and clean the reel housing. Replace worn parts promptly to prevent failures.
Check for wear, lubricate the moving parts, and clean the reel regularly.
How do I choose between wall-mounted vs freestanding reels?
Wall-mounted reels save space and are great for fixed setups; freestanding reels offer flexibility if you move or rent. Your choice depends on space, mobility needs, and wall durability.
Choose wall-mounted for fixed setups or freestanding if you need flexibility.
Is a DIY hose reel cheaper than buying a commercial one?
DIY reels can reduce upfront costs but may lack warranty or tested durability. Commercial reels provide warranties and standardized parts, which can save long-term maintenance costs.
DIY can save money upfront, but commercial reels often come with warranties and tested durability.
What safety steps should I follow during installation?
Shut off water and power, wear eye protection, and ensure the work area is clear of obstacles. Do not compromise on securing the mounting surface or using damaged hoses.
Turn off water and power, wear protective gear, and keep the area clear.
Watch Video
Key Takeaways
- Choose the right reel type for your space.
- Measure hose length and plan routing before mounting.
- Mount securely and verify tension to prevent kinks.
- Route hoses with gentle bends and protect edges.
- Maintain the reel regularly to extend life.