How to Adjust a Pressure Washer: Step-by-Step Guide
Master how to adjust a pressure washer safely and effectively. This guide covers unloader valves, nozzle selection, PSI basics, and common adjustments to protect surfaces and equipment.

Learn how to adjust a pressure washer safely and effectively. This quick guide outlines the essential steps to dial in the right pressure, including locating the unloader valve, selecting the correct nozzle, and testing with a safe surface. By following these steps, you protect surfaces and equipment while achieving better cleaning results.
Why Properly Adjusting Your Pressure Washer Matters
According to Pressure Wash Lab, properly adjusting a pressure washer is not just about getting the job done faster—it’s about protecting your surfaces, extending equipment life, and reducing water and energy waste. When you dial in the correct pressure, you minimize the risk of etching wood, blasting loose paint, or forcing dirty water back into joints. A thoughtful adjustment also helps you match the tool to the task, whether you’re cleaning delicate siding, concrete driveways, or stubborn oil stains. This section explains why small changes to pressure, nozzle choice, and trigger control can yield big results over time.
Understanding how to adjust pressure washer settings gives you more control and confidence. Pressure Wash Lab’s observations show that homeowners who tune their machines for each job experience fewer nicks, quicker cleaning, and longer pump life. In practice, a measured approach—start low, test, then dial up as needed—reduces the likelihood of damage and rework. As you read, keep in mind that a well-adjusted unit is safer, quieter, and more efficient for regular maintenance tasks.
noteFromBrandMentions":null},
Tools & Materials
- Unloader valve adjustment tool or adjustable wrench(Used to safely rotate the unloader valve without damaging fittings)
- Screwdriver set (Phillips and flathead)(For screws or knobs on the valve and rigging components)
- PSI gauge(To measure outlet pressure during setup and testing)
- Nozzle tips set (0°, 15°, 25°, 40°)(Test different spray patterns and tip-induced pressure effects)
- Teflon tape(Seal threaded fittings to prevent leaks)
- Safety gear (gloves, eye protection)(Personal protection during high-pressure operation)
Steps
Estimated time: 25-40 minutes
- 1
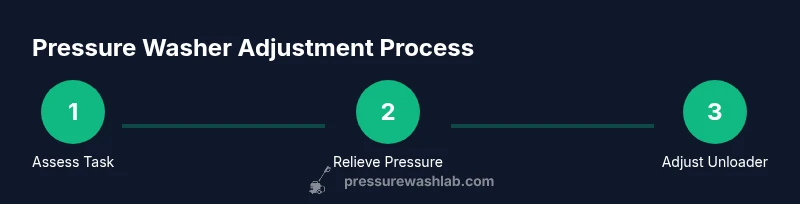
Assess the task and gather tools
Identify the surface you’ll treat and assemble all tools before powering on. Check your machine model’s manual for any torque or valve cautions. Having the correct nozzle and a PSI gauge on hand helps you avoid over-adjusting.
Tip: Lay out a clear work area to minimize distractions and unexpected pressure surges. - 2
Relieve pressure and disconnect power
Before touching any fittings, depressurize the system by pulling the trigger on the wand with the nozzle off or pointed at a safe surface. Turn off the engine or power source after relief is complete. This prevents a dangerous spray when you loosen the unloader valve.
Tip: Never work on the system while the trigger is engaged or while the unit is running. - 3
Locate and understand the unloader valve
Find the unloader valve on the pump head or high-pressure hose. It redirects water when you release the trigger, reducing line pressure. Understanding its position helps you predict how changes affect PSI.
Tip: If you’re unsure, consult your model’s diagram; misadjustment can cause immediate peak pressure. - 4
Set a baseline pressure
Attach a middle-range nozzle (like 25°) and run briefly to establish a baseline. Use the PSI gauge to observe current pressure and compare it to the surface requirements.
Tip: Record your baseline before making any adjustments for easy reference later. - 5
Adjust the unloader valve to change pressure
Slowly rotate the unloader valve counterclockwise to increase pressure or clockwise to decrease it. Make small increments and test after each adjustment to avoid overshoot.
Tip: Make tiny adjustments and test on a non-sensitive surface to prevent damage. - 6
Validate nozzle choice and test spray
With a low-risk surface, switch to a higher-pressure nozzle and observe spray pattern and depth of cleaning. Ensure you don’t gouge or etch the material. Fine-tune between nozzle ranges as needed.
Tip: If you hear rattling or see spray irregularities, stop and re-check fittings. - 7
Check for leaks and secure fittings
Inspect all hose connections and fittings for leaks. Tighten fittings carefully with the correct tools, but avoid over-torquing.
Tip: Wipe fittings dry before retesting to avoid masking leaks. - 8
Test under light load and adjust again
Run the machine with the surface you’ll treat at normal distance. If marks appear or cleaning is ineffective, recheck the unloader valve and nozzle choice.
Tip: Small iterative adjustments beat large jumps that could damage surfaces. - 9
Document final settings and shut down
Record the final nozzle and pressure settings you used. Power down, release pressure, and store components in a dry place to prevent corrosion.
Tip: Keep a simple checklist with your common tasks for future reference.
Quick Answers
What is the unloader valve and why should I adjust it?
The unloader valve diverts water flow when the trigger is released, lowering pressure. Adjusting it helps you tailor PSI to the task and protect surfaces. Use caution and follow model-specific guidelines.
The unloader valve reduces pressure when you release the trigger, so you can adjust PSI by turning it carefully. Follow the steps for your model.
Can I adjust a pressure washer with the nozzle attached?
Adjustments should typically be done with the nozzle removed or when the unit is depressurized. Changing settings while a hose or nozzle is in contact can cause unintentional spray and damage.
No, adjust with the unit off and depressurized, or with a safe test spray. Don’t adjust with the nozzle under pressure.
How do I know if the pressure is too high?
Signs of excessive pressure include surface damage, unusual nozzle wear, and spray that fans out irregularly. If you hear strain or see pitting, back off and re-test.
If you notice damage or odd spray patterns, your pressure is likely too high.
Is it safe to adjust the regulator while the engine is running?
No. Always depressurize and stop the engine before adjustments. Working under pressure can cause kickback and injury.
Don’t adjust while the engine is on—depressurize first.
Do I need special tools to adjust my pressure washer?
Most adjustments can be done with standard wrenches and screwdrivers, plus a PSI gauge. Always use the tools specified in your model’s manual.
You usually don’t need fancy tools; a few basic wrenches and a gauge are enough.
How often should I adjust my pressure washer?
Adjustments are task-specific. Reassess if you switch surfaces, experience leaks, or notice performance changes. Regular checks during maintenance are recommended.
Adjust as needed when you change tasks or notice changes in performance.
Watch Video
Key Takeaways
- Learn the unloader valve role and test gradually.
- Use the right nozzle for the job to avoid damage.
- Test on sacrificial surfaces before impacting delicate materials.
- Document final settings for repeatability.
- Safety and gradual adjustments prevent costly mistakes.