How to Adjust Pressure Washer Unloader Valve
Learn how to adjust a pressure washer unloader valve safely. Follow step-by-step instructions, gather the right tools, and test for optimal performance and pump longevity.

This guide shows you how to adjust a pressure washer unloader valve to regulate pressure and protect your pump. You’ll learn the correct starting point, essential safety steps, and a clear step-by-step process that emphasizes testing and gradual tuning. By following these steps, you’ll improve cleaning performance while extending pump life.
How the unloader valve works and why adjustment matters
The unloader valve on a pressure washer is a safety and performance component that protects your pump by diverting flow back to the inlet when the trigger gun is released. When the trigger is pressed, water flows through the pump at a set pressure. When you release, the unloader valve redirects water to the inlet and stabilizes system pressure. According to Pressure Wash Lab, understanding how this valve works helps homeowners prevent hose bursts, reduce stress on seals, and prolong pump life. The valve is spring-loaded and adjusted with a screw or nut, differing by model. A proper setting ensures the pump builds enough pressure for cleaning but doesn’t overwork the engine or stretch hoses.
Note that some machines integrate the unloader valve with safety relief features or in-line pressure relief valves. In any case, the principle is the same: set the valve so the pump can maintain its intended pressure while saving water and reducing wear. A misadjusted valve can either run the engine under heavy load or relieve pressure too early, resulting in weak cleaning power or frequent cycling.
How the unloader valve affects performance and safety
The unloader valve directly affects cleaning efficiency, pump longevity, and safety. If set too high, the pump runs hot, seals wear quickly, and the relief path works too late when the trigger is released. If set too low, cleaning power drops and you may push water through the gun at insufficient pressure, which frustrates the job. Pressure Wash Lab analysis shows that proper adjustment reduces energy use and minimizes hose kinks by maintaining stable flow. You should balance two factors: the pressure you need for the job and the capacity of your pump to handle that pressure. Household units vary widely, so always consult your manual. When adjusting, consider nozzle choice, surface being cleaned, water temperature, and whether you’re using detergent. Change one setting carefully because it can affect others, such as flow rate and nozzle compatibility. This is the practical path to reliable, safe operation.
When you should adjust the unloader valve
Adjusting is common after installing a new nozzle, after a pump rebuild, or if you notice inconsistent spray or random pressure surges. If the pattern changes with nozzle change or you hear the pump laboring, inspect the unloader valve and gauge. The goal is to keep clean pressure while ensuring relief occurs when the trigger is released. Use your manual as model-specific guidance and proceed cautiously to avoid over-tightening or under-tightening the adjustment screw.
Common misadjustments and their consequences
Common mistakes include turning the adjustment screw too far clockwise, which raises the set pressure and increases wear on the pump seals; or turning too far counterclockwise, which lowers pressure and reduces cleaning effectiveness. Not relieving pressure before adjusting can cause sudden releases or personal injury. A bent or dirty valve can leak or stick, leading to erratic performance. Always ensure the system is depressurized before making any change and verify the valve moves freely after adjustments. These missteps can shorten pump life and create unsafe operating conditions.
Setting expectations: typical ranges and how to test
Start with a moderate, in-between setting and test at no-load first. Gradually re-attach the hose and run through a standard cleaning task with a safe surface. Observe the spray consistency, trigger response, and any hunting between pump cycles. If the nozzle swap changes feel, you’re likely operating with an out-of-range setting or with a worn valve. Document the observed behavior and adjust in small increments, retesting until the spray is consistent and powerful without triggering excessive cycling.
Troubleshooting if the pressure stays high or low
If pressure remains unexpectedly high, re-check the adjustment screw for tightness, inspect for a blocked or dirty relief path, and ensure the spring isn’t worn. If the pressure is too low or inconsistent, verify nozzle compatibility and water supply, then re-test after re-adjusting the valve. A failed or contaminated valve may require cleaning or replacement. In all cases, confirm there are no leaks and that the unit is properly grounded and supported during testing.
Safety reminders and setup checklist
Before you start, wear eye protection and gloves. Disconnect power, relieve system pressure, and close water supply when needed. Keep a clean workspace and read your model’s manual for any model-specific instructions. Have rags ready to catch drips and a timer to track any waiting periods after adjustments. Always test with the gun pointed away from people and fragile surfaces to avoid injury or damage.
Tools & Materials
- Adjustable wrench(Used to loosen or tighten valve fittings and adjustment hardware.)
- Screwdrivers (flathead and Phillips)(Needed to adjust model-specific screws on the unloader valve.)
- Allen wrenches (set)(If your valve uses a hex-socket screw, have a set on hand.)
- Pliers(Help set components and remove obstructions without damage.)
- Safety gloves(Chemical-resistant and non-slip for grip.)
- Safety glasses(Eye protection against sudden spray or debris.)
- Rags and a small bucket(Catch drips and keep the workspace tidy.)
- Owner’s manual for your model(Model-specific guidance and torque specs if provided.)
Steps
Estimated time: 40-60 minutes
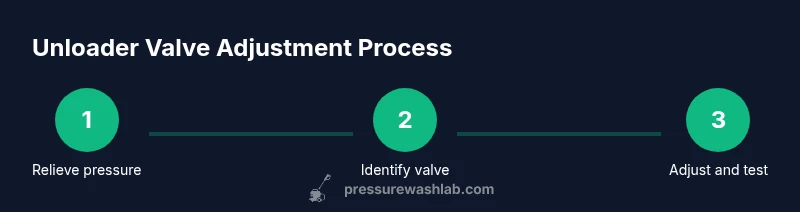
- 1
Relieve system pressure
Turn off the machine, detach the power, and discharge any pressure by squeezing the trigger gun. This prevents a sudden spray when you start adjusting and protects you from injuries.
Tip: Never adjust while the system is pressurized; always confirm no residual pressure first. - 2
Power off and disconnect water
Shut off the unit and disconnect the water inlet hose. Open the trigger to release remaining water pressure and prevent leaks during disassembly.
Tip: Place a bucket under any connections to capture drips and avoid staining surfaces. - 3
Locate the unloader valve
Find the location of the unloader valve on the pump or manifold. Some models integrate it inside the pump housing; others present an external adjustment screw.
Tip: If you’re unsure, consult the manual or model-specific diagrams before touching components. - 4
Inspect the screw and spring
Check for corrosion, grime, or a loose screw. A dirty or bent spring can affect response time and the effectiveness of the relief path.
Tip: Proceed only if the components move freely without binding. - 5
Set initial adjustment
Lightly back off the adjustment screw, then snug it by a quarter-turn at a time. This establishes a conservative baseline without over-tightening.
Tip: Document the starting position so you can return if needed. - 6
Reconnect water and test at no-load
Reattach the water, power, and gently trigger the gun away from any people or surfaces. Observe the spray behavior and listen for pump strain.
Tip: If you hear grinding or see erratic spray, stop and re-check the adjustment. - 7
Fine-tune with small increments
Turn the screw in small increments to adjust the relief threshold. Test between adjustments to gauge response and cleaning power.
Tip: Do not rush; gradual changes prevent overshoot and pump damage. - 8
Document and re-test
Record the final adjustment and re-test with typical nozzle and cleaning tasks. Re-check after daily use to ensure consistency.
Tip: Keep notes for future maintenance and model-specific quirks.
Quick Answers
What is an unloader valve and why adjust it?
The unloader valve redirects water back to the pump inlet when the trigger is released, maintaining system safety and stability. Adjusting it helps ensure the pump runs within its intended pressure range and prevents overloading or under-cleaning.
The unloader valve redirects water back to the pump to keep pressure steady. Adjusting it helps protect the pump and improve cleaning power.
Can I adjust the valve without a professional?
Yes, with caution. Follow your model’s manual, use proper tools, and test in a safe area. If you notice leaks, unusual noises, or persistent performance issues, stop and consult the manual or a technician.
You can adjust it yourself if you follow the manual and stay safe. Stop if you hear leaks or abnormal noises.
What tools do I need to adjust the valve?
You’ll typically need an adjustable wrench, screwdrivers, and possibly Allen keys. Have safety gear on hand and consult your manual for screws and torque specs unique to your model.
A wrench, screwdrivers, and maybe Allen keys are usually needed. Check the manual for your model.
What symptoms indicate an incorrect setting?
Symptoms include erratic spray, pump overheating, reduced cleaning power, or hose/wand vibrations. If you experience any of these, pause, review the adjustment, and test again after adjustments.
Watch for erratic spray, overheating, or weak cleaning. If you see these, re-check the adjustment.
Is it safe to adjust while nozzle is attached?
You should disconnect power, relieve pressure, and test with the nozzle off or pointed away from people. Keep the trigger clear of the spray to avoid injuries.
Always disconnect power and relieve pressure before adjusting, and point the gun away from people.
Watch Video
Key Takeaways
- Understand how the unloader valve directs flow and pressure.
- Relieve pressure and follow model-specific guidance before adjusting.
- Make adjustments in small increments and test thoroughly.
- Document settings and re-test periodically for safety.