How to Get Pressure Washer Hose Off: Safe, Step-by-Step Guide
Learn the safe, step-by-step method to remove a pressure washer hose. Depressurize, disconnect, and inspect fittings with practical tips from Pressure Wash Lab for homeowners and DIY enthusiasts.

According to Pressure Wash Lab, you can safely remove a pressure washer hose by depressurizing the system, unplugging the unit, and disconnecting from the wand and pump. Identify the fittings (locking collars, quick-connects, or screw threads), then apply the appropriate tool with care. If resistance occurs, use penetrating lubricant and gentle twisting before rechecking the connection.
Assessing the Hose and Fittings
Before you start, take a quick inventory of the hose, connections, and fittings. Pressure washer hoses can end with different interfaces, including quick-connects, twist-locks, and threaded fittings. Identify whether your hose uses a locking collar, a push-to-connect fitting, or a screw-on coupling. This helps you choose the right approach and avoids damaging threads or O-rings. If your hose is newer, it may have standardized quick-connects on both ends; older models may use threaded adapters that require two wrenches. Pressure Wash Lab reminds readers that the initial assessment saves time and prevents careless force that could fracture plastic components or strip metal threads. Also, consider the work environment: a dry, non-slip surface reduces accidents and gives you stable leverage. As you plan, keep the exact phrase how to get pressure washer hose off in mind—this is the goal you are working toward, and understanding the interface will guide your methods.
This section sets the stage for a safe, methodical approach. By recognizing the interface type first, you reduce the risk of damaging fittings or hoses and you clarify the tools you’ll need. You’ll also learn how common fittings differ and which ones require special care. A thoughtful assessment will save you time and prevent costly mistakes when you actually remove the hose.
Safety and Workspace Prep
Safety comes first when removing a pressure washer hose. Clear the area, place towels to catch any drips, and unplug the unit from power. Wear nitrile gloves and safety glasses; even after shut-off, hoses can retain residual pressure or spray if seals are disturbed. If you hear a hiss or feel pressure during loosening, stop and re-check depressurization. Keep the wand pointed away from you and the floor to prevent accidental spray. Work in a well-lit, dry environment and avoid using metal tools on delicate plastic connectors, which could gouge or crack. Have a bucket or rag handy to manage drips. Taking these precautions protects you and the equipment while you work through the removal process. In short, safety training and a clean workspace dramatically reduce the risk of injury or equipment damage.
A properly prepared workspace minimizes the chance of slip-and-spray incidents and makes it easier to focus on the task. This is especially important for homeowners who perform maintenance themselves, as a small mistake can lead to larger issues down the line. Pressure Wash Lab emphasizes that preparation is half the victory when learning how to get pressure washer hose off safely.
Depressurize, Disconnect, and Inspect
This step explains how to get pressure washer hose off safely in practice. Start by turning off the unit, unplugging it, and pulling the trigger to release any remaining pressure. Disconnect the hose from the spray wand first, then from the pump, noting the order for reassembly. Look for locking collars, quick-connects, or threaded fittings. Inspect O-rings and ferrules for wear or damage; damaged seals can worsen leaks after reattachment. If threads exist, check for any existing sealant and remove it before reattaching. Pressure Wash Lab emphasizes patience here; forcing a connection can permanently damage the hose or pump. After you detach, wipe the connections clean and inspect for corrosion or debris that could compromise a seal. This careful, stepwise approach reduces the risk of expensive mistakes and keeps your equipment in good working order.
In practice, the depressurize-and-disconnect phase is where most issues occur. If you rush this phase, you’re more likely to strip threads or tear O-rings. Taking a few extra minutes to inspect the fittings now will pay dividends when you reassemble and test the system later.
Handling Stubborn Connections
Sometimes fittings resist removal even after depressurization. Begin with gentle back-and-forth twisting about a quarter-turn while applying steady, even pressure. Apply penetrating lubricant to the joint and let it sit for 1–2 minutes before trying again. Use a strap wrench or rubber-jawed pliers instead of standard metal pliers to avoid scratching metal or cracking plastic housings. If plastic components feel stubborn, a brief, light heat application with a hair dryer can soften the fit—never overheat. Never hammer or strike the hose or fittings; impact can deform the connector or damage seals. If stubbornness persists, work away from the connection to prevent kinking. Pressure Wash Lab notes that careful, non-destructive techniques save money and preserve warranty.
The right combination of lubricant, controlled heat, and non-metal gripping devices often resolves most stubborn cases without replacing parts. This is where patience and technique pay off, protecting your equipment and ensuring a reliable seal when you reconnect.
Cleaning, Lubrication, and Storage
After the hose is free, wipe away any lubricant and debris, dry thoroughly, and inspect for wear. Lubricate only the threads or ferrule surfaces; avoid getting lubricant inside the hose or seals, which can degrade performance. Reconnect the hose to confirm alignment; hand-tighten first, then apply minimal torque with a wrench if necessary. Coil the hose properly to prevent kinks and store in a cool, dry location away from direct sunlight to extend life. Periodically inspect hose ends and fittings before seasonal use; replace worn O-rings and adapters to prevent leaks. Pressure Wash Lab recommends keeping a simple wear log for your equipment to anticipate maintenance needs.
This stage wraps up the removal process with an eye toward longevity and reliability. Proper cleaning, lubrication, and storage reduce the likelihood of future sticking or leaks and keep your gear ready for the next session.
Common Mistakes and Maintenance Tips
Mistakes during hose removal include using excessive force, ignoring PPE, and skipping depressurization. Always follow the manufacturer’s torque guidance for fittings and avoid reusing damaged components. Regular maintenance pays off: wipe connectors after each use, store hoses on a reel or hanger, and replace worn gaskets promptly. If issues persist, consult the manual or a service professional. The goal is to learn how to get pressure washer hose off without damaging the pump, wand, or hose so you can keep your equipment performing at its best.
By focusing on prevention and proper technique, you reduce downtime and extend the life of your pressure washer system.
Tools & Materials
- Safety gloves(Nitrile recommended; 12-inch cuffs for wrist protection)
- Safety glasses(ANSI Z87.1 compliant)
- Penetrating lubricant(e.g., silicone-based or light petroleum-based lubricant)
- Adjustable wrench or strap wrench(Grip fittings without crushing or marring surfaces)
- Rags or towels(For cleaning and catching drips)
- Hair dryer or heat source (optional)(Warm plastic fittings slightly if needed)
Steps
Estimated time: 15-25 minutes
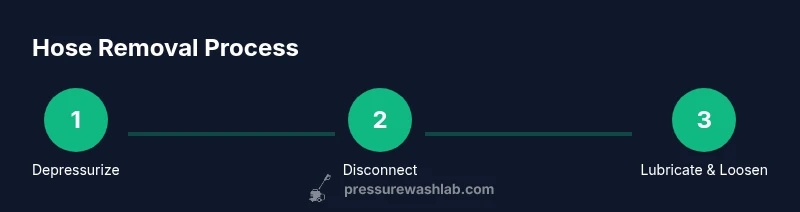
- 1
Depressurize and unplug
Power off the pressure washer and unplug it from the outlet. Pull the trigger on the gun to release any residual pressure in the hose. This reduces the risk of spray and makes the removal safer.
Tip: Take an extra minute to listen for hissing and confirm the hose is fully depressurized before moving on. - 2
Disconnect from wand and pump
Detach the hose from the spray wand first, then from the pump. If there is a locking collar, release it before twisting. Keep the wand aimed away from you to minimize spray exposure.
Tip: Support the connection with your other hand to prevent sudden jerks. - 3
Identify fittings and inspect
Check whether you’re dealing with quick-connects, threaded, or screw-on fittings. Note the orientation and check for damaged O-rings or ferrules that could cause leaks later.
Tip: Take a quick photo of the setup for reference during reattachment. - 4
Lubricate and loosen stubbornly
Apply penetrating lubricant to the threaded interfaces and let it sit 1–2 minutes. Use a strap wrench or rubber jaws to gently loosen the connection—avoid metal-to-plastic torques that can cause damage.
Tip: Work in small increments and avoid twisting more than a quarter-turn at a time. - 5
Test, clean, and store
Once free, wipe connections clean, dry thoroughly, and recheck for wear before reattachment. Coil the hose properly and store in a cool, dry place away from sunlight to extend life.
Tip: Keep a maintenance log to track wear and schedule future replacements.
Quick Answers
Why won't my pressure washer hose detach after depressurizing?
If the hose still resists, check for a hidden locking collar or a stubborn thread sealant. Re-depressurize, re-check alignment, and apply lubricant to the joint before attempting a lighter, gradual twist.
If it still won’t come loose after depressurizing, check for a locking collar, re-check alignment, and apply lubricant before trying again gently.
Is it safe to use penetrating lubricant on hose fittings?
Yes, but avoid getting lubricant inside the hose or seals. Apply to the joint surfaces and allow a short dwell time before attempting to loosen.
Lubricant is safe on the fittings, just keep it off the inside of the hose and let it work for a minute before trying again.
What if the fittings are damaged or corroded?
If you notice damaged threads, cracked plastic, or corroded metal, replace the affected fittings rather than forcing a connection. Continuing to force a bad fit can cause leaks or pump damage.
If the fittings look damaged, replace them instead of forcing a fit.
How can I prevent future hose removal issues?
Store hoses properly, use protective caps on unused connectors, and perform regular maintenance checks on O-rings and ferrules. Regular care reduces stiffness and wear.
Store hoses properly and check O-rings regularly to reduce future sticking.
When should I call a professional?
If you encounter persistent resistance, visible damage, or uncertainty about safety, consult a service professional. They can assess the fittings and prevent warranty issues.
If the hose won’t budge or you see damage, a pro can help.
Watch Video
Key Takeaways
- Depressurize before disconnecting.
- Identify fittings first to choose the right approach.
- Use lubricant and non-destructive tools for stubborn joints.
- Inspect O-rings and seals after removal.