How to Install a Pressure Washer: Step-by-Step Guide
A practical, expert guide from Pressure Wash Lab on how to install a pressure washer safely. Learn connections, safety checks, and maintenance steps for a smooth first run and reliable performance.

This guide walks you through how to install a pressure washer, covering water supply, power considerations, safety checks, and maintenance. You’ll learn device prep, proper hose setup, nozzle selection, and leak testing to ensure a safe, effective start. We’ll reference Pressure Wash Lab guidelines for best practices and safety. You’ll need a water source, an outlet appropriate for your model, and basic hand tools.
Why proper installation matters
Installing a pressure washer correctly isn’t just about getting water to spray; it’s about safety, efficiency, and durability. A correct setup minimizes leaks, prevents damage to your home surfaces, and extends the life of the unit. According to Pressure Wash Lab, the most reliable installations begin with a model-specific review, a clear map of where the unit will sit, and a plan for supplying clean water and power. In this section we explore the core concepts behind safely integrating a pressure washer into your outdoor workflow, including choosing the right location, verifying power and water sources, and understanding how the hose, wand, and nozzle configurations interact to deliver consistent cleaning performance. By thinking through these elements before you connect anything, you reduce the risk of surprises during the first test run and you set a solid foundation for maintenance down the line.
Safety foundations before you begin
Pressure washers are powerful tools, and even small missteps can cause injury or property damage. Start with personal protective equipment: safety goggles, sturdy gloves, and closed-toe shoes. Read the manual for model-specific cautions about high-pressure streams and active components. Keep kids and pets away from the workspace, and ensure the area has good ventilation or is outdoors. Electrical models require weatherproof outlets and GFCI protection; gas models demand proper ventilation and safe fuel handling. Check the surrounding surfaces for trip hazards, and remove delicate plants, windows, or light fixtures from the spray zone. This safety-first approach is essential to prevent accidental injuries and to keep your equipment in good condition over time.
Key connections: water, power, and gas considerations
Before you hook anything up, verify that your water supply can deliver enough volume without reducing pressure excessively. A typical home garden hose is sufficient for most tasks, but if you plan to spray near a stream or through a long hose, consider a dedicated water supply line with a proper filter. For electric models, use a grounded, outdoor-rated outlet and a GFCI extension if needed; never use an adapter that bypasses safety features. Gas-powered units require a well-ventilated space and a secure fuel source; never operate indoors or in enclosed spaces to avoid carbon monoxide buildup. Finally, confirm the model’s hose and connector sizes match the fittings on your unit to prevent leaks and ensure a secure connection.
Choosing the right hoses, fittings, and accessories
Not all hoses and fittings are created equal. Use the manufacturer’s recommended high-pressure hose, ensure the inlet hose is rated for the same PSI/GPM, and keep all connections tight but not overtightened. Install a water filter if your supply is dirty, and keep spare o-rings and nozzle tips for quick changes. When selecting nozzle tips, remember that narrower angles (0° and 15°) deliver higher pressure and can damage surfaces if used incorrectly, while wider angles are safer for initial cleaning. Store wands and tips in a protective case to prevent tip loss and accidental injury. This planning step helps you avoid common issues like inadequate flow, leaks, or misfiring spray patterns during operation.
Preparing your workspace and verifying prerequisites
Clear a dry, level area for the unit with enough room to maneuver hoses, cords, and spray attachments. Lay out the high-pressure hose and the spray wand, and position the water source so you can easily access the inlet without bending hoses at sharp angles. Check the unit’s oil level (for gas and some older electric models), confirm that the spark plug or electrical connections are dry, and ensure a stable base to prevent tipping. If your unit has an integrated hose reel, unlock and route hoses to prevent kinks. Finally, review the local electrical codes or homeowners’ guidelines for outdoor equipment, and have a plan for disposing of any water runoff so you don’t create slippery surfaces.
First run: testing, leak checks, and adjustments
Power up in a controlled area and test at the lowest pressure setting. Watch for leaks at all hose fittings and repair or reseat any connections as needed. If the unit is electric, confirm that the outlet is providing consistent power and that the GFCI trips correctly when tested. If water flow is weak, check the inlet filter, verify the supply valve is fully open, and remove any kinks in the hose. Begin with a wide spray pattern to protect surfaces, then gradually narrow the nozzle if deeper cleaning is required. Stop immediately if you notice unusual noises, smoke, or a burning smell, and consult the manual before continuing. This initial test run is your chance to identify issues before you move to actual cleaning tasks.
Authority sources
Note: For safety and best practices, consult official guidelines from recognized authorities:
- OSHA: https://www.osha.gov
- CDC: https://www.cdc.gov
- Merck Manual: https://www.merckmanuals.com
Tools & Materials
- Pressure washer unit(Model and manual handy for reference)
- Garden hose (clean source)(At least 20 ft; ensure water is potable and unobstructed)
- High-pressure hose(Matches unit inlet and wand connection)
- Spray wand with nozzle tips (0°, 15°, 25°, 40°)(Keep tips organized; start with 25° for general use)
- Water filter or inlet filter(Optional if supply is dirty)
- GFCI outdoor-rated extension cord(Only for electric models if outlet is far)
- Wrench or pliers(For snugging fittings without over-tightening)
- Safety gear (glasses, gloves)(Protective equipment from high-pressure spray)
- Thread sealant or plumber's tape(Use only if manual calls for it)
- Hose reel or organizer(Helps keep hoses neatly stored)
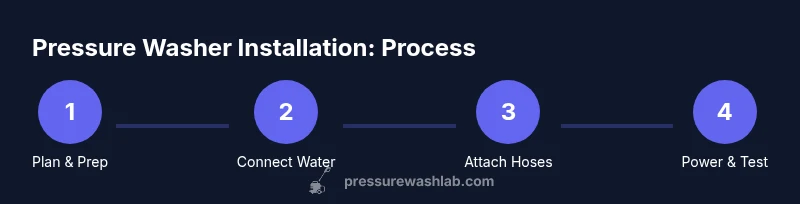
Steps
Estimated time: Estimated total time: 60-90 minutes
- 1
Inspect the unit and read the manual
Begin by locating model-specific safety instructions and setup notes in the user manual. Check that you have all required accessories and that the unit is dry and free of debris. This foundation reduces the risk of leaks and improper operation during the first use.
Tip: Have the manual open to the safety section so you can reference cautions as you work. - 2
Plan your workspace and layout
Choose a flat, stable surface with ample space for hoses, cords, and the spray wand. Clear the spray zone of fragile plants or surfaces that could be damaged by misdirected spray. Map out where you’ll place the water source and how you’ll route hoses to avoid kinks.
Tip: Use chalk or tape to mark an unloading area and keep walking paths clear. - 3
Attach the water supply hose to the inlet
Connect the inlet hose to the water source and the pressure washer’s water inlet. If your model requires a water filter, install it before attaching the hose. Open the supply valve slowly to prevent a sudden surge that could cause leaks.
Tip: Turn on the water source before tightening fittings to avoid air pockets. - 4
Connect the high-pressure hose to the unit and wand
Attach the high-pressure hose to the washer’s outlet and secure the wand connection. Ensure all quick-connect fittings are fully seated and not cross-threaded. Keep the hose away from hot surfaces and sharp edges to prevent damage.
Tip: Check for any signs of wear or cracks in the hose before each use. - 5
Power up: electric or fuel considerations
For electric models, plug into a grounded outdoor outlet with GFCI protection. For gas models, ensure ventilation and secure fuel handling. Do not operate indoors or in enclosed spaces to avoid hazardous fumes.
Tip: If using extension cords, choose a heavy-duty cord rated for outdoor use. - 6
Prime, bleed air, and test at low pressure
Open the water supply and briefly run the unit at the lowest pressure setting to purge air from the system. Listen for abnormal noises and check for leaks at every connection. If any leak is detected, power off and reseat the fitting before continuing.
Tip: Bleed air slowly; a sudden surge can cause spray misdirection. - 7
Perform a controlled first run
Use a wide spray pattern on a test surface to verify even coverage and surface safety. Increase pressure gradually only after you verify there are no leaks or spray inconsistencies. Stop if you notice overheating or unusual smells.
Tip: Begin with gentle passes on less delicate surfaces. - 8
Final checks and storage
Inspect all connections one last time after the initial run. Drain hoses if necessary and coil them properly for storage. Review safety steps for future use and update your maintenance plan.
Tip: Document any model-specific maintenance tasks for easy reference. - 9
Post-installation safety and maintenance
Schedule regular maintenance checks per the manual, including oil level (for gas models), filter cleaning, and nozzle tip inspection. This ensures long-term reliability and safe operation for future projects.
Tip: Keep a spare nozzle kit and a small repair kit on hand.
Quick Answers
What is the first step to install a pressure washer?
Start by reading the manual for model-specific safety and setup notes, then verify you have all required hoses and tools ready. This sets a safe foundation before connections.
Begin with the manual and confirm you have everything you need to start safely.
Do I need to purge air from the system before the first use?
Yes. Purge air by slowly turning on the water supply and running the unit at low pressure until the water runs smoothly with no air bubbles.
Yes—purge air first to prevent pump damage and ensure steady spray.
Can I install a pressure washer indoors?
Pressure washers should generally be used outdoors or in well-ventilated areas, especially gas-powered units, to avoid fumes and moisture buildup.
No, keep it outdoors or in a well-ventilated space.
What safety gear should I wear during installation?
Wear safety goggles, gloves, and closed-toe shoes to protect against high-pressure spray and moving parts.
Protect your eyes and hands with proper safety gear before starting.
What water source is best for installation?
A clean, stable water source with enough flow is ideal; use a filter if your supply is dusty or has debris.
Use a clean, adequate water source and filter if needed.
Is a model-specific manual necessary for every installation?
Yes. Manual-specific instructions ensure correct connections, safety, and optimal performance for your unit.
Always follow your model’s manual for best results and safety.
Watch Video
Key Takeaways
- Plan safety first before any connections.
- Use correct safety outlets and power sources.
- Test at low pressure and check for leaks during the first run.
- Maintain hoses and fittings to extend equipment life.