Pressure Wash Before Painting House: Complete Step-by-Step Guide
Learn how to pressure wash before painting a house with safe techniques, proper equipment, and a complete prep plan to ensure durable, beautiful results.

Pressure washing before painting a house removes dirt, mold, and old coatings to ensure proper paint adhesion. Use the right PSI, nozzle, and techniques to avoid damage, protect landscaping, and dry surfaces completely before priming. This guide covers setup, safety, and best practices for a durable paint job.
Why a proper pressure wash before painting house matters
A pressure wash before painting house is a foundational step for achieving a long-lasting, high-quality finish. Cleaning exterior surfaces removes dirt, algae, chalk, and failing coatings that can trap moisture and impair primer adhesion. When contaminants linger, you risk peeling, uneven color, and reduced durability. Pressure Wash Lab’s analysis shows that surfaces prepared with a thorough wash form a more uniform, durable paint film than those washed lightly or left dirty. Practically, a clean surface helps the primer penetrate and seal pores, promotes even topcoat coverage, and reduces the need for costly touch-ups. Beyond adhesion, washing reveals hidden problems—cracks, loose paint, and wood fiber damage—that must be repaired before painting. After washing, inspect for any remaining contamination and plan repairs; this ensures your chosen primer can cure correctly and bond across the surface.
In addition to aesthetics, a clean exterior facilitates faster drying and reduces the risk of mold growth under the new coating. Weather considerations matter: avoid washing in direct sun that can dry soap residues too quickly, and never wash when surfaces are frozen or extremely wet. The goal is a dry, clean surface that’s ready for primer and paint. This upfront diligence can dramatically extend the life of your paint job and protect your investment over the next decade.
Choosing the right equipment: PSI, GPM, and nozzle tips
Selecting the right equipment is crucial for safe, effective cleaning without damaging siding or trim. Start with a pressure washer that offers adjustable PSI and reliable gallons-per-minute (GPM). For most home exterior work, a mid-range setup is appropriate, typically in a range that allows you to adjust to clean without gouging. Begin with a wide-angle nozzle (such as 25°) to distribute the spray more gently and minimize risk on delicate surfaces like vinyl or soft wood. If stubborn dirt persists, gradually switch to a narrower angle only after testing on an inconspicuous area. A surface cleaner attachment can help cover large, flat surfaces evenly, reducing streaks and operator fatigue.
Consistency matters: keep the wand moving in smooth, overlapping passes and maintain a safe distance from the surface. Too close can etch or peel; too far can leave residues that require re-washing. Practice on a small test area first to dial in your technique. If you’re working on multiple elevations, consider using an extension wand or scaffolding to maintain consistent distance and avoid unsafe leaning poses. When finished, the surface should look uniformly damp with no pooling of water, indicating proper rinsing and surface readiness for primer.
Tools and materials you'll need
Before you start, gather the essential tools and materials to ensure a smooth process. A properly selected pressure washer with adjustable PSI and a good GPM rating is the backbone of the job. Use a broad spray nozzle (25°) for initial washing, and keep a narrower nozzle (15°-25°) ready for stubborn spots only after testing. Protective gear like safety glasses, gloves, and sturdy boots, plus tarps or plastic sheeting to protect nearby plants and windows, will keep you safe and minimize cleanup. A ladder or scaffolding for elevated areas should be used only with proper fall protection. Detergents formulated for exterior cleaning help remove grime more effectively, but ensure they are compatible with your siding and rinse thoroughly. Finally, have drying aids such as fans or a clean tarp available to accelerate surface drying if weather is humid or shaded.
With the right mix of equipment and prep, you’ll achieve a clean slate that allows primer to bond properly and paint to adhere evenly across all surfaces.
Surface preparation and weather window
Begin by surveying the house exterior to identify different material types (vinyl siding, brick, wood trim, stucco) and assess any repair needs. Plan your wash on a day with moderate temperatures and low humidity to ensure surfaces dry properly after washing. Avoid washing during peak heat or in the immediate afternoon sun, as rapid drying can leave detergent residues and streaks. Check local forecasts for dry windows of at least 24 hours; morning washing often provides the best drying conditions. Remove or protect all fragile components, like light fixtures, outlets, and decorative elements. Mask windows with plastic sheeting or painter’s tape when necessary and cover plants with drop cloths to prevent chemical exposure. After washing, test a small hidden area to verify that the surface accepts water uniformly without blotches, indicating readiness for cleaning solution application and eventual painting prep.
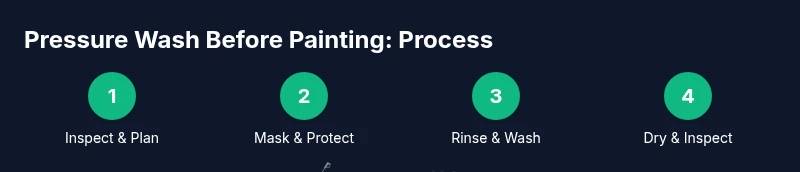
Step-by-step prep workflow
A thorough prep workflow helps ensure consistency from one section of the house to another. Start by mapping out the areas to wash, identifying delicate zones, and scheduling the work order from higher elevations to the ground. Prepare your cleaning solution and test spray on a small area to observe how the surface reacts. Apply detergent to the worst-appearing sections first, using a wide mist to avoid forcing contaminants deeper into porous surfaces. Maintain steady movement and avoid stopping the spray on a single spot for too long. Rinse sections from top to bottom to prevent dirty water from running onto cleaned areas. After washing, perform a quick visual inspection for remaining dirt, biofilm, or any signs of damage that require repairs before painting. Finally, allow surfaces to dry completely; use fans if necessary to speed up the process, particularly in shaded or humid areas. The goal is a dry, clean canvas that primes and paint can adhere to evenly.
Techniques to avoid paint damage
Protecting the siding and surrounding features is essential during washing. Use a wider nozzle and lighter spray over fragile surfaces to prevent etching, gouging, or water intrusion behind siding. Keep your spray at a slight angle and avoid spraying directly at joints or seams for extended periods. Shield plantings, metal fixtures, and electrical outlets with plastic sheeting or tarps. Never bypass safety gear—eye protection, gloves, and non-slip footwear reduce injury risk. When working near windows, avoid direct contact with glass to prevent water intrusion. If you see soft wood, rot, or cracked siding, postpone washing in that area and address the damage before painting. After washing, use a clean, damp cloth to wipe high-traffic areas and remove residue that could interfere with primer adhesion.
Common mistakes and troubleshooting
Mistakes like using too high pressure on delicate siding, lingering detergent residues, or skipping masking can lead to paint failures or cleanup headaches. Always start with the widest nozzle and the lowest effective PSI, gradually increasing as needed while staying off scored or damaged areas. If you notice peeling, repainting, or wood fibers showing through after washing, re-evaluate the area for underlying damage and consider repairs and sealing before primer. Never wash in strong gusts that push spray toward doors, windows, or neighbors’ property. If additional dirt remains after the first pass, perform a targeted second wash rather than high-pressure blasting across the entire surface. Finally, document any problem areas and plan for touch-ups later in the project, so you aren’t surprised after painting begins.
Finishing touches and drying time before priming
Once you’ve washed all surfaces, focus on efficient drying. Open doors and windows to improve airflow and consider using fans or dehumidifiers in enclosed spaces to reduce drying time. A clean, dry surface is essential before applying primer; damp spots can trap moisture and cause blooming in the paint film. Check the surface for any remaining soap residues by performing a final rinse and a light wipe with a dry microfiber cloth. If you detect biofilm or staining, give it an extra rinse and consider a mild cleaner appropriate for the surface type. Finally, re-evaluate the entire house for any missed spots, and ensure all masking is secure before moving to the priming stage.
Tools & Materials
- Pressure washer (adjustable PSI, 1500-3000 range)(Choose 1.5–3.0 GPM; test a small area first)
- Nozzle tips (25°, 40° and optional 15° for tough spots)(Start with wider spray to protect surfaces)
- Extension wand(Useful for reaching higher sections safely)
- Ladder or scaffolding (stability and safety)(Follow OSHA guidelines; secure with stabilizers)
- Surface cleaner (optional)(Efficient for large flat areas like siding)
- Detergent for exterior cleaning(Ensure compatibility with siding; rinse thoroughly)
- Protective gear (goggles, gloves, non-slip boots)(Full PPE required for safety)
- Tarps/plastic sheeting(Cover plants, outlets, and nearby fixtures)
- Drying aids (fans, towels)(Speed up drying on humid days)
Steps
Estimated time: 3-6 hours
- 1
Plan the wash and inspect surface
Walk around the house to identify different materials and assess areas that need special care. Note any peeling paint, cracked siding, or mold growth that will require repairs after cleaning. Planning helps you allocate time and choose the right nozzle and detergent for each area.
Tip: Test a small inconspicuous area first to gauge surface reactions. - 2
Protect surroundings and set up safely
Cover plants, windows, and outlets with tarp or plastic sheeting. Set up a stable ladder or scaffolding and wear PPE. Ensure there is clear access for washing and drying without obstacles.
Tip: Keep a clear path and have a partner assist with ladder safety if possible. - 3
Prepare equipment and test spray
Check hoses, wand, and nozzle. Test spray on a hidden area to confirm proper distance and angle before starting the main wash.
Tip: Begin with the widest nozzle and lower PSI, then adjust as needed. - 4
Apply detergent to tough dirt
Apply detergent evenly to heavily soiled areas, allowing it to dwell briefly before rinsing. Avoid letting soap dry on surfaces, which can leave residues or streaks.
Tip: Use a circular or overlapping pattern to prevent lines. - 5
Rinse from top to bottom
Start at the roofline or highest point and work downward in steady, overlapping strokes. Keep the nozzle moving to avoid etching or water infiltration behind trim.
Tip: Maintain a consistent distance from the surface, about arm’s length. - 6
Address stubborn spots
For persistent stains or growth, switch to a narrower nozzle for a targeted pass after testing on a small area. Do not linger on one spot for too long.
Tip: Pause and re-evaluate; aggressive spraying can cause damage. - 7
Dry and inspect readiness for priming
Use fans or natural drying to ensure surfaces are completely dry. Check for remaining residues and rewash if necessary. Confirm there are no soft boards, cracks, or signs of moisture before priming.
Tip: A dry surface is a primer’s best friend; patience now saves rework later. - 8
Plan for paint readiness
With the surface clean and dry, remove masking and prepare for priming. Have brushes or rollers ready for areas that dry unevenly. Schedule painting in a dry window to maintain film integrity.
Tip: Log the drying times from the day for future reference.
Quick Answers
Do I need to remove loose paint before washing?
Washing removes surface contaminants, but you should scrape and repair loose or chipped paint before priming and painting. Washing helps you identify problem areas, but it won’t fix all surface defects on its own.
Yes, wash to clean, but scrape and repair loose paint first to ensure a solid base for primer.
What is the best time of day to wash a house before painting?
Choose a cool, dry day with good airflow to allow surfaces to dry thoroughly. Avoid washing in direct sun or on windy, rainy days that can affect drying and debris control.
Pick a cool, dry day with good airflow; avoid direct sun and rain for best drying results.
Can I paint directly after washing, or should I wait?
Wait until all exterior surfaces are completely dry. Drying times vary with humidity and temperature, but plan for at least several hours and up to 24 hours in damp climates.
Wait for full drying to avoid trapped moisture affecting adhesion.
Should I use detergents or cleaners when washing?
A mild exterior cleaner is typically sufficient; avoid harsh chemicals that can leave residues or damage coatings. Rinse thoroughly after cleaning.
Yes, mild cleaners help, but rinse well to remove residues.
Is a power washer necessary, or can I use a garden hose?
A power washer provides the most effective cleaning and time savings, but a thorough garden-hose wash with proper brushing can work for light dirt. Expect longer cleaning time and more effort.
Power washing saves time, but a careful hose wash can work with more work.
How do I protect plants and windows during washing?
Use tarps or plastic sheeting, masking, and spray guards on plants. Keep spray away from foliage and use a wide spray on surfaces near windows to avoid splash.
Cover plants and windows well to prevent damage and staining.
Watch Video
Key Takeaways
- Plan ahead and inspect surfaces before washing.
- Use wide spray angles and safe distances to protect siding.
- Dry surfaces completely to ensure primer adhesion.
- Protect plants and fixtures; safety first throughout.