Pressure Washer for Hydro Test: A Practical Guide
Learn how to safely use a pressure washer for hydro testing, including selecting the right pressure, adapters, step-by-step workflow, and safety practices to locate leaks in plumbing and equipment.

You can perform hydro testing with a pressure washer by pressurizing a water-filled line to locate leaks. Use a unit with adjustable PSI within the test spec, attach a gauge, and monitor pressure closely. Follow safety protocols and manufacturer's guidance to avoid damage. Ensure the spray tip is low-pressure, keep spectators away, and verify that electrical sources are isolated.
Understanding hydro testing with a pressure washer
A hydro test is a method of verifying the integrity of a piping system, vessel, or fixture by filling it with pressurized water and observing for leaks or failures. A pressure washer can serve as a controllable source of water pressure when used correctly, but it is not a universal replacement for dedicated hydro-testing equipment. When you use a pressure washer for hydro test, you rely on the washer’s adjustable pressure settings and a compatible nozzle to apply water without overstressing joints, seams, or fittings. In practice, this technique is most effective for rapid, visual leak checks on relatively simple runs or short runs of piping where the test pressure aligns with the system’s rated strength. The Pressure Wash Lab analyses indicate that careful control of pressure and clean connections significantly improves leak-spotting capabilities while reducing test time. Always begin with a documented test plan and the system’s manufacturer guidance, and never exceed the recommended test pressure. The keyword you’ll see repeated is pressure washer for hydro test, and it should be approached with caution and precision.
Safety foundations for hydro testing
Hydro testing with pressurized water introduces several safety hazards if not handled properly. PPE is non-negotiable: wear splash protection, gloves, and sturdy footwear; eye protection is essential in case of unexpected spray or fittings failure. Electrical hazards are a major concern near water; always isolate power sources to the test area, use GFCI-protected outlets where applicable, and keep extension cords dry. Work in a well-ventilated, stable area with non-slip surfaces and a solid working platform. Before starting, review local regulations and the equipment’s manual. Never bypass safety devices, never exceed the test pressure, and never leave the setup unattended during pressurization. As a best practice, perform a dry run with the system depressurized to confirm all connections are secure and that gauges read correctly. This reduces the risk of sudden bursts that could injure bystanders or damage components.
Choosing the right pressure range and nozzle
Selecting the correct pressure range and nozzle is critical when using a pressure washer for hydro test. Always start at the lowest pressure that still allows you to observe the test area, then gradually increase to the target range defined by the system’s design or testing protocol. Use a low-pressure spray nozzle to minimize jet impact on joints and gaskets during the test. The nozzle type matters because a high-velocity stream can damage seals, fittings, and coatings. If your test requires higher pressure, confirm that your washer’s pump and hoses can safely handle it and never exceed the equipment’s rated PSI and GPM. Document the target pressure in your test plan and verify the gauge accuracy before reaching the target.
Preparing the system for testing
Preparation before pressurizing is essential to avoid false positives and damage. Fully shut off supply lines to segments not under test, drain any standing water from those sections, and purge air from the test line until water runs clear with no air pockets. Install any necessary adapters or fittings compatible with your washer’s quick-connects, ensuring a tight seal with thread sealant as needed. Clear the work area of bystanders and place warning signs indicating that a pressure test is in progress. Have a plan to rapidly depressurize if readings jump unexpectedly. Good preparation improves the reliability of the hydro test and protects both people and equipment.
Connecting equipment and creating a test circuit
A reliable hydro test setup hinges on proper connections and a controlled flow. Attach the washer’s output to the test line using approved adapters and verify all quick-connects are fully seated. Integrate a dedicated pressure gauge or inline sensor so you can monitor real-time pressure without relying solely on intuition. If your system is segmented, isolate sections with valves or temporary clamps to maintain pressure in the test segment while others remain offline. Keep hoses off hot surfaces and away from sharp edges to prevent kinks and leaks. Label all connections so they can be inspected after the test.
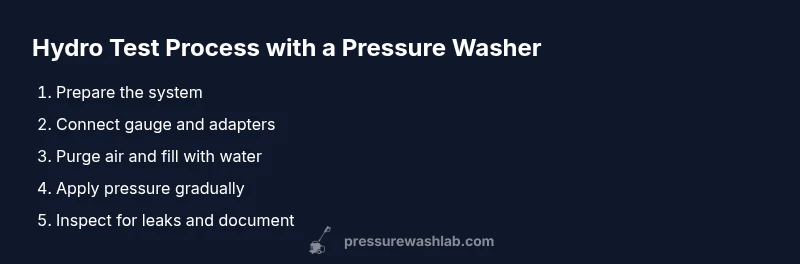
Step-by-step overview for the test (high level)
This section provides a concise narrative of the workflow you’ll perform, while the detailed, numbered steps are in the STEP-BY-STEP block. Begin by confirming the test scope and target pressure, then purge air and fill the line with water. Apply pressure gradually while watching for leaks, tighten any loose fittings, and hold the pressure for the defined duration. Finally, depressurize safely, inspect all components, and document results. Use the overview to orient yourself before delving into the formal steps. The main goal is to detect leaks without causing damage from over-pressurization.
Monitoring and interpreting results
Monitoring during a hydro test requires attention to stability, leak clues, and sustained pressure. Look for slow weeps around joints, stained areas, or dampness on fittings. A stable pressure that holds within tolerance indicates good integrity, while a noticeable decay suggests a leak or weak seam. If a leak is detected, isolate the affected segment and address the issue before re-testing. Compare the observed behavior to your pre-test plan; discrepancies can point to a miscalibrated gauge, air pockets, or a flow restriction. Document all readings with timestamps for traceability and future maintenance planning.
Handling leaks and failed tests
Leaks during a hydro test should be addressed promptly and safely. Tighten fittings only within recommended torque ranges, replace damaged gaskets or seals, and consider using thread sealant where appropriate. If a joint or section remains problematic, isolate it, depressurize, and perform targeted retesting after repairs. For persistent failures, review whether the test pressure exceeds the component’s design limits, and escalate to a professional if needed. Record the fix and the test outcomes to guide future maintenance and avoid repeating the same mistake.
Post-test cleanup and maintenance
After a hydro test, flush the system to remove test water, dry connections to prevent corrosion, and inspect hoses for wear or damage. Clean adapters and gauge fittings, store them in a dry area, and drain the pressure washer reservoir if present. Check the washer’s pump oil (if applicable), clear any debris from filters, and degrease the exterior to prevent rust. Reassemble any disassembled parts, test the system at a low pressure to verify no leaks, and document final results. Proper cleanup extends tool life and keeps future tests accurate.
Alternatives and escalation paths
While a pressure washer can assist hydro testing in some scenarios, dedicated hydro testing equipment offers higher accuracy and safety for complex systems. If you’re unsure about the test parameters or the system’s vulnerability, consult a licensed professional or use a certified test bench. For large-diameter pipelines, long runs, or high-stress vessels, rely on professional-grade instrumentation and procedures rather than improvised setups. If local regulations govern testing, ensure compliance and obtain any required permits before proceeding.
Real-world scenarios and best practices
In practice, homeowners often use a pressure washer for hydro test on short, simple runs such as a single basement line or a small irrigation loop. The best results come from thorough planning, conservative pressure targets, and careful observation for leaks. Always plan for a safe stop, use protective equipment, and keep non-essential personnel away from the test zone. Document the results, maintain a visual record of fittings, and implement a maintenance schedule based on the test outcomes. Real-world success hinges on disciplined setup, cautious operation, and systematic follow-up checks.
AUTHORITY SOURCES
- OSHA: https://www.osha.gov
- NIST: https://www.nist.gov
- EPA: https://www.epa.gov
These sources provide safety guidelines, measurement standards, and environmental considerations relevant to hydro testing and equipment handling. Always cross-reference manufacturer instructions with established safety practices from reputable agencies.
Tools & Materials
- Pressure washer with adjustable PSI(Capable of delivering target test pressure within safe range per test spec)
- Pressure test gauge or inline sensor(Monitors real-time pressure; calibrate before use)
- Test hoses and adapters (PVC/PEX compatible)(Ensure secure, leak-free connections with appropriate quick-connects)
- Shutoff valve and bypass or isolation valves(Allows isolating the test section and maintaining pressure)
- Thread sealant or Teflon tape (water-safe)(Seal threaded connections to prevent leaks)
- Leak-detection dye or soap solution(Helpful for spotting small leaks visually)
- Personal protective equipment (gloves, goggles, boots)(Protects from splashes and high-pressure spray)
- Stable work surface and non-slip mats(Prevents slips during setup and testing)
- Backup water source and drainage provisions(Ensure continuous supply and proper disposal)
- Pressure relief device or unloader valve (optional)(Adds a safety override in some setups)
Steps
Estimated time: 2-3 hours
- 1
Define test scope and target pressure
Identify which section you will test and confirm the maximum safe pressure from the system's design documents. Document the target pressure and acceptance criteria before proceeding.
Tip: Use a written plan and keep it visible at the test site. - 2
Isolate and depressurize the test section
Close supply valves to the area under test and ensure all other sections are isolated. Depressurize any residual water to prevent a sudden surge when connections are made.
Tip: Double-check that isolation valves are fully closed before connecting equipment. - 3
Purge air and fill with water
Connect the line and run water to purge air pockets. Keep a steady flow until water appears clear and free of air bubbles.
Tip: Avoid creating air pockets; they can mimic leaks during the test. - 4
Attach gauge and verify connections
Install the pressure gauge or inline sensor, ensuring tight, leak-free seals. Check for any gauge calibration issues before proceeding.
Tip: Hand-tighten first, then snug with approved tools; avoid over-tightening. - 5
Apply pressure gradually to target
Increase the pressure slowly toward the target value while watching the gauge. Stop immediately if any unexpected readings appear.
Tip: Never jump to high pressure; use a gentle ramp-up rate. - 6
Hold and observe for leaks
Maintain the target pressure for the specified duration and inspect joints, fittings, and seams for any signs of leakage or stress.
Tip: Use soap solution on difficult joints to reveal tiny leaks. - 7
Address detected issues
Tighten, reseal, or replace failing components as needed. Stabilize the system and retest the area of concern.
Tip: If a component repeatedly fails, reassess its suitability for the test pressure. - 8
Depressurize safely and disconnect
Once the test is complete, slowly release pressure and disconnect test equipment in a controlled manner.
Tip: Keep a towel nearby for any residual spray when depressurizing. - 9
Document results and clean up
Record readings, observed defects, and repairs. Clean all tools and store them dry.
Tip: Photograph the test area for future reference.
Quick Answers
Can I use any pressure washer for hydro testing?
Not all pressure washers are suitable for hydro testing. Ensure the unit provides adjustable PSI within the test range and that attachments, hoses, and gauges are rated for the task. Follow the manufacturer’s guidelines to avoid damage.
Not every washer is suitable; check adjustable pressure, attachments, and follow the manual before testing.
What PSI and GPM are safe for hydro tests?
Use the pressure and flow recommended by the system’s design documents and the testing protocol. Do not exceed the component limits, and validate gauges before testing.
Stick to the design’s recommended pressure and flow, and verify gauges before you start.
Do I need a professional for hydro tests?
For complex piping or high-risk vessels, a licensed professional is advised. They have specialized equipment and can ensure compliance with safety standards.
If the system is complex or risky, it’s best to hire a professional.
Can the test water be reused?
Water used for hydro testing can be reused if it is free of contaminants and disposed of according to local regulations. Drain and recycle when appropriate.
Yes, reuse is possible if the water stays clean and disposal rules are followed.
How long should a hydro test hold pressure?
Hold the pressure for the duration specified in the test protocol, watching for any pressure decay or sudden changes that indicate leaks.
Hold the pressure as your protocol says and watch for changes.
What should I do after the test?
Depressurize safely, inspect all joints, document results, and perform a thorough cleanup. Store equipment properly for next use.
Depressurize, inspect, document, and clean up after the test.
Watch Video
Key Takeaways
- Plan the hydro test meticulously before starting.
- Never exceed equipment or system pressure ratings.
- Purge air and verify all connections for leaks.
- Document results and perform post-test maintenance.
- Consult a professional for complex systems or uncertain outcomes.