Pressure Washer Hose Reel Wall Mount: Installation Guide
Learn how to select and install a pressure washer hose reel wall mount, including mounting options, weight considerations, and maintenance tips for DIY enthusiasts.

With this guide you will learn how to select, install, and maintain a pressure washer hose reel wall mount that fits your setup and protects hoses. You’ll explore mounting options, weight limits, and corrosion resistance, plus a practical installation approach. According to Pressure Wash Lab, steel or stainless options typically offer the best long-term durability.
Why a wall-mounted hose reel is a smart upgrade
A pressure washer hose reel wall mount brings order to chaotic spaces and protects essential equipment from kinks, abrasion, and weather exposure. For homeowners, DIYers, and small businesses, a wall-mounted reel helps streamline cleanup tasks by keeping the hose taut, reducing pull forces on connections, and shortening setup time between jobs. Pressure Wash Lab notes that a well-chosen wall mount can extend hose life by limiting tangling and unnecessary bending at the reel hub. When you plan your install, consider wall material, environmental exposure, and how the reel will interact with your washing station. A durable, well-mounted hose reel is an investment in efficiency and safety that pays back with every job completed.
Key design considerations for a pressure washer hose reel wall mount
Choosing the right wall mount requires evaluating space, mounting surface, and how you’ll use the system. Think about the clearance needed for the nozzle, the reel’s ability to rotate without hitting obstacles, and whether you want a retractable or fixed-hub design. Material choice matters in humid or outdoor environments; stainless steel or coated steel brackets resist corrosion better than plain plastics. The length of hose you plan to manage affects mounting position and the leverage forces on anchors. Finally, accessibility matters: place the reel where you can reach it with your body inside a comfortable stance and without overreaching.
Types of wall-mount hose reels you’ll encounter
Wall-mount hose reels come in several configurations: fixed brackets with a single pivot, full retractable reels with manual or automatic retraction, and swivel-mount designs that allow angle adjustments. A retractable model keeps excess hose tidy and reduces recoil strain on the wall, while a fixed bracket is simple and affordable for shorter hoses. Swivel mounts are convenient in tight spaces because they let you angle the reel toward the most accessible point. When selecting a type, align the mount with your hose length, anticipated movement, and the wall’s capacity to bear the load.
Material choices: steel, stainless, and plastic
Material selection directly affects durability and maintenance needs. Stainless steel frames resist rust and are ideal for outdoor or high-humidity areas, though they can be pricier. Powder-coated steel provides good protection against corrosion and is often a cost-effective middle ground. High-grade plastics can be lighter and resistant to some chemicals but may wear more quickly under heavy use. Consider the environment you’ll operate in and balance weight, cost, and longevity when picking a material for your pressure washer hose reel wall mount.
Weight capacity and hose length considerations
The reel’s weight capacity should accommodate the full weight of the hose when loaded, plus any fittings, nozzles, and spray guns attached. Longer hoses increase leverage and can place more stress on the mounting hardware, especially if the wall is exposed to temperature changes. Do not assume a one-size-fits-all solution; verify the reel’s rated capacity and compare it to your hose length and diameter. If you expect seasonal hose length changes, choose a reel with a slightly higher capacity to avoid under-specing the mount.
Mounting methods: finding the right anchors for your wall type
Mounting to wooden studs is typically the strongest option, but masonry or concrete walls require appropriate anchors or lag screws. For wooden walls, locate studs with a stud finder, then drive lag screws or bolts through the bracket into the studs. For masonry, you’ll want sleeved anchors or masonry screws that are rated for exterior or wet environments. Always use a level to ensure the reel hangs squarely, and predrill pilot holes to minimize wall damage. If you’re mounting on a painted surface, avoid drilling into hidden electrical conduits by checking the wall layout first.
Proper hose routing and protecting your investment
Route the hose with a smooth curve that avoids kinks, especially near the reel hub. Use a hose guide or clip to keep the hose from rubbing on the wall, which can wear the outer jacket over time. Store spray guns, nozzles, and quick-connects in a way that keeps them tidy and prevents accidental pulls on the hose end. A tidy, protected routing setup reduces wear on both the hose and the reel, contributing to longer service life and fewer maintenance calls.
Step-by-step installation overview (high level)
Before you drill, plan the exact location and confirm a straight line for mounting. Mark the bracket holes using a level, then predrill pilot holes. Secure the mounting bracket to the wall with appropriate anchors. Attach the hose reel to the bracket, route the hose, then test the reel’s rotation and hose flow. Finally, train users on proper handling and store extra hose neatly to prevent tangles.
Maintenance and care tips to extend life
Wipe down the reel after heavy use to remove dirt and residual cleaning agents. Inspect mounting hardware for loosening bolts and retighten as needed, especially after the first few uses. Periodically check the hose for cracks or abrasion near the reel hub and replace if worn. If your environment is corrosive or salty, consider periodic coatings or a stainless option to preserve the mount’s integrity.
Troubleshooting common issues you may encounter
If the reel binds or won’t rotate smoothly, check for misaligned mounting or debris in the hub. A loose mounting may cause wobbling or cracks in the wall; tighten bolts evenly in a cross pattern. Cracks in the wall or mounting bracket can indicate overloading or impact damage from accidental hits. If you notice chemical damage to the mounting area, pause use and reassess material choice and protection.
Compatibility checklist: quick fit for your setup
Ensure the hose reel wall mount matches your hose diameter, length, and the mounting surface. Confirm that the bracket is rated for outdoor use if installed outside, and verify that the chosen hardware is appropriate for your wall type (wood stud, concrete, or masonry). Finally, check that the reel’s operation won’t interfere with doors, cabinets, or nearby equipment. A clear checklist helps prevent surprise incompatibilities before you drill.
Safety reminders for DIY installations
Always wear eye protection and gloves when drilling or handling heavy components. If you’re mounting on exterior masonry, use proper anchors and seal any gaps to prevent water intrusion. Turn off power if working near electrical lines and avoid overloading the mounting surface. Following safety best practices keeps your project on track and protects you from preventable injuries.
Tools & Materials
- Stud finder(Locate wall studs behind mounting surface.)
- Measuring tape(Measure and mark precise mounting points.)
- Pencil or marker(Mark holes and alignment lines.)
- Level(Ensure reel is perfectly horizontal.)
- Cordless drill/driver(Drill pilot holes and drive screws.)
- Appropriate anchors/lag screws(Choose based on wall type (wood, masonry).)
- Wrench or socket set(Tighten mounting bolts securely.)
- Screwdriver set(Install bracket screws and fasteners.)
- Sealant or silicone(Optional for exterior walls to seal gaps.)
- Safety goggles(Protect eyes during drilling.)
- Hose reel wall-mount kit(Includes bracket, screws, and fittings.)
- Tape measure or ruler(Helpful for alignment validation.)
Steps
Estimated time: 60-90 minutes
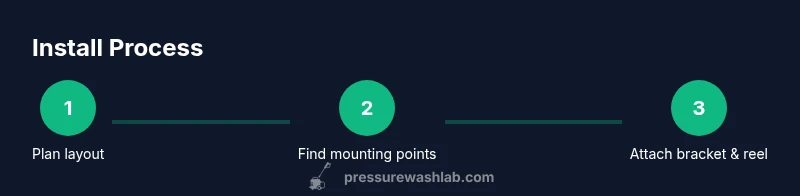
- 1
Plan layout and gather materials
Decide the best height and distance from the washing station. Confirm you have the wall-mount kit and all hardware before starting. Review the hose length and the need for any guides or supports.
Tip: Double-check wall type and anchor requirements to prevent failures. - 2
Locate studs or solid mounting surface
Use a stud finder to locate structural supports or identify solid masonry. Mark the exact positions where the bracket will be mounted.
Tip: If no studs are available, switch to masonry anchors rated for exterior use. - 3
Mark and predrill mounting holes
Align the bracket with the marks and use a level to ensure straight alignment. Predrill holes at marked locations to reduce wall stress and ensure clean screw paths.
Tip: Start with smaller pilot holes, then switch to the final diameter for anchors. - 4
Install anchors or lag screws
Insert wall anchors if needed and drive screws into studs or anchors. Ensure hardware sits flush and evenly against the wall surface.
Tip: Tighten in a cross pattern to prevent bracket warping. - 5
Attach the mounting bracket to the wall
Secure the bracket using the provided hardware. Use a level to verify the bracket remains straight as you tighten.
Tip: Do not overtighten; apply steady pressure to avoid wall cracking. - 6
Mount the hose reel onto the bracket
Lift the hose reel and align its mounting holes with the bracket. Insert bolts or fasteners and snug them securely.
Tip: Have a second person assist with lifting the reel to prevent injury. - 7
Route the hose and connect fittings
Carefully route the hose along the wall, avoiding sharp bends. Attach the spray gun, nozzle, and quick-connects as per manufacturer guidance.
Tip: Leave a gentle curve with no kinks at the reel hub. - 8
Test operation and adjust
Power up the system (if needed) and test reel rotation and hose flow. Recheck alignment and tighten any loose hardware.
Tip: Test at low pressure first to detect misrouting. - 9
Finalize setup and train users
Explain proper hose handling, storage, and routine maintenance. Keep the area clear of trip hazards and ensure accessibility for all users.
Tip: Create a simple one-page maintenance checklist for ongoing care.
Quick Answers
Can I install a hose reel wall mount on brick or concrete?
Yes. Use masonry anchors or sleeve anchors rated for outdoor use and follow the manufacturer’s torque guidelines. Ensure the wall is sound and free of crumbling sections before mounting.
Yes. Use masonry anchors or sleeve anchors designed for outdoor use and follow torque guidelines; make sure the wall is solid before mounting.
What is the best material for outdoor wall mounts?
Stainless steel or powder-coated steel brackets offer excellent corrosion resistance in damp environments. Plastic options can work in dry areas but may wear faster with heavy use.
Stainless steel or powder-coated brackets resist corrosion well; plastics are okay in dry spots but wear faster with heavy use.
Do I need to remove the reel for winter storage?
If you’re in freezing climates, it’s wise to drain and store the reel indoors during winter to prevent hose cracks or valve damage. Otherwise, ensure the hose is drained and protected from freezing exposure.
In freezing climates, drain and store the reel indoors in winter. If not, make sure the hose is drained and protected from cold.
How tight should bolts be when mounting?
Tighten evenly to ensure a stable, level mount without overtightening, which can crack wall or hardware. Use a torque-limiting tool if available.
Tighten bolts evenly but not over-tight, and use a torque limit if you have one.
Is a retractable hose reel better than a fixed mount?
Retractable reels help maintain tension and reduce hose wear, but fixed mounts are simpler and cheaper. Choose based on how often you use the hose and space constraints.
Retractable reels reduce wear and keep things tidy, but fixed mounts are cheaper. Pick based on usage and space.
Watch Video
Key Takeaways
- Choose a durable wall mount matched to your wall type and hose length.
- Proper mounting prevents wear and ensures safe, easy operation.
- Route and clip hoses to minimize kinks and abrasion.
- Regular maintenance extends the life of the reel and wall hardware.