Pressure Washer Tips Chart: A Practical How-To Guide
Master a pressure washer tips chart with step-by-step guidance, safety tips, and printable references for concrete, siding, wood, and driveways. Learn how to read the chart, choose nozzle tips, apply detergents, and prevent damage.

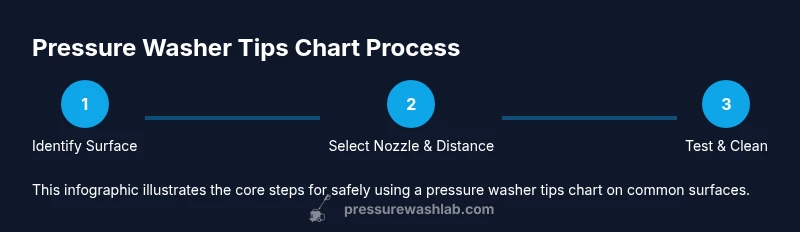
With this pressure washer tips chart guide, you’ll confidently map nozzle tips, PSI ranges, and surface-specific techniques before you spray. The guide walks you through a safe, step-by-step approach, explains how to read charts, and shows real-world examples for concrete, wood, and siding. According to Pressure Wash Lab, using a formal chart minimizes mistakes and speeds up decision-making on every job.
Why a Pressure Washer Tips Chart Saves Time and Reduces Risk
A pressure washer tips chart acts as a quick-reference guide that translates complex cleaning choices into simple, repeatable actions. By aligning nozzle angles, PSI ranges, and surface type in one place, homeowners and pros can avoid guesswork that leads to damage or uneven results. According to Pressure Wash Lab, using a formal chart minimizes mistakes and speeds up decision-making on every job. In practice, you’ll flip to the chart before you turn on the machine, verify the surface, and select the first nozzle and setting with confidence. Over time, this habit lowers the risk of etching wood, stripping paint, or blasting grout or sealants loose. The chart also supports training for new operators, ensures consistency across crews, and gives you a baseline to compare results from one project to the next. Finally, it helps in budgeting because you’ll know exactly what nozzle tips, wands, and detergents are required for typical tasks, reducing unnecessary tool purchases.
How to Read Your Chart: Key Columns and Terms
Charts typically show columns labeled Surface, Material, Nozzle Tip, PSI Range, Distance, and Best Practices. Start by identifying the surface you’re cleaning, then match it to the material category. Next, select a nozzle tip that provides adequate cleaning without causing damage; common choices include wider angles for delicate surfaces and narrower angles for stubborn stains. The PSI Range tells you the safe operating range for that pairing, while Distance indicates how far the spray should be from the surface. Look for cautions about edges, weather, and delicate finishes. Many charts also include quick notes on technique, such as keeping the spray in motion and avoiding “spot-cleaning” that can create uneven textures. A quick test on a hidden patch confirms you’re in the safe zone before proceeding.
Surface-by-Surface Guidelines: Nozzle Tips, PSI, and Distances
In practice, a 0° nozzle delivers the strongest focused force and should be reserved for hard, non-porous surfaces or stubborn stains with care. 15° and 25° tips strike a balance for most siding, brick, and concrete surfaces, while a wide 40° angle helps cover larger areas with gentler spray. For delicate surfaces like wood decking, vinyl siding, or painted finishes, start with the widest angle and move closer only if the chart indicates it’s safe. Maintain a steady, sweeping motion and never linger in one spot. If you encounter paint peeling or wood fibers lifting, back off immediately and switch to a gentler tip. For uneven surfaces, angle the spray slightly to avoid gouging edges, and always test on a small area first. When in doubt, rely on the chart’s recommended combinations rather than memory alone.
Detergents, Detailing, and Attachments: Extending the Chart's Reach
Detergents can dramatically improve cleaning in the chart’s framework, but you must verify compatibility with your surface and machine. Use a dedicated chemical injector or a spray bottle to apply cleaner before rinsing with water, following the chart’s guidance on dwell time. Attachments like a surface cleaner or rotary nozzle can speed up large-area jobs and reduce streaks, as long as you keep the spray moving and maintain the recommended distance. Detailing brushes, masks for delicate plants, and tarps for landscaping help protect non-target areas. Always rinse away any cleaner completely to prevent residue, and test a small patch first to ensure you don’t dull finishes or strip protective coatings.
Safety First: PPE and Safe Operation
PPE is non-negotiable when using any pressure washer. Wear ANSI-rated safety goggles, waterproof gloves, and hearing protection. Keep bystanders away, especially children and pets, and never aim the spray at your body or feet. Check hoses and connections for leaks, refuel or recharge away from any ignition source, and never operate a unit with damaged cords or outlets. If you’re using an electric model, ensure you’re plugged into a grounded outlet and use a GFCI-protected circuit. A quick pre-job safety checklist keeps you aligned with best practices and reduces the risk of injuries.
Real-World Scenarios: Patio, Siding, and Driveways
For patios, begin with a wide-angle nozzle and a low-to-moderate pressure, working in straight, overlapping passes to remove dirt without etching stone. On siding, opt for the gentlest safe setting; test on a hidden area first and use a soft surface cleaner for best results. Driveways often respond well to a 25° or 40° angle; keep the spray moving and avoid staying in one spot to prevent streaks. In all cases, rinse from top to bottom to avoid re-depositing grime, and pause if you notice any paint damage or moisture intrusion behind surfaces. The chart should be your on-site reference, not a sacred rule—adjust for soil type, weather, and equipment condition.
Maintaining and Updating Your Chart for Longevity
Your chart is a living document. Record the outcomes of each job, noting which nozzle, distance, and detergent worked best on each surface. Review results after every season and update your chart to reflect new equipment or surface finishes. Create a simple digital version for easy search and a printable card for field use. Regular updates help you maintain accuracy, reduce mistakes, and extend the life of tools and surfaces.
Quick Reference: Printable Card Formats and Digital Tools
Create a compact, one-page card that lists surface categories, recommended nozzle tips, and safe distance guidelines. Save a digital version on your phone or tablet for quick access on the job site. Consider adding color-coding and symbols to differentiate surfaces and intensities. Pressure Wash Lab offers templates and examples you can adapt to your deck, your driveway, and your business.
Tools & Materials
- Pressure washer (gas or electric)(Choose model with adjustable PSI and fresh water supply.)
- Assorted nozzle tips (0°, 15°, 25°, 40°)(Keep tips clean; use quick-connect if available.)
- Surface cleaner attachment(Speeds up large-area cleaning and reduces streaks.)
- Detergent-compatible sprayer (optional)(If using detergent, test compatibility.)
- Safety goggles(ANSI-rated; protect eyes from debris.)
- Gloves(Chemical-resistant if using cleaners.)
- Hearing protection(Protect ears from noise.)
- Garden hose with proper inlet(Ensure adequate water supply.)
- Tarps or plant protection (optional)(Protect plants and landscaping.)
Steps
Estimated time: 60-90 minutes
- 1
Inspect equipment and organize tools
Check hoses for leaks, connect to a clean water supply, and verify all attachments. Confirm you have the chart handy and a safe work area. Power off when inspecting connections, then prepare your starting setup.
Tip: Test connections for leaks before energizing the machine. - 2
Review the chart and identify surface
Identify the surface you’ll clean (concrete, wood, siding, brick, or metal) and locate the chart’s recommended combination for that surface. Note any special cautions for edges or delicate finishes.
Tip: Mark the chosen combination on a notepad or digital note for later reference. - 3
Set initial nozzle and distance
Attach the recommended nozzle and hold the wand at a safe starting distance. Begin with the broadest angle allowed and adjust only if the surface shows acceptable results.
Tip: Begin with the widest safe angle to minimize damage. - 4
Apply detergent if needed
If the chart calls for detergent, apply according to dwell time guidelines before rinsing. Ensure compatibility with the surface and equipment.
Tip: Rinse thoroughly after dwell time to avoid residue. - 5
Clean with overlapping passes
Move the wand in consistent, overlapping strokes to avoid streaks and missed patches. Keep the spray moving and avoid lingering on any spot.
Tip: Use a steady, sweeping motion rather than back-and-forth jitter. - 6
Rinse and inspect results
Rinse from top to bottom and inspect for missed areas or damage. Re-clean problematic sections with a lighter approach if needed.
Tip: Inspect edges for signs of surface wear before proceeding. - 7
Shutdown and storage
Relieve residual pressure, power off, disconnect hoses, and store tools in a dry area away from sunlight. Wipe down the wand and nozzle to prevent mineral buildup.
Tip: Label your stored tools and keep a quick-reference card nearby.
Quick Answers
What is a pressure washer tips chart?
A pressure washer tips chart is a reference that maps surface types to recommended nozzle tips, distances, and PSI ranges to prevent damage and improve results.
A pressure washer tips chart is a quick reference that links surfaces to the right nozzle, distance, and pressure for safe cleaning.
How do I use a chart on the job?
Start by identifying the surface, then pull the chart's recommended nozzle and distance. Test on a small patch, adjust if needed, and proceed with the chosen settings.
Identify the surface, pick the recommended nozzle and distance from the chart, test on a patch, then clean.
Can detergents be included in the chart?
Yes, if your chart covers detergents, note dwell times and rinse requirements. Always verify compatibility with the surface and equipment.
Detergents can be included if the chart covers them; follow dwell times and ensure compatibility.
Are there risks using a chart with every material?
A chart reduces risk but cannot replace testing on sensitive finishes. When in doubt, use the widest safe angle and a light touch.
Charts help, but always test on a hidden area to avoid damage.
How often should I update the chart?
Update after unfamiliar surfaces, new equipment, or new coatings. Seasonal checks help maintain accuracy.
Update the chart whenever you encounter new surfaces or equipment.
Is a pressure washer tips chart compatible with all machines?
Most standard charts apply to a wide range of electric and gas washers, but always adapt to your unit’s minimum and maximum PSI and GPM.
Most charts fit many machines, but always adjust to your unit’s limits.
Watch Video
Key Takeaways
- Standardize nozzle choices with a chart
- Test patches before full cleaning
- Wear PPE and maintain safe distance
- Update chart after each job