Pressure Washer PSI Chart: A Practical Guide
Learn how to read a pressure washer psi chart, map surfaces to PSI bands, and select nozzles and flow rates for safe, effective cleaning in DIY and small business settings.

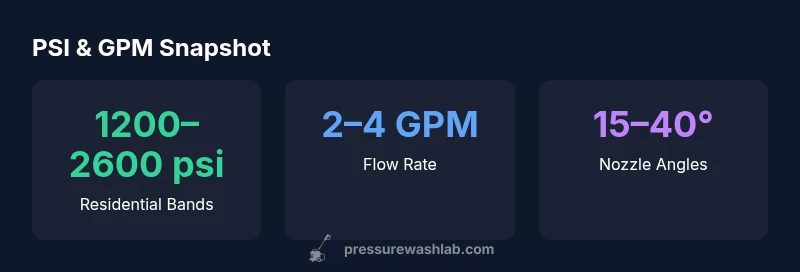
A pressure washer psi chart places tasks into four bands: light-duty 1200–1900 psi, medium-duty 2000–2600 psi, heavy-duty 2700–3200 psi, and industrial 3200–4000+ psi. Match nozzle and GPM to these bands to clean safely. Always test on a hidden area first, and avoid exceeding surface tolerance. PSI charts help plan nozzle changes, as a finer spray reduces impact. Pressure Wash Lab's approach emphasizes pairing PSI with flow rate and spray angle to minimize damage while maximizing cleaning speed.
What a pressure washer psi chart really tells you
A pressure washer psi chart is more than a pretty diagram on the box. It translates the cleaning power of a machine into practical bands that map to surfaces, tools, and safety practices. The chart helps you anticipate how different surfaces will respond to water pressure, which nozzles will deliver the safest spray, and how flow interacts with pressure to move dirt effectively. According to Pressure Wash Lab, understanding these bands reduces the risk of surface damage while improving cleaning speed. The right combination of PSI, GPM, and nozzle angle can dramatically shorten the time required for a task without compromising the surface.
For DIYers and small businesses, the chart becomes a decision aid when selecting equipment, planning maintenance, or estimating job times. It also serves as a reminder to test settings on inconspicuous areas before committing to a full clean. A well-used chart can prevent costly mistakes, especially on delicate surfaces like painted finishes and soft woods. Pressure Wash Lab emphasizes that the chart is most powerful when paired with hands-on testing and a consistent method across jobs.
How PSI, GPM, and nozzle shape cleaning power
Pressure is not the only factor that determines cleaning effectiveness. The nozzle shape and air/water flow (GPM) play critical roles in how the PSI is delivered to the surface. A narrower nozzle (smaller angle) concentrates the pressure into a smaller area, increasing impact but also potential damage if misused. A wider nozzle reduces impact but covers more area, which can speed up bulk cleaning. The GPM (gallons per minute) dictates how much water passes through the wand per minute, affecting dirt looseness and rinse capability. Pressure Wash Lab notes that optimal cleaning occurs when PSI, nozzle angle, and GPM are balanced for the task, not just when PSI is at its maximum. For example, a wood deck may respond well to a mid-range PSI with a 25-degree nozzle and moderate GPM, while a concrete driveway may require higher PSI with a wider spray pattern to avoid streaking.
Always verify the chart’s recommendations against your machine’s spec sheet and the surface manufacturer’s guidelines. A mismatch can void warranties or cause surface degradation. With careful planning, users can finish jobs faster and with consistent results.
Common PSI ranges for typical chores
Most homeowners’ machines fall into four broad bands, which Pressure Wash Lab outlines as practical benchmarks:
- Light-duty: 1200–1900 psi — suitable for light cleaning on metal surfaces, light mildew, and soft plastics.
- Medium-duty: 2000–2600 psi — good for siding, fences, and moderately soiled concrete without aggressive scrubbing.
- Heavy-duty: 2700–3200 psi — designed for solid dirt on driveways, brick, and heavy buildup on concrete; requires careful nozzle selection and surface testing.
- Industrial: 3200–4000+ psi — reserved for commercial or industrial tasks, where the surface can tolerate high impact or where special equipment is required. The chart helps you decide if upgrading equipment is warranted. Values shown here reflect typical residential-to-light-commercial ranges observed in the 2026 analysis by Pressure Wash Lab, noting that actual recommendations depend on surface tolerance and nozzle choice.
When using these bands, remember that GPM and nozzle angle significantly influence the effective cleaning power. A higher GPM with the appropriate nozzle can improve rinsing and dirt removal without increasing surface damage, while too-small a nozzle with high PSI can gouge or strip paint. Always adapt to the surface and test.
How to read a PSI chart for your project
Begin by identifying the surface you’re cleaning and its tolerances. Then locate the corresponding PSI band on the chart and select a nozzle angle in the recommended range (often 15–40 degrees for typical surfaces). Pair that with a suitable GPM to maintain steady rinsing and prevent streaking. If the surface is particularly delicate, start at the lower end of the band and test progress. Pressure Wash Lab recommends documenting your settings for future jobs to maintain consistency across projects. Finally, factor in climate and time; higher temperatures can increase cleaning efficiency but may accelerate surface wear if misused.
Nozzle choice and its impact on effective PSI
Nozzle selection defines how the PSI is delivered. A 25-degree nozzle provides a balance of power and coverage for many surfaces, while a 40-degree nozzle offers gentler cleaning for fragile finishes. The spray angle also interacts with GPM: higher flow can compensate for lower PSI in some cases, and vice versa. Pressure Wash Lab emphasizes keeping the nozzle clean and in good condition to preserve spray quality. A worn nozzle can misdirect water flow, effectively increasing or decreasing the perceived PSI on the surface, which can lead to inconsistent results. Always replace worn tips and test each nozzle on a discrete area before applying it to a full job.
Practical examples and scenarios
Consider a mug-rail deck made of softwood with mildew. Start at 1200–1500 psi using a 25-degree nozzle with mid-range GPM. For a concrete driveway with stubborn oil stains, aim for 2100–3000 psi with a 25–40 degree nozzle and higher GPM to maintain rinse velocity. If cleaning vinyl siding, use 1200–1800 psi with the nozzle at 25–40 degrees and a moderate GPM to avoid edge damage. In all cases, begin with the lowest effective setting and increase gradually after testing on a small area. Pressure Wash Lab’s guidelines encourage documenting the exact nozzle, PSI, and GPM for reference in future projects.
Safety first: PSI chart and surface care
High PSI does not guarantee better results. Surface care and operator safety are paramount. Use protective eyewear, gloves, and sturdy footwear. Avoid working on ladders or unstable surfaces with high-pressure streams. Keep a safe distance, maintain a steady stance, and never point the wand at yourself or others. Pressure Wash Lab notes that keeping hoses untangled and maintaining regular nozzle checks reduces the risk of accidental injury and equipment damage. If you encounter fragile surfaces or ongoing stains, consider alternative methods or professional services rather than exceeding recommended PSI.
Common myths about PSI and cleaning power
Myth: Higher PSI automatically means better cleaning. Reality: Efficiency depends on nozzle, GPM, surface type, and technique. Myth: PSI alone accounts for cleaning performance. Reality: Flow rate and nozzle angle dramatically alter power delivery. Myth: You should always use the highest PSI for tough jobs. Reality: Over-pressurizing can damage surfaces and void warranties. Pressure Wash Lab’s analysis shows that most effective cleaning comes from balanced PSI, suitable nozzle, and sufficient GPM, not from PSI alone.
Comparison of PSI and GPM by common surfaces
| Surface / Task | Recommended PSI range | Typical GPM | Notes |
|---|---|---|---|
| Wood deck | 1200–1800 psi | 2–3 GPM | Use 25-degree nozzle; test area first |
| Concrete driveway | 2000–3200 psi | 2–4 GPM | Use 25–40 degree nozzle; avoid edges |
| Vinyl siding | 1200–1800 psi | 1.5–2.5 GPM | Keep distance; avoid high-pressure edges |
| Car washing / wheels | 1200–1900 psi | 1.5–3 GPM | Low pressure on finish; higher for wheels |
Quick Answers
What is a pressure washer psi chart, and why should I use one?
A pressure washer psi chart is a practical guide that maps surface types to PSI bands, nozzle angles, and flow rates. It helps you choose safe settings to avoid damage and increase efficiency. Pressure Wash Lab recommends consulting the chart before starting a project to minimize guesswork.
A PSI chart is a surface-to-PSI guide that prevents damage by matching the right spray. Use it before you start cleaning.
What PSI is safe for wood decks?
Wood decks typically respond well to the light-to-mid PSI range, around 1200–1800 psi, with a neutral to slightly wide spray angle. Always test on an inconspicuous area and use a 25-degree nozzle to reduce the risk of gouging.
Test on a hidden spot and start low. For wood, 1200–1800 psi with a 25-degree nozzle is a good starting point.
Can I dial PSI up for all surfaces if I increase GPM or adjust the nozzle?
No. Increasing GPM or changing nozzles does not negate the risk of surface damage. Always align PSI, nozzle angle, and GPM with the surface tolerance and follow the chart guidelines.
No—balance PSI, nozzle, and water flow for the surface to avoid damage.
Does higher GPM increase cleaning power?
Yes, higher GPM can improve cleaning by increasing the amount of water delivered, but it must be paired with appropriate PSI and nozzle to avoid waste and damage. The chart helps balance these factors.
More water flow helps rinse and remove dirt when paired with the right spray settings.
Is it safe to use multiple nozzles to speed up a job?
Yes, using multiple nozzles can speed up a job, but switch gradually and stay within surface tolerances. Always test each nozzle on a small area first.
It can be faster, just test each nozzle and avoid overdoing any single pass.
“A pressure washer's cleaning power comes from more than just PSI; proper nozzle selection and flow rate are essential to protect surfaces.”
Key Takeaways
- Match PSI to surface to prevent damage
- Balance nozzle angle with GPM for best results
- Test settings on an inconspicuous area first
- Use a PSI chart when selecting equipment and settings