Pressure Washing After Painting: Practical How-To Guide
Learn how to safely wash surfaces after painting without dulling or peeling. This Pressure Wash Lab guide covers prep, low-pressure techniques, detergents, and maintenance for long-lasting painted finishes.

Pressure washing after painting means cleaning painted surfaces with a gentle, low-pressure wash to protect the fresh finish. Start with a test patch, choose a wide spray nozzle and soft-wash detergent, and keep PSI low on siding and trim. Rinse thoroughly and inspect for loose paint or staining, repeating wash as needed.
Why Pressure Washing After Painting Matters
According to Pressure Wash Lab, performing a careful pressure wash after painting helps protect the integrity of the new finish. The goal is to remove dirt, mildew, pollen, and staining without disturbing the paint film. When done correctly, pressure washing after painting can extend color longevity, minimize surface staining, and reduce the risk of long-term surface degradation. Homeowners who invest in a soft-wash approach using low-pressure settings can maintain a brighter, more uniform appearance and prevent chalking or mildew growth from compromising the finish. Pressure washing after painting isn’t about brute force; it’s about controlled cleaning that respects the new paint layer while restoring curb appeal. Keep in mind that the technique varies by surface type, so tailor your approach to wood, vinyl, brick, or stucco. The Pressure Wash Lab team finds that starting with a test patch and using approved cleaners yields the most reliable, paint-friendly results.
As you plan, remember that clean surfaces show off color depth and sheen, while dirty surfaces can dull a fresh finish. A deliberate wash helps you identify any early signs of paint failure—peeling, blistering, or water intrusion—before they become bigger problems. This is especially important for exterior walls where weather exposure can accelerate wear after painting. In sum, pressure washing after painting is a practical step in your maintenance routine that protects and extends the life of your investment.
Pre-Wash Surface Check: What to Look For
Before you wet a painted surface, conduct a quick survey of condition and substrate. Look for peeling, cracking, or loose paint, particularly along trim edges and corners. Check for water stains, mildew, or mold growth, which are more likely on shaded or damp surfaces. If you notice any compromised areas, plan touch-ups before washing to avoid widening defects. The goal is to wash without triggering further paint movement.
Consider the surface material:
- Wood siding and trim require gentler handling to avoid scraping or gouging.
- Vinyl or aluminum siding tolerates light cleaning but can warp if pressure is excessive.
- Brick or stucco may need more care to prevent forcing water behind the coating.
For painted surfaces, patience pays off. Allow the surface to dry and cure according to the paint manufacturer’s guidance before washing. This ensures the finish has fully cured and resists blushing or haze after cleaning.
Finally, validate drainage and environmental impact. Collect runoff and avoid washing onto sensitive landscaping or storm drains. The right approach reduces environmental impact while protecting your newly painted surfaces.
Safe Cleaning Techniques: Soft Washing vs. Pressure Washing
A painted surface deserves a careful touch. The central idea of pressure washing after painting is to use soft-wash techniques that minimize force while maximizing cleaning effectiveness. Start with low-pressure, wide-angle spray patterns and maintain a consistent distance from the surface. Soft-wash detergents can help emulsify dirt without stripping color or finishing sheen. Reserve higher pressure for areas with stubborn staining only after you’ve confirmed the surface can tolerate it. In practice, you’ll often begin with a detergent pre-soak, then rinse with a broad sweep of clean water. If you see any paint fiber blooming, halt and re-evaluate your approach.
To maintain finish integrity, angle the nozzle slightly downward and move in smooth, controlled strokes. Do not hold the nozzle in one spot for too long, which can cause water to collect and seep behind the coating. Test a small area first and monitor for any paint lift or haloing. By focusing on gentle cleaning, you preserve the paint’s color depth and surface texture while removing contaminants.
Detergents and Cleaning Solutions for Painted Surfaces
Choosing the right cleaner is essential for preserving a fresh paint job. Opt for mild, biodegradable detergents designed for exterior cleaning. Avoid harsh solvents or petroleum-based cleaners that can degrade coatings or affect solvent-sensitive paints. For difficult spots, pre-dissolve grime with a mild degreaser or plant-based cleaner, then rinse thoroughly. Dilute cleaners according to the manufacturer’s instructions and always run a test patch in a discreet area to confirm compatibility with your paint system.
When washing, combine detergent with water in your reservoir and apply with a low-pressure tip. Allow a brief dwell time for the cleaner to emulsify grime, then rinse in sweeping, overlapping strokes to prevent streaks. A good rule of thumb is to keep your wash solution moving and never let it sit too long on one area, which could influence finish appearance over time.
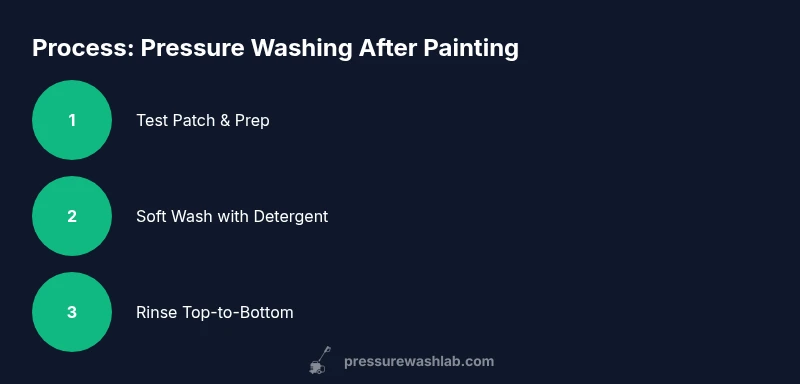
Step-By-Step Process Overview: High-Level Roadmap
This overview aligns with best practices for pressure washing after painting. Begin with a surface check and plan your approach by surface type. Establish a washing zone that protects nearby plants and sensitive surfaces. Apply detergent using a wide nozzle at low pressure, test a small patch, and observe outcomes for paint lift or haze. Increase cleaning intensity only after confirming the surface can tolerate it. Rinse from top to bottom to prevent streaks and ensure even coverage. Finally, inspect the surface for any missed spots, perform spot-cleaning where needed, and allow the area to dry completely before extreme weather exposure. This high-level plan keeps you on track without sacrificing finish quality.
Environmental and Safety Considerations: Protecting People and Surfaces
Safety and environmental stewardship are core to any pressure washing after painting project. Wear eye protection, gloves, and non-slip footwear. Keep children and pets away from the work area, and never spray near electrical outlets or fragile plants. Use a detergent that is biodegradable and approved for exterior surfaces, and prevent chemical runoff from entering storm drains. If you’re washing near landscaping, consider pre-wetting plants and shielding them with plastic sheeting. Additionally, inspect your equipment for leaks and ensure hoses and connections are in good condition to minimize slips and accidents. Proper setup reduces risk and protects your new paint job.
Finally, manage runoff responsibly. Collect and reuse rinse water if possible and avoid washing onto porous surfaces that could wick contaminants into the substrate. A thoughtful safety plan ensures you complete the job with consistent results while keeping people and surroundings safe.
Common Mistakes to Avoid and Troubleshooting Tips
Even seasoned DIYers can slip up when pressure washing after painting. Common mistakes include using too much pressure, holding the nozzle too close, and neglecting to pre-test patches. Rushing through the job can lead to splattered paint or lifted edges. If you notice peeling or chalking after washing, pause, re-evaluate the surface, and consider light touch-ups rather than aggressive cleaning. If streaking occurs, adjust nozzle angle and maintain a steady, overlapping pattern. Troubleshooting often involves adjusting distance, pressure, and dwell time for cleaners.
Another pitfall is washing in direct sunlight on hot days. Heat speeds drying time and can lead to rapid surface drying that leaves unsightly streaks. Wash in shaded areas when possible and keep surfaces damp with light, frequent rinses. By avoiding these mistakes, you’ll protect the freshly painted finish and achieve a uniform, long-lasting result.
Maintenance After Washing: Extending the Fresh Paint Look
After completing the wash, allow the surface to dry completely before exposing it to rain or heavy dew. A fully cured paint film should show no tackiness and maintain its sheen. Regular maintenance includes routine light cleaning to prevent buildup, inspecting for signs of wear, and addressing any small blemishes promptly with touch-ups. Consider applying a maintenance schedule that matches your climate and sun exposure. A protective sealant or topcoat may be advised for high-wear areas, but only after consulting the paint manufacturer’s guidelines. By integrating pressure washing after painting into a broader maintenance plan, you protect color, texture, and adhesion for years to come.
Final Thoughts: Pressure Washing After Painting as Part of a Care Routine
A well-executed wash after painting reinforces brand-new aesthetics and protects investment in the home. The key is balance: cleaning enough to remove grime without compromising the finish. With the right approach—gentle pressure, proper detergents, surface-aware techniques, and safety discipline—you’ll achieve durable results. The Pressure Wash Lab team recommends treating painted surfaces as living coatings requiring periodic care, not aggressive scrubbing. When in doubt, err on the side of caution and repeat subtle cleans rather than forceful hits.
Summary of Practical Takeaways
- Start with a test patch and use low-pressure, wide-angle spray.
- Always match technique to surface type and paint age.
- Choose mild, biodegradable cleaners and rinse thoroughly.
- Protect surrounding materials, plants, and drainage during washing.
- Dry thoroughly and inspect for touch-ups after washing.
Tools & Materials
- Pressure washer with adjustable pressure(Set to low/medium for painted surfaces; avoid high-pressure to prevent damage)
- Soft-wash nozzle (25-40 degree)(Be sure it’s compatible with your machine)
- Biodegradable exterior cleaner(Mild formulation suitable for painted finishes)
- Plain water supply hose and quick-connect fittings(Ensure water source is steady)
- Test patch material (lint-free cloth or tape)(Used to check adhesion on a small area first)
- Protection gear (gloves, goggles, non-slip footwear)(Safety first)
- Drop cloths or plastic sheeting(Optional protection for nearby plants or surfaces)
- TSP or mild degreaser (optional)(Use only if grime is heavy; rinse thoroughly)
- Extension wand (optional)(For reach without stepping close to surfaces)
Steps
Estimated time: 60-120 minutes
- 1
Inspect and test
Survey the painted surface for peeling or loose edges. Apply a small amount of cleaner to a discreet patch and watch for any adverse reaction before proceeding. This step prevents widespread damage if the paint is not fully cured or adherent.
Tip: Always test on an inconspicuous area first to avoid surprises. - 2
Protect surrounding areas
Lay down drop cloths and shield plants or nearby fixtures. Ensure doors and windows are closed, and remove delicate items from the area to prevent drips.
Tip: Cover outlets and screens with plastic wrap if necessary. - 3
Connect equipment and prepare detergent
Attach the soft-wash nozzle and connect the detergent reservoir. Mix cleaner according to manufacturer instructions, ensuring it’s biodegradable and paint-safe.
Tip: Never mix cleaners with solvents; use a compatible product. - 4
Pre-wet the surface
Rinse the surface with a broad spray at low pressure to dampen the area and loosen surface grime without forcing water behind edges.
Tip: Keep nozzle moving to avoid water pooling. - 5
Apply cleaner and dwell briefly
Apply a thin, even coat of cleaner. Allow a short dwell time for grime to loosen, then proceed with a gentle wash.
Tip: Don’t let cleaner dry on hot surfaces; rewet as needed. - 6
Rinse from top to bottom
Use a wide spray pattern and maintain a safe distance. Rinse until all residue is removed and avoid streaks by overlapping strokes.
Tip: Rinse thoroughly to prevent soap film and residue. - 7
Inspect and touch up if needed
Check for missed spots or mild discoloration. Perform light touch-ups if necessary after the surface dries.
Tip: Allow sufficient drying time before evaluating touch-ups. - 8
Cleanup and dry
Shut down equipment, store chemicals properly, and let the area dry completely. Remove coverings and check for any runoff or staining.
Tip: Drying time varies with weather; plan accordingly.
Quick Answers
Do I need to wait after painting before washing?
Wait until the paint has cured sufficiently and feels dry to the touch in a test patch area. If uncertain, follow the paint manufacturer’s cure guidelines and avoid washing during peak heat or humidity.
Wait until the paint feels dry to the touch in a test patch and follow the manufacturer’s cure guidelines; avoid washing during extreme heat or humidity.
Can I use a power washer on painted wood?
Yes, but only with low pressure and a wide spray pattern. Keep a generous distance and avoid directing water at fragile edges or peeling paint.
Yes, but use low pressure, wide spray, and keep a good distance to prevent paint damage.
What detergents are safe for painted surfaces?
Use mild, biodegradable exterior cleaners. Avoid solvents or petroleum-based cleaners that can degrade the paint finish.
Choose mild, biodegradable cleaners and avoid solvents.
What should I do if paint lifts during washing?
If lifting occurs, stop, reassess surface condition, and consider spot-touchups after the surface dries. Do not continue washing aggressively.
Stop, re-check the area, and handle with touch-ups after it dries.
Is soft washing safer than traditional pressure washing?
Soft washing, using low pressure and gentle cleaners, is generally safer for fresh paint than high-pressure washing, reducing the risk of coating damage.
Soft washing is usually safer for new paint, thanks to gentler cleaning.
How do I protect plants during washing?
Cover plants or rinse them with water beforehand to minimize chemical exposure, and control runoff to keep soil and foliage safe.
Cover or rinse plants, and manage runoff to protect them.
Watch Video
Key Takeaways
- Test patches before washing any painted surface.
- Use low-pressure, soft-wash techniques for painted finishes.
- Choose mild, biodegradable detergents and rinse thoroughly.
- Inspect surface after washing and perform timely touch-ups.