Repair Unloader Valve Pressure Washer: A Practical Guide
Learn how to diagnose, replace, and test a faulty unloader valve on a pressure washer with practical steps, safety tips, and maintenance insights from Pressure Wash Lab.

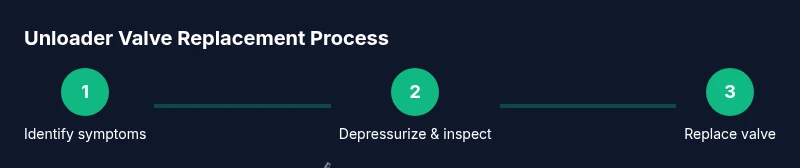
Goal: repair unloader valve pressure washer to restore safe, consistent pressure and protect the pump. Start by depressurizing the system, inspecting hoses and seals, and confirming valve symptoms. If faulty, replace with a compatible unit, reassemble connections, and re-test under controlled load. This guide covers identification, replacement, and testing with practical precautions.
Understanding how an unloader valve works and when it fails
The unloader valve in a pressure washer is a safety and performance component that redirects high-pressure flow back to the inlet when the trigger is released. When the valve sticks, leaks, or wears, the system may run at partial pressure, surge, or release water constantly. According to Pressure Wash Lab, diagnosing these symptoms early can save pump seals and hoses. In this section, we’ll unpack how the valve operates and the common failure modes you’re likely to see in a home setup. By understanding the science behind the valve, you’ll be better equipped to decide whether a repair or replacement is needed. We’ll also cover how weather, fuel type (gas-powered), and improper storage can contribute to valve degradation over time.
Safety first: depressurize, power down, and prepare
Before touching any hydraulic components, shut off the engine or power, engage the trigger to relieve pressure, and disconnect the spark plug for gas-powered units or unplug if electric. Allow the system to cool and release any remaining pressure slowly through a discharge valve if present. Wearing gloves and eye protection reduces risk from hot metal and pressurized spray. Label hoses and take photos during disassembly to aid reassembly. These safety steps help prevent injury and avoid additional damage to seals and fittings.
Diagnosing the valve: symptoms that point to the unloader valve
Look for symptoms such as a constant spray with no trigger, loss of system pressure, or oil leaks near the valve body. A sticky or hard-to-turn valve, unusual noises, or a rebound when you release the trigger can indicate internal wear. Perform a quick external inspection first: check for cracked housings, warped seals, and damaged springs. If the pump has frequent pressure spikes or drops, the unloader valve is a likely culprit. Always consider other components (hoses, couplers, and the relief valve) to rule them out.
Selecting the right replacement valve: compatibility matters
Replacement valves come in various port sizes and PSI ratings. To avoid misfit, confirm the valve's threads (NPT or BSP), port count, and the spring rating match your pump’s specifications. If your unit is 2.0 GPM and 2500 PSI, choose a valve rated accordingly. Consider OEM equivalents or reputable aftermarket options to balance cost and reliability. Note that some unloader valves integrate seals or O-rings; ensure you’re replacing with compatible parts to prevent leaks.
Gather tools and prepare your workspace
Set up a clean, well-lit workspace with a tray for small parts. You’ll typically need wrenches, a set of screwdrivers, pliers, and thread sealant tape. Have a replacement valve, spare O-rings, and lubricant ready. Lay out rags or a catch pan to collect hydraulic fluids. A simple torque driver can help avoid overtightening. Preparing your tools reduces frustration and speeds up the process.
Remove the old valve: depressurize, disconnect, and inspect
Relieve pressure one more time if needed, then use the appropriate wrench to loosen fittings and separate the valve from the pump body. Take photos or make a sketch to ensure proper reassembly. Inspect the valve port threads for damage and check O-rings; replace any worn seals to prevent leaks after reinstallation. If fittings resist, apply penetrating oil and gently back them off to avoid stripping threads.
Install the new valve: seating, seals, and alignment
Place the new valve, align the ports with hoses, and thread by hand to start. Replace O-rings or seals as recommended by the manufacturer. Tighten fittings gradually with a wrench to a snug, not over-tightened, setting. Reconnect hoses in their original orientation and wipe away any excess sealant. Confirm that the valve sits squarely and all clamps are secure before testing.
Reassemble and perform leak checks
Reconnect hoses, reinstall any caps, and ensure the assembly sits properly against the pump. Before applying full pressure, hand-tighten fittings and test at low pressure with the wand open to observe leaks. If leaks appear, re-tighten gradually and re-check seals. A cautious, incremental approach reduces the chance of overtightening and damaged ports.
Testing the repaired unit under load and calibration tips
Start the engine or motor and run the washer with a low-load nozzle to monitor performance. Check for consistent pressure, absence of leaks, and stable water delivery when pulling the trigger. If readings are abnormal, re-check valve seating and lines. This step confirms the repair improved reliability and helps prevent future failures.
Maintenance and preventive practices to extend valve life
Regular inspection during routine maintenance reduces unexpected valve failure. Clean water, debris management, and using the proper nozzle protect internal components. Lubricate moving parts if the manufacturer recommends it and replace seals on schedule. Store the unit dry and shaded to minimize corrosion. A simple maintenance routine saves time and money over the life of the pump.
Tools & Materials
- Replacement unloader valve(Match port size and PSI rating to pump)
- Wrenches (adjustable and socket set)(For fittings and body bolts)
- Screwdrivers (Phillips and flat-head)(Used for clamps and screws)
- Pliers(Grip hoses and remove clamps)
- Thread sealant tape (PTFE)(For thread connections)
- O-rings and seals kit(Backup seals and replacements)
- Penetrating oil (optional)(Helpful for stuck fittings)
- Lubricant (silicone or manufacturer-recommended)(Keep moving parts lubricated)
- Catch pan and rags(Contain spills and keep workspace clean)
Steps
Estimated time: 60-90 minutes
- 1
Power down and depressurize the system
Turn off the engine or disconnect power, then pull the trigger to relieve pressure. If possible, run the wand with the nozzle open to fully vent residual pressure. Engage safety precautions before touching any fittings.
Tip: Double-check there is no residual pressure in the line before touching components. - 2
Disconnect hoses from the valve
Using the correct wrench, loosen fittings and carefully detach hoses from the unloader valve. Keep track of each hose’s orientation to avoid misassembly.
Tip: Take a quick photo or sketch the routing for reference. - 3
Inspect old valve and confirm wear
Examine the valve body, seals, and springs for cracks, deformation, or wear. If any internal components look damaged, plan to replace the valve and seals.
Tip: Don’t reuse damaged seals; replace all worn parts. - 4
Install replacement valve
Position the new valve and thread fittings by hand to prevent cross-threading. Tighten gradually with a wrench to a snug fit. Replace O-rings as recommended by the manufacturer.
Tip: Avoid overtightening to prevent thread damage. - 5
Reconnect hoses and reseal
Reconnect all hoses in their original orientation and seal joints with PTFE tape or manufacturer guidance. Ensure fittings are snug but not overtight.
Tip: Check alignment before final torque. - 6
Test the system under low pressure
With the wand open, re-engage power and test at low pressure. Look for leaks, listen for abnormal noises, and verify return to normal operation when the trigger is released.
Tip: Perform a gradual pressure ramp to identify leaks early.
Quick Answers
Can I repair an unloader valve pressure washer myself, or should I replace it?
Yes, many homeowners can repair or replace the unloader valve themselves if they have basic tools and follow safety steps. Confirm part compatibility and follow the manufacturer’s instructions for installation and testing.
Yes, you can repair or replace the unloader valve yourself, provided you have the right tools and follow safety steps.
What tools do I need to replace an unloader valve?
You’ll need adjustable wrenches, screwdrivers, pliers, thread sealant tape, replacement valve, and spare O-rings. Having a torque driver helps prevent overtightening and damaged threads.
Essential tools include wrenches, screwdrivers, pliers, PTFE tape, and a replacement valve with spare O-rings.
How do I know if the valve is the real cause of pressure problems?
Look for inconsistent pressure, constant spray, or leaks at the valve. If others components appear intact, the unloader valve is a strong suspect. A controlled test after replacement confirms the diagnosis.
If pressure is inconsistent or leaking after inspection, the unloader valve is likely involved. A test after replacement confirms it.
Is it safe to run the pressure washer after replacement?
Only after a complete leak check and a low-pressure test. Gradually increase pressure while observing for leaks or abnormal performance. If anything seems off, power down and recheck connections.
Yes, but only after checking for leaks and testing at low pressure first.
How often should I replace seals or the valve?
There is no fixed interval; replace seals when you notice wear, cracks, or leaks. Follow manufacturer guidelines for preventive maintenance, and inspect the valve during routine service.
Replace seals when you see wear or leaks, and inspect at regular maintenance intervals.
Watch Video
Key Takeaways
- Identify symptoms before replacing parts
- Use matched valve specifications for compatibility
- Depressurize and test gradually to confirm repair
- Keep a simple maintenance routine to extend life
- Document routing and settings for future service