Water Pressure Cleaning: A Practical How-To Guide
A practical, step-by-step water pressure cleaning guide for homeowners and pros. Learn safety, gear, techniques, and maintenance to clean driveways, siding, decks, and more.

With water pressure cleaning, you can restore a home’s exterior, deck, or driveway by removing grime quickly and effectively. This guide explains the safe, step-by-step method, the right gear, and surface-specific techniques to prevent damage. Start by assessing the surface, selecting the proper nozzle, and testing on a hidden area before broader cleaning.
What water pressure cleaning is and when to use it
Water pressure cleaning uses a high-pressure spray of water to strip away dirt, mold, algae, and stains from hard surfaces. It is especially effective on concrete driveways, brick, siding, decks, and stone pathways. According to Pressure Wash Lab, the most reliable results come from planning, surface testing, and choosing the right nozzle and pressure for each material. Start with a surface you can test and adjust technique based on how the material responds. This approach helps you decide where and when to apply water pressure cleaning rather than harsher methods like chemical cleaners or abrasive scrubbing. You’ll learn about surface compatibility, the common terms you’ll hear (PSI, GPM, nozzle angles), and how to set realistic expectations for results. Remember: not every surface tolerates high pressure, and gentler alternatives may be better for delicate materials.
Safety first: PPE, electrical hazards, and environmental concerns
Safety is non-negotiable in water pressure cleaning. Always wear protective eyewear, gloves, and sturdy footwear. For electrical machines, keep cords and outlets dry and use outdoor-rated power sources. Protect plants, shrubs, and windows by covering them with tarps or plastic and sealing off nearby doors. Use a drip pan or towels to catch runoff if you’re cleaning near gutters or landscaping. Understand wind direction to avoid blowback and never spray water toward electrical fixtures or outlets. If you’re using detergents, read the label for contact times, rinse requirements, and compatibility with your surface. Pressure Wash Lab emphasizes testing on an inconspicuous area first to prevent damage. After each session, inspect hoses and connections for wear to prevent leaks.
Equipment essentials: choosing a machine, nozzle types, and accessories
A reliable pressure washer is the foundation of water pressure cleaning success. Choose electric or gas based on the scale of your job, noise tolerance, and available outlets. Nozzle tips control spray pattern and impact; common choices include wide-angle tips for most surfaces and focused tips for tougher grime. Accessories like surface cleaners can speed up work on flat areas, while extension wands help reach high spots safely. Always verify that your equipment is rated for exterior cleaning, has adjustable pressure, and comes with safety features like automatic shutoff and reliable seals. By selecting the right combination of machine, nozzle, and accessories, you reduce the risk of damage while maximizing cleaning efficiency.
Testing and surface prep: testing, masking plants, and presoak
Before you dive in, test a small, inconspicuous patch to judge how the surface responds to pressure. If you’re cleaning siding or wood, start with the widest spray and lowest practical pressure, then inch upward as needed. Mask and cover any plants, electrical outlets, windows, and exterior fixtures to protect them from spray and runoff. For stubborn grime, apply a mild pre-wash solution and allow dwell time according to the product label, then rinse. Doing this prep work minimizes spotting, staining, and potential surface damage while ensuring a more uniform finish.
Stepwise technique by surface: concrete, wood, vinyl siding, brick
Concrete and brick tolerate higher pressure but can still gouge or erode if misused. Wood decks require lower pressure and a careful angle to avoid raising grain. Vinyl siding is sensitive to force and should be kept at wider angles and lower pressure to prevent moisture intrusion. Always spray from bottom to top and use a 45-degree angle to lift grime without pushing water behind surfaces. When unsure, test both the spray angle and distance on a small area and adjust you technique accordingly to protect structural integrity while achieving a clean result.
Detergents, chemicals, and dwell time
Detergents can boost cleaning power, especially on oil stains, mildew, and algae. Use only cleaners that are compatible with your surface and your machine, and never mix chemicals unless the label explicitly instructs you to. Apply with a dedicated applicator or the washer’s built-in soap nozzle if available, and allow dwell time as directed before rinsing. Rinse thoroughly to avoid streaks or residue, and consider a spot test for colorfastness on painted surfaces. If you’re cleaning near plants or lawns, stick to non-foaming formulas and limit chemical runoff to protect landscaping and the environment.
Maintenance, storage, and long-term care
After finishing a job, rinse the system to remove residue, check hoses for wear, and store in a dry, ventilated area. Drain residual water from hoses and attachments to prevent mold growth. Store detergents upright in a cool place away from children and pets. Regularly inspect o-rings, seals, and the spray wand for wear and replace parts as needed to extend the life of your equipment. By performing routine checks and proper storage, you’ll keep your pressure washing gear reliable for years of use.
Troubleshooting common issues and avoiding damage
Common issues include inconsistent spray patterns, leaks, and surface damage from overly aggressive techniques. If the spray delivery is uneven, inspect connections and nozzle condition, and recalibrate the distance from the surface. Leaks indicate worn seals or hoses that require replacement. To avoid damage, never hold the nozzle too close, never use high velocity near delicate surfaces, and always test first. When in doubt, step back to a lower pressure and re-test before proceeding.
Tools & Materials
- Pressure washer (electric or gas)(Ensure adjustable pressure and exterior cleaning suitability.)
- Nozzle tips (25° and 40° recommended)(Use wider angles for most surfaces; keep 3–4 feet away to start.)
- Hose and water supply(Good water flow; check for leaks and kinks.)
- Surface cleaner attachment (optional)(Speed up cleaning on flat surfaces like driveways.)
- Protective gear (gloves, safety goggles, closed-toe shoes)(Essential for eye and skin protection.)
- Tarps or plastic sheeting(Cover plants, outlets, and nearby furniture.)
- Detergent or pre-wash cleaner (optional)(Use only surface-compatible cleaners; read label first.)
- Extension wand or ladder (as needed)(For hard-to-reach areas; use with caution.)
Steps
Estimated time: 60-90 minutes
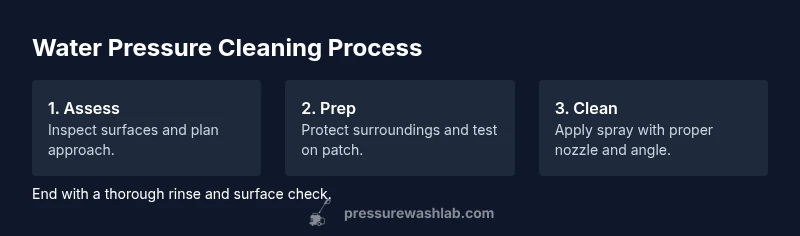
- 1
Assess surface and plan
Inspect the area for damage, determine cleaning approach for each material, and identify any surfaces that require gentler methods. Create a plan that prioritizes delicate areas and sets expectations for results.
Tip: Document the surface with a quick note or photo and choose the gentlest effective method first. - 2
Set up equipment and safety check
Assemble the washer, connect hoses, attach the appropriate nozzle, and verify all safety features. Do a quick test spray on a hidden area to confirm settings and avoid surprises.
Tip: Always test a small patch before starting the full job. - 3
Protect surroundings and prep area
Cover plants, windows, outlets, and nearby furniture. Clear loose debris and pre-wet surfaces that are prone to absorbing water too quickly.
Tip: Mask vulnerable plants with plastic sheeting to prevent chemical contact. - 4
Apply detergent or pre-wash (if needed)
Apply an appropriate detergent to heavily soiled areas and let it dwell per the label. Rinse lightly or let it sit before a full rinse, depending on the product.
Tip: Never mix cleaners without official guidance; follow label directions precisely. - 5
Clean from bottom to top with proper technique
Start with wider angles and lower pressure, then gradually move to surfaces that require more focus. Keep the wand at a safe distance and maintain a steady, sweeping motion.
Tip: Maintain a 45-degree angle to lift grime without forcing water behind materials. - 6
Rinse thoroughly and inspect
Rinse off all detergents and residue, then inspect surfaces for missed spots. Re-clean any stubborn areas if needed and ensure surfaces have dried before exposing them to foot traffic.
Tip: Check for streaks or damp patches that indicate incomplete rinsing.
Quick Answers
What surfaces can be cleaned with water pressure cleaning?
Water pressure cleaning works well on concrete, brick, siding, decks, and stone. Delicate surfaces require gentler methods or avoidance of high pressure. Always test and adjust based on material tolerance.
You can clean most hard exterior surfaces, but test first and avoid delicate materials that might be damaged by high pressure.
Is pressure cleaning safe for wood decks?
Wood can be cleaned with caution using lower pressure and a wider spray. Avoid stripping boards or forcing water into seams. Pre-wet and test on a hidden area before proceeding.
Wood decks can be cleaned, but use gentle pressure and test first to prevent damage.
Can I use bleach or detergents with a pressure washer?
Detergents and certain cleaners are suitable if labeled for exterior use and compatible with your surface. Do not mix chemicals unless the label explicitly allows it. Rinse thoroughly after application.
Yes, but only with compatible cleaners and following the product label.
How often should I service my pressure washer?
Regular inspection of hoses, seals, and fittings helps prevent leaks and failures. Clean or replace filters as recommended by the manufacturer and store equipment dry when not in use.
Inspect hoses and seals regularly and follow the manufacturer’s storage recommendations.
What are common signs I should stop and inspect?
If you notice spray irregularities, leaks, or changing surface color, pause and inspect connections, nozzle, and surface tolerance. Persistent issues may require professional assessment.
Pause if the spray is irregular, leaking, or surfaces look damaged. Reassess before continuing.
Renting vs buying: which is better for homeowners?
Renting is often cost-effective for one-off jobs; buying makes sense for frequent use. Consider the scope of your projects, storage space, and maintenance needs when deciding.
Rent if you only do occasional cleaning; buy if you plan multiple projects over time.
Watch Video
Key Takeaways
- Plan safety first and protect surroundings.
- Choose the right nozzle for each surface.
- Test a small area before full cleaning.
- Work from bottom to top and rinse thoroughly.
- Maintain and store equipment properly.